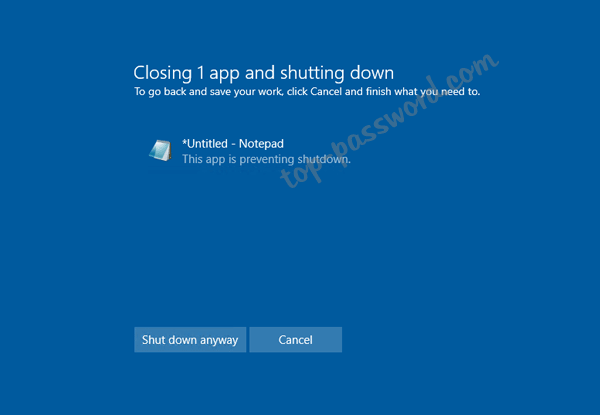
When you restart or shut down Windows 10, it may be stuck on a blue screen for a long time with a spinning circle.
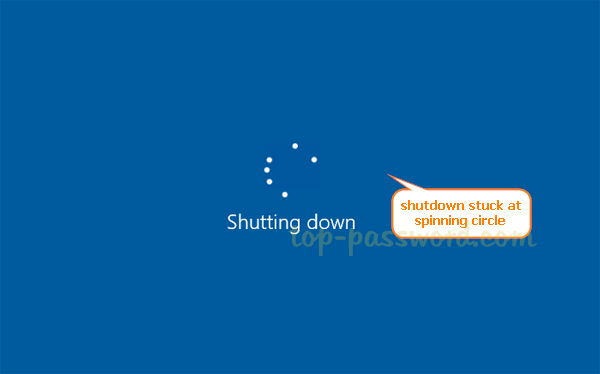
Actually, Windows 10 is waiting for running applications to exit. If they don’t respond within 30 seconds, you’ll get the following screen and you can proceed with a forced shutdown.
To speed up the shutdown or rebooting process, you can reduce the timeout for unresponsive applications so Windows 10 doesn’t stuck at spinning circle for a long time.
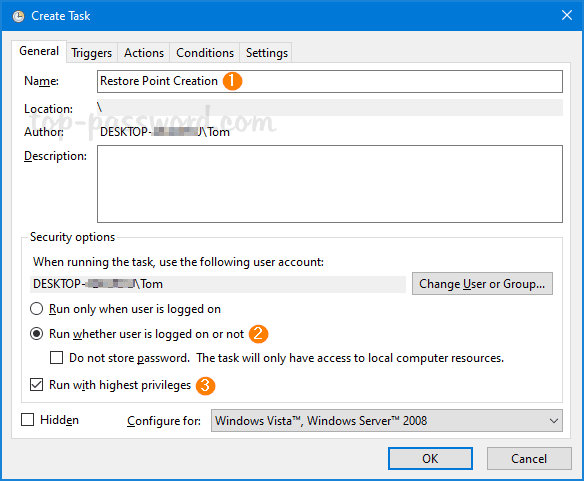
How to Change Timeout for Unresponsive Applications in Windows 10
- Press the Windows key + R to open the Run dialog. Type regedit and hit Enter to launch Registry Editor.

- In the left pane, navigate to the following key. Right-click on the Desktop key and select New -> String Value.
HKEY_CURRENT_USER\Control Panel\Desktop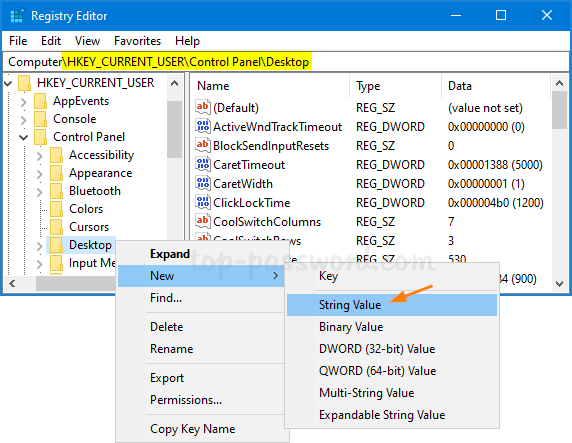
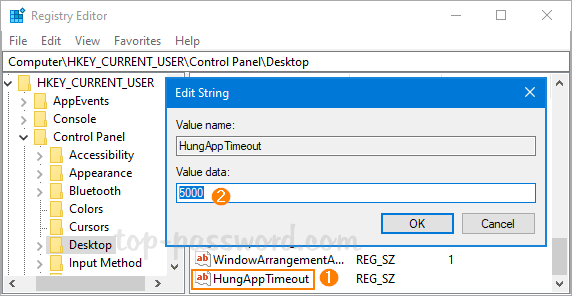
- Name the new string “HungAppTimeout“, and then double-click it to modify. Enter a number between 1000 and 20000 in milliseconds and click OK. A low number means the app will be considered as unresponsive shortly.
- Navigate to
HKEY_LOCAL_MACHINE\SYSTEM\CurrentControlSet\Controland create a new string named WaitToKillServiceTimeout, which works the same as “HungAppTimeout”, but it applies to services instead of applications. Don’t set this value below 2000 milliseconds. - Close Registry Editor when you’re done. You’ll have to restart Windows for the change to take effect.