Archive for June, 2013

Windows 8 Tablet Password Recovery

June 29th, 2013 by Admin

Lost your Windows 8 tablet password? Unable to login after changing the Microsoft account password? In this article we’ll show you a quick way to recover access to your Windows 8 tablet easily after you’ve lost or forgotten the password to your administrator account or Microsoft account. This method will work with all brands of Windows 8 tablet PCs, including the tablets with UEFI Secure Boot turned on.

How to Recover Windows 8 Tablet Password?

To get started, you need to make a bootable password recovery USB drive. Download the zipped ISO image of PCUnlocker on an alternate PC you have access to. Unzipping the download file and you’ll find a bootable ISO image file: pcunlocker.iso, which needs to be burned on a CD or USB drive. Obviously, USB drive is a better option for tablet PCs without CD drive.

Download and install ISO2Disc on your computer, and then start ISO2Disc program. Click on Browse button to select the ISO image file of PCUnlocker, then choose your USB drive and select GPT from the partition style drop-down box. Click on Burn. The program will create a bootable password recovery USB drive which can boot in either UEFI mode or legacy BIOS mode.

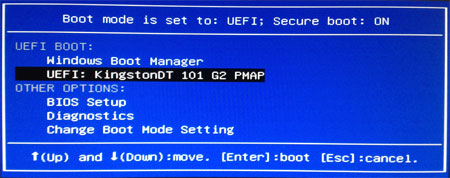
After creating a bootable USB drive, you can use it to recover your Windows 8 tablet password. Plug the USB drive into your Windows 8 tablet and get the machine to boot from USB drive.

The computer will load the WinPE operating system inside the USB drive. After a while, you’ll see the PCUnlocker program open up, which shows you a list of local user accounts existing on your Windows 8 tablet.

Select a user account and then click on Reset Password button. It will remove/reset your lost Windows 8 tablet password and also unlock/enable your user account in no time. If you’re using a Microsoft account on your Windows 8 tablet, you need to choose the local user account which is linked to your Microsoft account, the program will reset the cached password on your machine.

After that, unplug the USB drive and restart your Windows 8 tablet, you can then log back into Windows 8 without a password! It’s that easy!

How to Create A Bootable UEFI/GPT-Based Windows 8 Installation USB Drive

June 28th, 2013 by Admin

In order to perform a clean install of Windows 8 on my computer, I’ve made a bootable Windows 8 installation USB drive using Microsoft’s Windows USB/DVD download tool. However, the USB drive never showed as UEFI bootable in the Boot Menu. After some Google searching I discovered that this is because UEFI boot only recognizes FAT32 and will not show up NTFS devices during boot selection. What’s more, the USB drive must also be partitioned with GPT (GUID Partition Table) instead of traditional MBR.

So here I’m going to walk you through how to create a bootable UEFI/GPT-based Windows 8 installation USB drive. It’s very useful in case your computer doesn’t have optical drive, especially if you’re using a tablet such as Microsoft Surface Pro. To make the job easier, we’ll use a free ISO burning software – ISO2Disc, which provides you a super easy way to make a bootable UEFI/GPT-based USB drive from an ISO image.

How to Create A Bootable UEFI/GPT-Based Windows 8 Installation USB Drive?

Step #1: First download and install ISO2Disc utility on your computer.

Step #2: Launch ISO2Disc program. Click on the Browse button to specify a 64-bit Windows 8 ISO image file. Remember that only x64 versions of Windows 8 and Windows Server 2012 support UEFI Secure Boot.

Step #3: Click on the Burn to USB Flash Drive option, then select your USB drive from the list. Choose the GPT from the partition style. This allows you to partition your USB drive with a GUID Partition Table.

Step #4: Next click on Burn. The program will begin creating a UEFI/GPT-based Windows 8 installation USB drive.

Step #5: When the burning procedure is complete, unplug the USB drive and you can then use it to boot off any UEFI-based computers and perform Windows 8 installation from your USB drive. It’s that simple!

How to Remove Microsoft Surface Pro Password with A Bootable USB Drive

June 28th, 2013 by Admin

Forgot your password for signing in to Windows 8 on your Microsoft Surface tablet? There are lots of Windows password recovery bootdisks which could be used to reset Windows 8 password, but they would be unable to boot up your Surface Pro. That is because Microsoft Surface Pro only supports UEFI native boot. Luckily, PCUnlocker can create a 64-bit UEFI capable USB drive which can be used to remove your lost Microsoft Surface Pro password easily! It works even if you’ve turned on the UEFI Secure Boot option.

How to Remove Microsoft Surface Pro Password with A Bootable USB Drive?

First you need to make a UEFI bootable USB drive. Download the zipped ISO image of PCUnlocker Enterprise on an alternate PC you have access to. Unzipping the download file and you’ll find a bootable ISO image file: pcunlocker.iso, which needs to be burned on a CD or USB drive. Obviously, USB drive is better choice for Microsoft Surface Pro.

Download and install ISO2Disc on your computer, and then start ISO2Disc program. Click on Browse button to select the ISO image file of PCUnlocker, then choose your USB drive and select GPT from the partition style drop-down box. Click on Burn. The program will format your USB drive with a GPT partition table and copy the contents of the ISO image to the partition.

After creating a bootable USB drive, you can use it to boot up your Microsoft Surface Pro tablet. No need to disable the Secure Boot option. Just hold down the volume-down (-) button as you press the Power button. Once you see the Surface logo, release volume button and now it will boot from your USB drive.

The computer will load the 64-bit UEFI capable operating system inside the USB drive. After a while, you’ll see the PCUnlocker program open up, which shows you a list of user accounts existing on your Microsoft Surface Pro.

Select a user account and then click on Reset Password button. It will remove/reset your lost Windows password and also unlock/enable your user account in no time. Unplug the USB drive and restart the Surface Pro, you can then log back into Windows without a password!

Conclusion

So this is how can you remove Microsoft Surface Pro password with a bootable USB drive. Quickly unlock your Microsoft Surface Pro tablet when you lost or forgot your Windows password. No need to reset or restore your Surface Pro back into factory settings, especially when there are important data or files left in your tablet.

How to Reset Windows Password on Any Computers with UEFI Secure Boot

June 28th, 2013 by Admin

Forgot Windows password on a computer with UEFI Secure Boot enabled? If you’ve bought a Surface Pro tablet from Microsoft, you’ll find that the tablet can only run in native UEFI without CSM. It means most of password reset Live CDs such as Ophcrack, Offline NT Password & Register Editor won’t work on your computer any more. The only bootdisk that works is PCUnlocker. It can run from a USB flash drive on any UEFI-based computer, even without disabling the Secure Boot option. In this tutorial we’ll show you how to create a GPT bootable USB drive and use it to reset lost Windows password on any computers with UEFI Secure Boot.

How to Reset Windows Password on Any Computers with UEFI Secure Boot?

First, download the zipped ISO image of PCUnlocker Enterprise on an alternate PC you have access to. After unzipping the download file you’ll find a bootable ISO image file: pcunlocker.iso, which needs to be burned on a CD or USB flash drive.

Download and install the free ISO burning software ISO2Disc on your computer, and then launch ISO2Disc program. Click on Browse button to select the ISO image file you’ve gotten, then choose your USB drive and select GPT from the partition style drop-down box. Click on Burn. The program will format your USB drive with a GPT partition table and copy the contents of the ISO image to the partition.

After creating a PCUnlocker recovery USB drive, you can use it to boot up your locked computer which runs in UEFI Secure Boot. No need to disable the Secure Boot option. Just turn on the machine and press a key like F12 to bring up the Boot Menu. The exact key depends on your computer.

Choose your USB drive from the Boot Menu and press Enter. The computer will load the operating system from the USB drive so the password reset utility can access your Windows SAM registry file offline. After a while, you’ll see the PCUnlocker program open up, which shows you a list of user accounts existing in your Windows system.

Select a user account and then click on Reset Password button. It will remove/reset your lost Windows password and also unlock/enable your user account in no time. Unplug the USB drive and restart the machine, you can then log back into your Windows system without a password!

Conclusion

So that is how can you reset lost Windows password on any computers with UEFI Secure Boot. The PCUnlocker recovery USB drive supports booting in both UEFI Secure Boot or Legacy BIOS mode.

How to Change the Window Border Size in Windows 8

June 26th, 2013 by Admin

If you’ve upgraded to Windows 8, you’ll noticed that the border size of window is fairly thick, which doesn’t look good. If you’re one of those users who want to customize the window border size, then you hit the right place. In this article we’ll show you how to change the window border size in Windows 8 using a quick registry tweak.

How to Change the Window Border Size in Windows 8?

First, we have to open the Windows Registry Editor. Press Windows + R key combination to bring up the Run box, type regedit and press Enter.

Navigate to the location: HKEY_CURRENT_USER\Control Panel\Desktop\WindowMetrics. In the right panel, you can easily find the values here that are related to the border width are BorderWidth and PaddedBorderWidth. The default value of BorderWidth is -15 and that of PaddedBorderWidth is -60. Change them to higher values to reduce the border width.

change-windows8-border-size

To make your window borders as small as possible, double-click BorderWidth and set it to 0, and then double-click PaddedBoderWidth and set it to 0.

That’s it. Now you have successfully changed the window border size in Windows 8. Restart your system and see the effect. To make your window look more attractive, you can also change the color of the window borders. To do so, right-click on your desktop and select the Personalize from the context menu, then click on the Color option which allows you to change the border color to whatever you like.

Forgot the Administrator Password for Windows 7 Starter

June 26th, 2013 by Admin

I have a Windows 7 Starter netbook laptop, and I have forgotten the administrator password for it. I only have ONE account on it and that is the one where I forgot my password. How can I get in?

Forgot your Windows 7 Starter password? Can’t log into your computer at all after losing the administrator password? In many occasion because of your stress there you have a chance to forget the password. Sometimes it may occur due to the security consciousness of the user as you frequently change the password.

Fortunately there is a safe and quick recovery disk to reset lost or forgotten Windows 8/7/Vista/XP password. With PCUnlocker you can unlock and reset passwords for local system accounts easily. In this tutorial we’re going to walk you through how to reset Windows 7 Starter password using PCUnlocker Recovery USB drive. Quickly get back into your computer in case your administrator password is lost or forgotten.

How to Reset the Administrator Password on Windows 7 Starter?

Download the zipped ISO image of PCUnlocker and save it to any computer that you have access to. Unzip the download file and burn the ISO image to your USB flash drive using ISO2Disc program. PCUnlocker can also load from a bootable CD but USB drive should be more useful when your computer doesn’t come with a CD/DVD burner.

After creating a PCUnlocker Recovery USB drive, plug it into your Windows 7 Starter computer. Power on the machine and press the key indicated during the power-on self-test (POST) to enter BIOS, then change the boot priority in BIOS to boot from removable device. Save your changes and exit.

This time your computer should boot from the PCUnlocker Recovery USB drive. After a while you’ll see the PCUnlocker program which displays a list of local user accounts existing in your Windows 7 Starter system. Choose the administrator account and click on Reset Password button, it will remove/unlock your Windows 7 Starter administrator password instantly.

Now you’ve successfully reset the administrator password, unplug the USB drive and restart the computer. You can then log back into your Windows 7 Starter administrator account without a password!

Besides resetting Windows 7 Starter password, you can also use the PCUnlocker Recovery USB drive to reset lost administrator password on other editions of Windows 7, such as Windows 7 Home / Professional / Ultimate.

How to Create A Bootable USB Drive for UEFI Computers

June 25th, 2013 by Admin

Nowadays, most of the new Windows 8 laptops, desktops or tablets use the UEFI replacement for the traditional BIOS, such as Surface Pro, Samsung Slate or other UEFI systems. The problem with UEFI-based computers is that they can’t boot from bootdisk with NTFS partition. UEFI system requires that your bootdisk resides on FAT32 partition.

Most USB burning programs will format your USB drive as NTFS, which includes the Microsoft Store Windows USB/DVD download tool. Luckily there is a free ISO burning software that lets you create a bootable USB with FAT32 file system only. It’s called ISO2Disc. But here I’m going to show you how to use the Command Prompt to create a bootable USB drive for UEFI computers.

How to Create A Bootable USB Drive for UEFI Computers?

  1. Open the Command Prompt with administrator privileges, then start the diskpart utility:
    diskpart.exe
  2. List all the disks and identify your USB drive:
    list disk
  3. Select the disk number that is your USB drive.
    select disk 1
  4. Remove all existing partitions:
    clean
  5. Convert the partition table from MBR to GPT:
    convert gpt
  6. Create a new partition, make it active and format as FAT32, then assign a drive letter:
    create partition primary
    select partition 1
    active
    format quick fs=fat32
    assign
  7. Type “exit” and press Enter to quit diskpart utility.

The final step is to copy all the files from your physical boot CD to the USB drive. For example, you can copy all files from either your Windows 8 installation DVD or ISO image to your USB drive. After that, you can use the USB drive to boot your UEFI computer and perform system repairing or installation for your own purpose.

If you still are unable to boot your UEFI computer from the USB drive, you may need to disable the Secure Boot option in the BIOS. In my Samsung Slate tablet PC, I have to disable the Secure Boot by following these steps:

  1. Press and hold Volume-Up and Volume-Down, then power up or reboot the slate. It should go into BIOS setup.
  2. In “Advanced Configuration”, change “Attempt Secure Boot” to Disabled.
  3. Press Volume-Up and Volume-Down to exit, then “Save Changes and Reset”.
  4. Power off the machine.
  5. Plugin USB drive to slate. Press and Hold Volume-Up button, then power up the machine. It should boot into USB drive now.

How to Reset Forgotten Windows 8 Password on Dell Latitude Tablet

June 24th, 2013 by Admin

I am using a Latitude 10 tablet with the Dell factory release of Windows 8 pre-installed. I have forgotten the administrator password and don’t have a password reset disk. Is there a way to delete/reset the password so I can get into my computer?

Forgot Windows 8 password on your Dell Latitude tablet? How to reset lost Windows 8 password without performing a factory reset? Windows is getting more secure with every release but unfortunately a new feature of UEFI Secure Boot makes old password cracking methods to common problems obsolete. So here I’m going to walk you through how to reset forgotten Windows 8 password on Dell Latitude tablet.

How to Reset Forgotten Windows 8 Password on Dell Latitude Tablet?

Download the zipped ISO image of PCUnlocker on another PC you can access. Unzip the download file and burn the ISO image on a USB flash drive using ISO2Disc program.

After you have created a PCUnlocker Live USB drive, connect it to your Dell Latitude tablet which requires a password reset. Turn on the tablet PC and hit F2 from keyboard dock or volume- rocker at startup. In the BIOS, navigate to the System Configuration > USB Configuration and enable the Boot Support option, then go to Secure Boot > Secure Boot and disable the Secure Boot option. Apply settings and Exit.

dell-latitude-secure-boot

Hit F2 from keyboard dock or hold down volume+ rocker at power-on. Choose your PCUnlocker Live USB drive and press Enter. Your tablet will load the WinPE operating system from your USB drive. After a while, you’ll see the PCUnlcoker program. The program displays a list of Windows 8 user accounts existing in your Dell Latitude tablet.

Choose a user account and click on Reset Password button. The program will reset your lost Windows 8 password and also unlock/enable your user account when it’s necessary. Now click on Restart button to reboot the computer and remove the PCUnlocker Live USB drive.

After booting to the Windows 8 login screen, just leave the password box empty and you can log back into your Windows 8 user account immediately. It’s so easy to reset a forgotten Windows 8 password on Dell Latitude tablet PC.

How to Reset Lost Windows Password with PCUnlocker Boot CD

June 24th, 2013 by Admin

So you forgot your Windows password and can’t get into your computer? Hey, it happens. We’re supposed to make very complicated passwords so they’re difficult to guess but sometimes we make them so complicated that we forget them ourselves. There are many software that can unlock your password, but nothing beats PCUnlocker Boot CD which is extremely powerful CD. In this tutorial we’ll show you how to reset lost Windows password with PCUnlocker Boot CD.

Since you obviously can’t get into your computer right now because you’ve forgotten your Windows password, we need to make a PCUnlocker Boot CD on another computer that you have access to. Then you can use it to boot off your computer and it enables you to reset lost Windows 8/7/Vista/XP password easily!

How to Reset Lost Windows Password with PCUnlocker Boot CD?

Download the zipped ISO image of PCUnlocker Boot CD. Unzip the download file and burn the ISO image on a CD or DVD using your preferred software such as ImgBurn, BurnCDCC, ISO2Disc or InfraRecorder.

Once you’ve created a PCUnlocker Boot CD, put it into the CD drive of your locked computer. Turn on the computer and change the boot sequence in the BIOS to set CD/DVD-ROM as the first boot device. On a Windows 8 computer with UEFI BIOS, you also need to disable the Secure Boot option and change the boot mode from UEFI to Legacy.

After booting from the PCUnlocker Boot CD, the Computer will run a Windows PE operating system from the CD, it will NOT install anything. Just about one or two minutes, you’ll see the PCUnlocker program. The program should display a list of user accounts existing in your Windows SAM registry hive.

Choose a user account and click on “Reset Password” button. The program will reset your lost Windows password and also unlock/enable your user account when it’s necessary. Now click on “Restart” button to reboot the computer and remove the PCUnlocker Boot CD.

When you come to the Windows login screen, just leave the password box empty and you can log back into your Windows user account immediately. Done!

How to Find Windows Administrator Password without Resetting It

June 22nd, 2013 by Admin

How can I find out Windows administrator password without changing or resetting it? That’s where Ophcrack comes in. Ophcrack is one of the more effective password cracking software that runs on a Live CD, and it can be used to find your original Windows password.

Since you obviously can’t get into your computer right now because you’ve forgotten the administrator password, we need to make a Ophcrack Live CD on another computer that you have access to. Then you can use it to boot off your computer and it enables you to find Windows administrator password without resetting it.

How to Find Windows Administrator Password without Resetting It?

  1. Put the Ophcrack Live CD in the CD drive of the computer you want to find the Windows administrator of.
  2. Have the computer to boot from Ophcrack Live CD. This shouldn’t be to hard. Depending on computer, enter the bios settings and change the boot settings to boot from a disc drive on first boot device.
  3. After the initial startup of your computer is complete, the Ophcrack Live CD menu should display. Select the Ophcrack Graphic mode option and press Enter.

    ophcrack

  4. The next screen is the Ophcrack Live CD software itself. Ophcrack will attempt to find the passwords for all of the Windows user accounts that it can find on your computer. This password cracking process is completely automated.

    ophcrack-program

  5. After Ophcrack recovers your password, write it down, remove the Ophcrack Live CD from your optical drive and restart your computer. You can then get to log on to Windows with your discovered password!

Ophcrack won’t find every password – some are too long and some are far too complicated. If Ophcrack didn’t do the trick just try some Windows password reset software. One of the most powerful software is PCUnlocker, which can help you reset lost Windows administrator password instantly. It always works no matter how long or complicated your administrator password is.