By default, Windows will automatically turn off your hard drive after 20 minutes of idle time. This can help save energy and extend a laptop’s battery life. When you try to access a hard disk that is turned off, you will notice a slight delay for the drive to spin back up. Constantly spinning down/up can reduce the life of the hard disk, so I recommend you leave the drive spinning all the time, or set the drive to turn off after a longer period (one or two hours) of inactivity. In this tutorial we’ll show you 2 methods to prevent Windows from turning off hard drive after idle.
Method 1: Prevent Turning off Hard Drive via Power Options
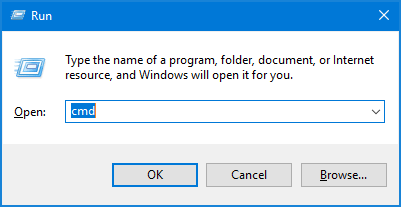
- Press the Windows logo key + R to open the Run box. Type the following and hit Enter to open the Power Options window.
control.exe powercfg.cpl,,3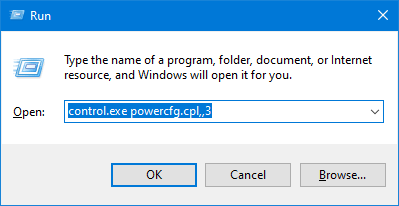
- Expand Hard disk and Turn off hard disk after, change the value to 0 and click OK.

Your hard drive will never fall into sleep after idle.
Method 2: Prevent Turning off Hard Drive via Command Prompt or PowerShell
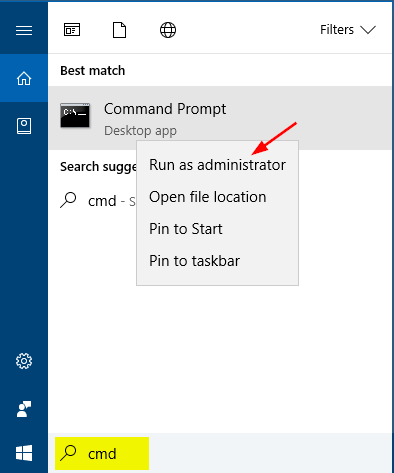
- Open the Command Prompt or PowerShell as administrator.
- Run the following commands one by one, replacing “
seconds_of_idle” with 0.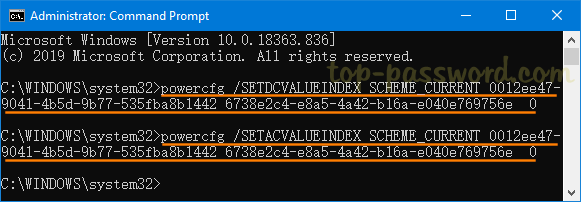
powercfg /SETDCVALUEINDEX SCHEME_CURRENT 0012ee47-9041-4b5d-9b77-535fba8b1442 6738e2c4-e8a5-4a42-b16a-e040e769756e seconds_of_idlepowercfg /SETACVALUEINDEX SCHEME_CURRENT 0012ee47-9041-4b5d-9b77-535fba8b1442 6738e2c4-e8a5-4a42-b16a-e040e769756e seconds_of_idle
- When it’s done, your hard drive should keep spinning all the time and it never goes to sleep after idle.