How do you delete or remove a shared folder that you no longer want to share? File Explorer lets you share a folder or file to other users on the local network using SMB protocol. In this beginner’s guide, we’ll show you 3 methods to stop sharing a folder in Windows 10.
Method 1: Stop Sharing a Folder Using File Explorer
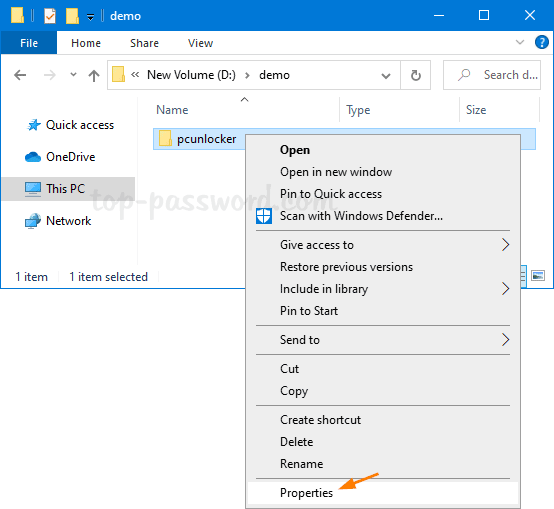
- Open File Explorer and browse to the folder which you want to stop sharing. Right-click on it and select Properties from the context menu.
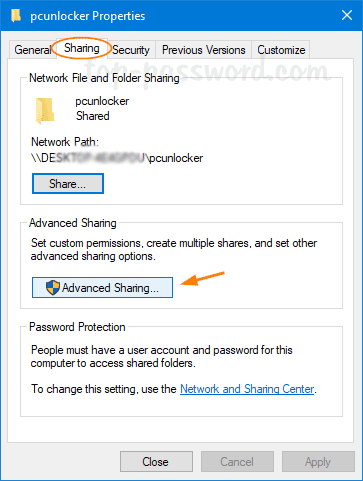
- Go to the Sharing tab and click on the “Advanced Sharing” button.
- Uncheck the box “Share this folder” and click OK.

If you want to delete many network shares at once or you can’t remember where your shared folders are, the following methods can come in handy.
Method 2: Stop Sharing a Folder Using fsmgmt.msc
- Press the Windows + R key combination, type fsmgmt.msc and hit Enter to open the “Shared Folders” window.

- In the left pane, select “Shares“. On the right, you’ll see all shared folders on the local system. Right-click on the folder you no longer want to share, and select “Stop Sharing“.
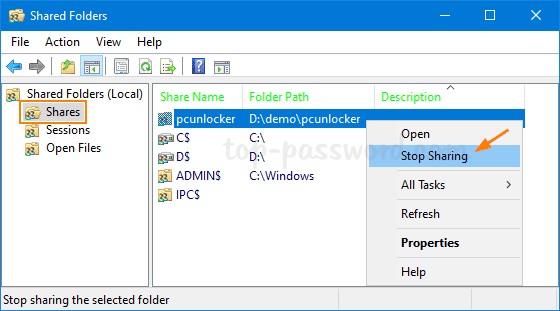
- The selected folder will disappear from the list.
Method 3: Stop Sharing a Folder Using Command Prompt
- Open the Command Prompt or PowerShell as administrator.
- Run the “net share” command to list all folders you’re sharing over the local network.
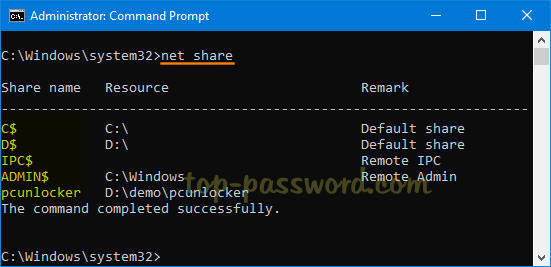
In the first column it shows the name of the share, while the second column shows the actual location. You need to find the name of the share you want to disable.
- To stop sharing a folder, enter the following command and hit Enter.
net share your_share_name /delete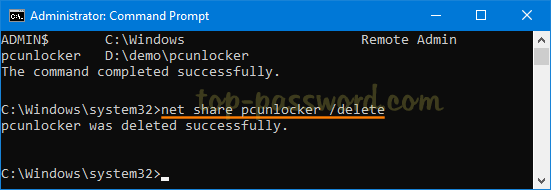
If you want to disable all shared folders at once, use this command instead.
net use * /delete
That’s it!