Archive for March, 2021

Disable Drag and Drop to Prevent Accidental Move or Copy in Windows 10

March 24th, 2021 by Admin

Accidentally moved a folder to another location without being aware of it? A sensitive touchpad or mouse can cause accidentally dragging of folders / files. If you’re unaware that you did it, it could be a nightmare to recover. In this tutorial we’ll show you how to disable drag and drop functionality to prevent accidental move or copy of files in Windows 10.

How to Disable Drag and Drop in Windows 10

  1. Open Registry Editor and navigate to the following location:
    HKEY_CURRENT_USER\Control Panel\Desktop

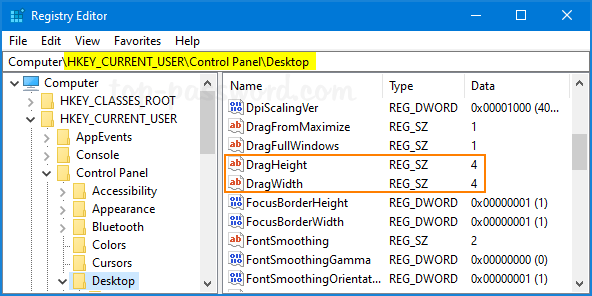
    On the right side, you’ll see two entries called DragHeight and DragWidth, with the default value 4.
  2. Double-click on DragWidth and change its value to a huge number of pixels. This value should be greater than the screen resolution of the display. Do the same for DragHeight.

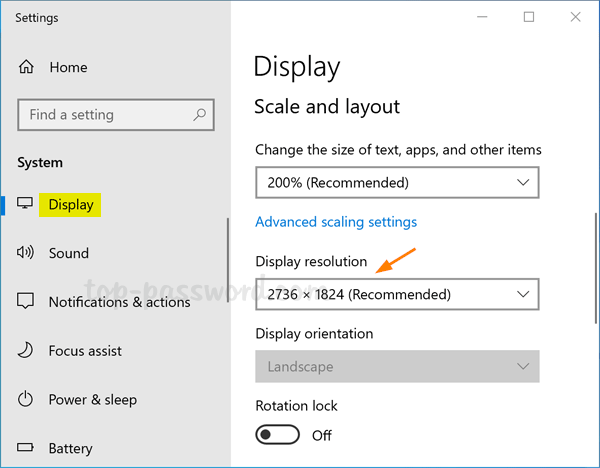
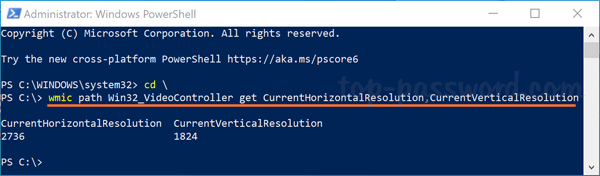
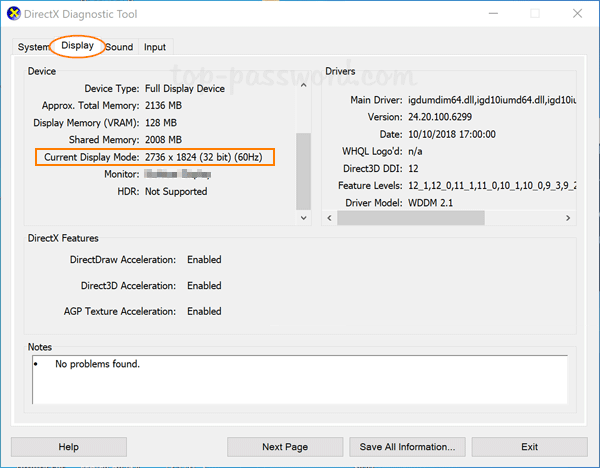
    For example, my monitor uses a resolution of 2736 x 1824 pixels, so I modify both DragHeight and DragWidth values and set them to 3000.

  3. Close Registry Editor and restart your computer. You’ll find the drag and drop functionality will not work any longer in Windows 10.

If you just want to prevent some important folders/files from being accidentally moved or copied, you can take use of the Protect My Folders application to lock them down.

Easy Ways to Check Screen Resolution in Windows 10

March 23rd, 2021 by Admin

What is my screen resolution? How do I find out screen resolution on my monitor using Command Prompt? Screen resolution is the number of pixels a screen can show, both horizontally and vertically. In this tutorial we’ll show you easy ways to check screen resolution in Windows 10.

Method 1: Check Screen Resolution in Windows 10 Using Settings App

Right-click any empty space on the desktop and select Display settings from the context menu.

The Settings app will launch and open to the Display page. On the right side, you can see the display resolution in the drop-down list.

Method 2: Check Screen Resolution in Windows 10 Using Command Prompt

Open up the Command Prompt or PowerShell window, copy and paste the following command and hit Enter.
wmic path Win32_VideoController get CurrentHorizontalResolution,CurrentVerticalResolution

You’ll get screen resolutions for all the available monitors on your computer. In my example, my display uses a resolution of 2736 x 1824 pixels.

Method 3: Check Screen Resolution in Windows 10 Using DirectX Diagnostic Tool

To launch DirectX Diagnostic Tool, press the Windows logo key + R to open the Run dialog. Type dxdiag and hit Enter.

Click the Display tab. Under the Device section, you can find your current screen resolution next to the “Current Display Mode” field.

That’s it!

How to Disable, Enable and Use Reading List in Chrome

March 18th, 2021 by Admin

Reading List is a new feature in the most recent version of Chrome, which allows you to save webpages for reading later. It functions far more like a to-do list than a standard bookmark.

In this tutorial we’ll show you how to disable/enable, and use the Reading List feature in Chrome.

Part 1: Disable or Enable Reading List in Chrome

  1. Open up Google Chrome browser, type the following in the address bar and press Enter.
    chrome://flags/#read-later
  2. Click the drop-down list next to the “Reading List” option. You can select Enabled to enable Reading List, or choose Disabled to remove it.

  3. Relaunch Chrome to apply the changes. Make sure you enable “Show bookmarks bar” so you can check if Reading List is activated or removed.

Part 2: Use Reading List in Chrome

If you come across a webpage and want to read it later, just click the bookmark icon (​far right side of the address bar). When a menu appears, click on the “Add to reading list” option.

Click the “Reading list” icon and you will see a menu containing all your saved webpages. Just click any webpage and Chrome will immediately open it in a new tab, and then automatically mark it as read.

When you move your cursor over a webpage shown in the Reading list menu, it will display two icons at the right side. You can click the circle icon to manually mark the webpage as read (or unread), or click the ‘X‘ icon to remove it from the list.

Conclusion

Reading List in Chrome is a handy feature that lets you manage your reading plan more effectively. When you come across a great article or news, you can simply save the webpage to read it later.

Fix: Office Word 2019 / 2016 Showing Two Pages Side by Side

March 9th, 2021 by Admin

How can I get Office Word 2016 to stop showing two pages? Looking for a way to turn off side by side page view in Word? By default, Word will display two pages side by side in one window and changing the zoom doesn’t fix it. If you would like to view a single page at a time, here is how you can configure Word 2019 / 2016 to stop showing two pages side by side upon startup.

How to Stop Word from Showing Two Pages Side by Side

In Office Word 2019 / 2016, select the View tab on the ribbon. If your document is shown in either Read Mode or Web Layout, switch to the Print Layout view. Under the Page Movement section, there are two buttons for Vertical and Side to Side, click the Vertical button.

Proceed to click One Page under the Zoom section. If the font looks smaller or bigger than you expect, click the Zoom icon and the pop-up dialog allows you to change the zoom level.

After switching to one page view, Office Word will remember the display settings being used when your document is closed.