How can I change the name of the printer that has already been setup? The first time you add a new printer, Windows assigns a default name based on its manufacture name, series and model number. If you want to give your printer a more meaningful name, you can change it with ease. In this tutorial we’ll show you 3 easy ways to rename your printer in Windows 11.
Method 1: Rename Printer Using Settings App
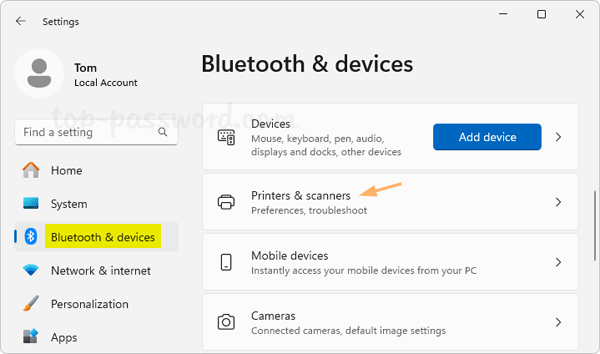
- Press the Windows logo key + I to access the Settings app. Choose Bluetooth & devices from the left sidebar, and then click Printers & scanners on the right.
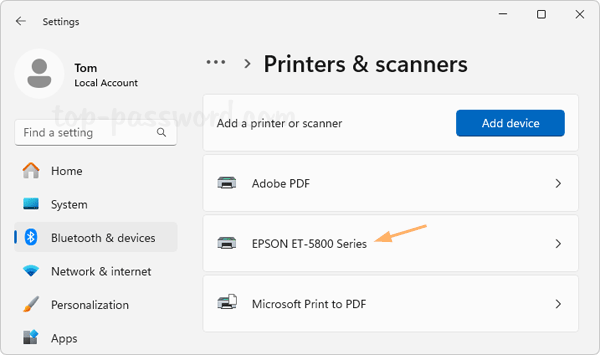
- Select the printer you would like to rename.
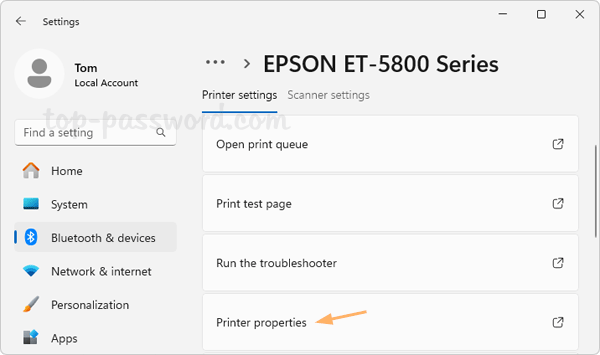
- Click the Printer properties option.
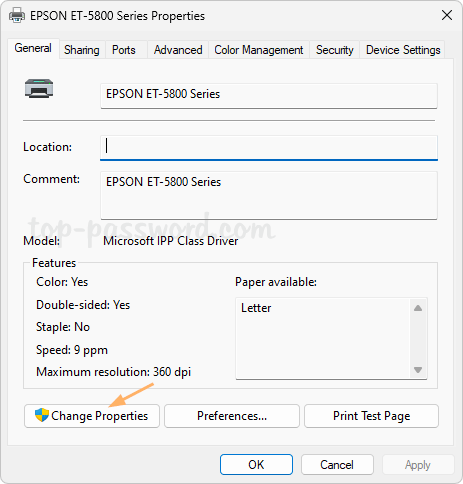
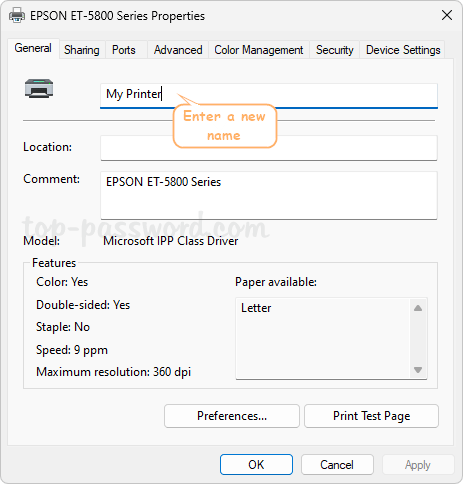
- By default, the printer’s name can’t be edited or changed. You need to click the “Change Properties” button at the bottom.
- Now you can change the printer’s name to anything you like. Click OK to save your change.
Method 2: Rename Printer Using Print Management
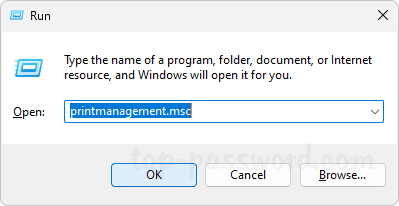
- Press the Windows logo key + R to access the Run box, type printmanagement.msc and hit Enter to bring up the Print Management utility.
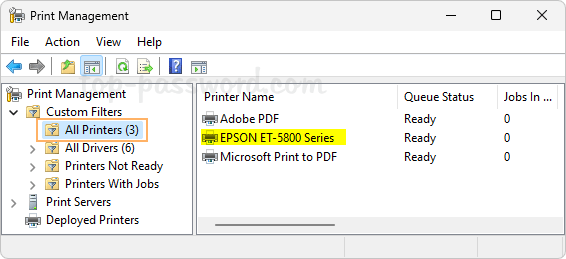
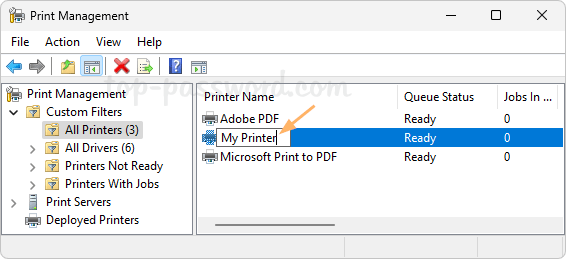
- Expand to Custom Filters -> All Printers, you’ll see a list of printers available on your PC, including virtual printers.
- Right-click the printer whose name you want to change, and then choose “Rename” from the pop-up menu.
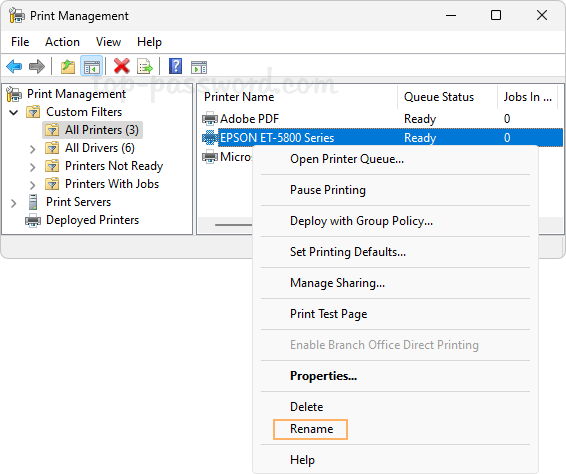
- Now the printer’s name should be editable. You can type a new name and press Enter to save it.
Method 3: Rename Printer Using Windows Terminal
- Right-click the Windows button on the taskbar, and then choose “Terminal (Admin)“.

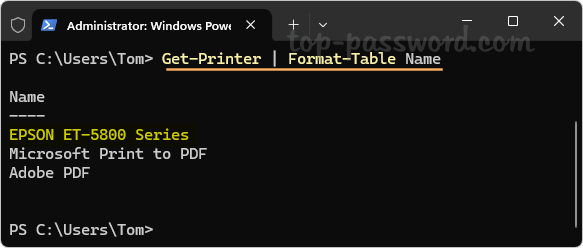
- When it opens a PowerShell window, type
Get-Printer | Format-Table Nameand press Enter to view the names of all your available printers.
- To change the name of one of your printers, run the following command. Replace
Current_Printer_Nameand andNew_Printer_Namewith the actual names that you want to use.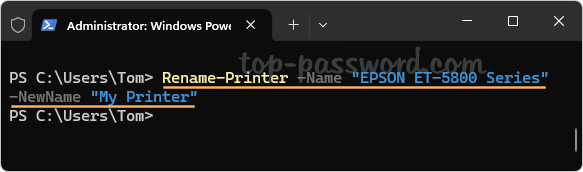
Rename-Printer -Name "Current_Printer_Name" -NewName "New_Printer_Name" - Your printer will be renamed immediately.
That’s it!