Archive for August, 2019

Easy Ways to Open Display Color Calibration in Windows 10

August 27th, 2019 by Admin

If your monitor is not showing the most accurate colors for your games or photos, calibrating the monitor is necessary. Thankfully, Windows 10 has included a Display Color Calibration tool and you can access it using different ways.

Method 1: Open Display Color Calibration via Search

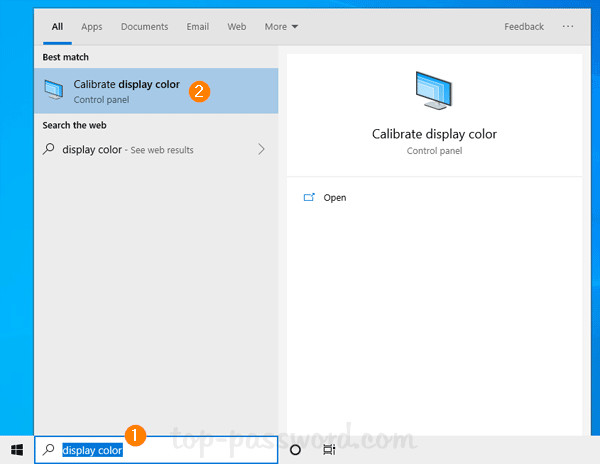
  1. Click the Search box at the left of the taskbar and enter “display color”. Choose Calibrate display color in the result.

  2. The Windows Color Calibration tool will open. You can follow the wizard to change your display’s gamma, brightness, contrast, and color balance settings.

Method 2: Open Display Color Calibration via Control Panel

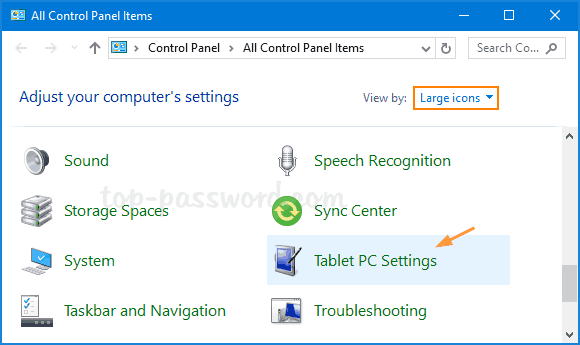
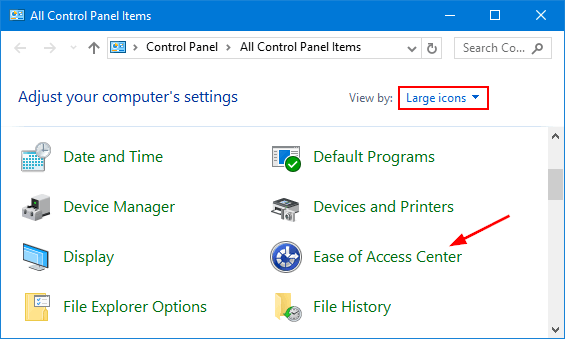
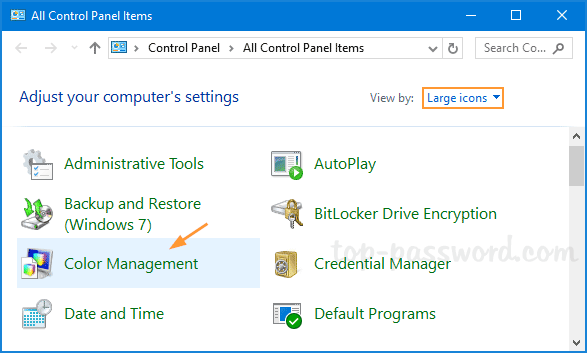
  1. Open Control Panel in Large icons view, and click on Color Management.

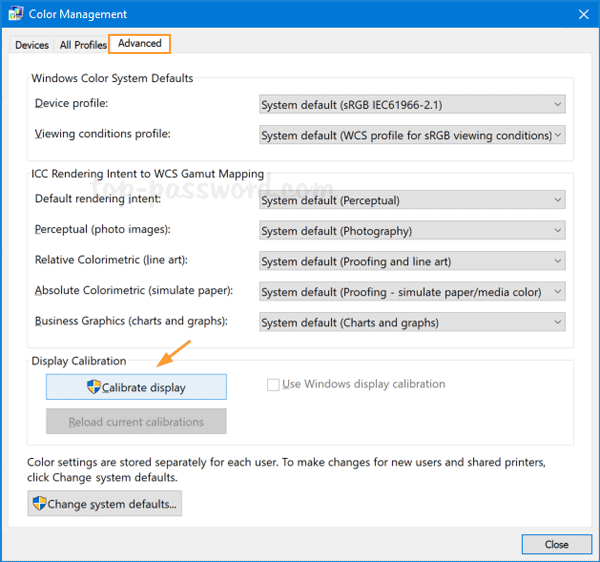
  2. When the Color Management window opens, select the Advanced tab and you can click on the Calibrate display button to launch the Display Color Calibration utility.

Method 3: Open Display Color Calibration via Right-clicking Desktop

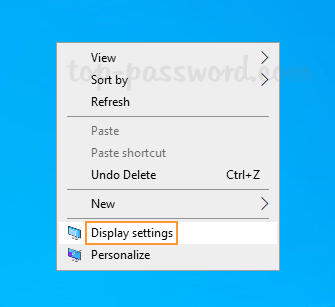
  1. Right-click empty space on your desktop and select Display settings.

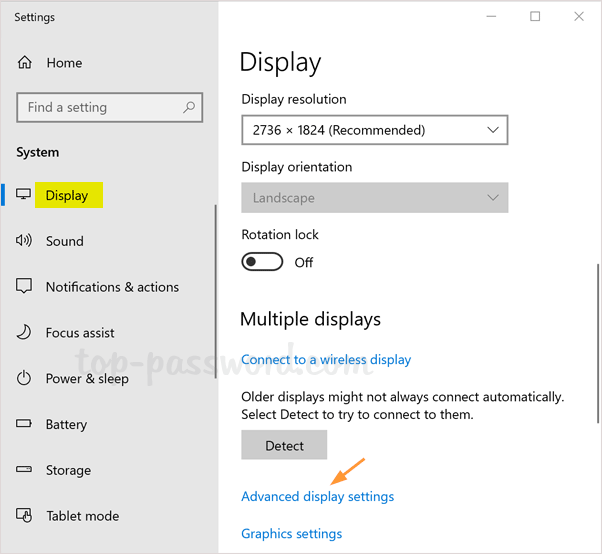
  2. Click on the “Advanced display settings” link on the right side of the Settings window.

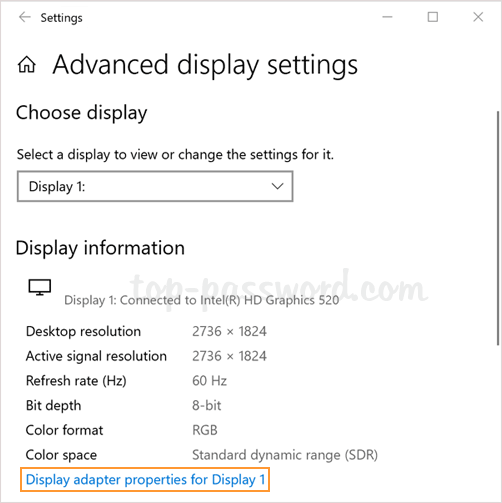
  3. On the next screen, click on the “Display adapter properties for Display 1” link.

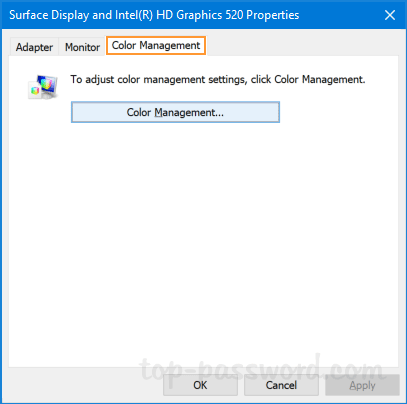
  4. Choose the Color Management tab, then click on the Color Management button.

  5. Select the Advanced tab then click on Calibrate display to launch the utility.

Method 4: Open Display Color Calibration via Run or Command Prompt

  1. Press the Windows key + R to open the Run dialog box, or open up a Command Prompt window. Type dccw and press Enter.

  2. This should be the quickest way to open the Display Color Calibration tool in Windows 10.

Reveal Saved Passwords in Vivaldi, Brave, Torch and UC Browsers

August 23rd, 2019 by Admin

Relying on your browser to remember passwords can be convenient, but you probably forget all your passwords sooner or later. What to do if your browser keeps crashing or it can’t start for any reason? How can I backup or export the saved passwords? Well, then Password Recovery Bundle is here to save the day. The program lets you reveal saved passwords in Vivaldi, Brave, Torch, UC browser, Microsoft Edge Dev and other Chromium-based browsers, with just a single click.

How to Reveal Saved Passwords in Vivaldi, Brave, Torch and Other Browsers

  1. Download Password Recovery Bundle and install it on your computer. The installation process is extremely easy, and you can get the software installed by simply clicking Next at each page.
  2. After starting Password Recovery Bundle, click on the Start Recovery button. It will list all Web browsers which you can recover saved passwords from.

  3. If you select the “Chrome Password” option, the program will decrypt and reveal login credentials saved in Vivaldi, Brave, Torch, Chrome, UC browser, Microsoft Edge Dev, Comodo Dragon, Epic privacy browser, Avast secure browser, CoolNovo and other Chromium-based browsers.

  4. Once your passwords are recovered, you can copy and write them down on a piece of paper and put it in a safe place like your wallet.

Conclusion

If someone gains access to your computer, they can also reveal and view the passwords saved in your Web browser. For basic security, you should set a master password to protect the browser, lock your computer when you step away, or completely turn off password saving for every browser.

Fix: Touchscreen not Working in Windows 10

August 20th, 2019 by Admin

Your touchscreen not working after Windows 10 updates? Or touchscreen isn’t as accurate as it used to be? If your Windows 10 touchscreen doesn’t respond or respond inaccurately, just follow this troubleshooting tutorial to fix the issue with ease.

Solution 1: Enable Touchscreen & Update Drivers

  1. Press the Windows key + R to open the Run box, type devmgmt.msc and hit Enter to open Device Manager.

  2. Expand the “Human Interface Devices” category, right-click on HID-complaint touch screen and select Enable device from the pop-up menu. If the “Enable device” option is not available, continue to the next step.

  3. Now, we need to update the touchscreen driver. Just right-click on HID-complaint touch screen and then choose “Update driver“.

  4. Click the Search automatically for updated driver software option.

  5. If a newer driver package is available, Device Manager will download and install the package automatically. Reboot your computer and tap the screen to see if it responds.

Solution 2: Calibrate Touch Screen

  1. Open the Control Panel with Large icons view, and then click on Tablet PC Settings.

  2. On the Display tab, click on Setup. Follow the on-screen directions to identify your screen as a touch screen.

  3. When you’re back to the “Tablet PC Settings” dialog, click on the Reset button to reset touch calibration to the default settings.

    Another way of resetting touch calibration is to open Command Prompt and execute this command:
    tabcal.exe ClearCal DisplayID=\\.\DISPLAY1

  4. Now, restart Windows 10 and check if your issue got fixed.

Solution 3: Changing Power Management Settings

  1. Open Device Manager and expand the “Human Interface Devices” category. We need to turn off power saving for each device related to touch screen. Right-click on the related device (e.g. “Intel(R) Precise Touch Device“) and select Properties.

  2. Go to the Power Management tab and uncheck the box which says “Allow the computer to turn off this device to save power“. Click OK.

  3. After disabling power saving for each touch device, then restart and see if your problem is resolved.

Conclusion

This can solve a lot of issues you may experience with your computer’s touchscreen. Still having the issue? If your touchscreen experienced a hardware failure, then visit your computer manufacturer’s website and download the hardware diagnostics tools to detect or fix the problem.

How to Fix: Windows 10 Notifications Disappear Too Quickly

August 19th, 2019 by Admin

Windows 10 notifications disappear too quickly from the bottom right of your screen before you can read them? By default, the notifications will pop up for 5 minutes before they are sent off to the Action Center. If you would like the notifications to stay a litter longer, here are 3 ways to change Windows 10 notification duration with ease.

Method 1: Change Windows 10 Notification Duration from Settings App

  1. Open the Settings app, and click on the Ease of Access.

  2. Choose the Display tab on the left side. On the right, click the “Show notifications for” drop down menu and you can change the time duration from the default 5 seconds to 7, 15, 30 seconds or even 5 minutes.

  3. Your notifications will now stay longer on the bottom right of your screen before they disappear.

Method 2: Change Windows 10 Notification Duration from Control Panel

  1. Open the Control Panel in Large icons view, and click on Ease of Access Center.

  2. Under the “Explorer all settings” section, click on the “Use the computer without a display” link.

  3. Scroll down to the “Adjust time limits and flashing visuals” section, click the drop-down list to specify how long Windows notification dialog boxes should stay open.

  4. Click OK to save your changes.

Method 3: Change Windows 10 Notification Duration from Registry Editor

  1. Open Registry Editor and navigate to the key: HKEY_CURRENT_USER\Control Panel\Accessibility. Double-click the DWORD MessageDuration on the right pane to modify it.

  2. The Edit DWORD Value window will appear. Set Base to Decimal and enter the time duration in seconds. If you enter 300, notifications will disappear within five minutes.

  3. Close Registry Editor. You have to log off or restart your computer to make the changes take effect.

Turn On / Off Automatically Pause OneDrive Sync on Metered Network

August 13th, 2019 by Admin

By default, OneDrive will automatically pause file syncing if a metered connection is detected. But sometimes you may need to make OneDrive continue to sync files no matter if metered or not. In this tutorial we’ll show you 2 simple ways to turn on or off automatically pause OneDrive sync on metered network in Windows 10.

Method 1: Turn on / off Pause OneDrive Sync on Metered Network via OneDrive Settings

  1. Click on the OneDrive icon in your system tray, then click on the More button and choose Settings.

  2. Under the Settings tab, just check or uncheck the option “Automatically pause sync when this device is on a metered connection” and click OK.

  3. Relaunch your OneDrive app to apply your changes.

Method 2: Turn on / off Pause OneDrive Sync on Metered Network via Registry Editor

  1. Open Registry Editor and navigate to: HKEY_CURRENT_USER\Software\Microsoft\OneDrive. On the right panel, you have to create a 32-bit DWORD value UserSettingMeteredNetworkEnabled.

  2. In order to make OneDrive automatically pause sync on a metered connection, just double-click on UserSettingMeteredNetworkEnabled and set its value data to 1. Otherwise, change the value to 0 if you would like OneDrive to keep syncing regardless of the connection type.

  3. Close Registry Editor and reboot your system to apply.

2 Ways to Hide or Show Desktop Background Image in Windows 10

August 13th, 2019 by Admin

Looking for a way to remove desktop background wallpaper in Windows 10? To avoid the distraction from a wallpaper or a slideshow, you can turn off the background image on your desktop. In this tutorial we’ll show you 2 easy ways to hide or show desktop background image in Windows 10.

Method 1: Hide or Show Desktop Background Image via Control Panel

  1. Open the Control Panel with Large icons view, and then click on Ease of Access Center.

  2. Under the “Explore all settings” section, click the “Make the computer easier to see” link.

  3. Scroll down to the “Make things on the screen easier to see” section, check the “Remove background images (where available)” box and click OK. You’ll get a black desktop background. Or uncheck that box to make the desktop background image show up again.

  4. When your desktop background image is turned off, all the desktop background settings are locked down and the Settings app will display a warning message “Your background is currently turned off by Ease of Access settings“.

Method 2: Hide or Show Desktop Background Image via the Settings App

  1. Open the Settings app and click on the Ease of Access category.

  2. Select Display from the left-side menu. On the right, you can toggle on/off the setting called “Show desktop background image“.

Conclusion

If you’re using a picture or a slideshow as your background, turning off desktop background image will give you a black desktop background. When you prefer to use a different color other than black, just set your desired solid color as your background before turning off desktop background image.

How to Save Spotlight Images Appeared on your Windows 10 Lock Screen

August 5th, 2019 by Admin

Spotlight is a new feature included in Windows 10 which automatically downloads beautiful images and display them on your lock screen. If you find the Spotlight images are really nice, you may want to save them for later use. In this tutorial we’ll show you the easiest way to save Spotlight images appeared on your Windows 10 lock screen.

How to Save Spotlight Images Appeared on Windows 10 Lock Screen

  1. Press the Windows key + R to open the Run dialog box. Type the Spotlight images location and hit Enter:
    %userprofile%\AppData\Local\Packages\Microsoft.Windows.ContentDeliveryManager_cw5n1h2txyewy\LocalState\Assets

    Sometimes, the Spotlight images might be saved in a different location:
    %userprofile%\AppData\Local\Packages\4484Ram6ler.SpotlightWallpapers_a1cxeyfetfvyt\LocalState\Wallpaper

  2. It will open a new File Explorer window and you’ll see a bunch of files, all with with meaningless file names and no extensions. Just select all of these files and copy them to a new folder where you can easily find them.
  3. After that, hold down the SHIFT key and right-click the blank space of the new folder, then select Open PowerShell window here.

  4. In order to add the .jpg extension to all these files, run the following command in the PowerShell window:
    Dir | rename-item -newname { $_.Name +".jpg" }

    If you’re at the Command Prompt window, type this command instead:
    Ren *.* *.jpg

  5. Right-click inside the new folder and select View -> Large Icons. You should be able view all the images used by Windows Spotlight. Delete any images you don’t want.

That’s it!

Fix “Something happened and your PIN isn’t available” in Windows 10

August 2nd, 2019 by Admin

Unable to login to your computer as it is saying “Something happened and your PIN isn’t available” or “Your PIN is no longer available due to a change in the security settings on this device“? Windows Hello PIN is backed by a Trusted Platform Module (TPM) chip, so any changes with the TPM chip will result in the above error. If you see such error message while signing in to Windows 10, then you can follow this tutorial to resolve it.

How to Fix “Something happened and your PIN isn’t available” in Windows 10

To get started, just click on the Sign-in options beneath the error message “Something happened and your PIN isn’t available. Choose another sign-in option and set up your PIN again by going to Settings > Accounts > Sign-in options“.

Next, click on the key icon and try to log in to your local account or Microsoft account with a password. If you’ve forgotten your Windows 10 password, PCUnlocker Live CD can help.

After logging into Windows 10, open the Settings app and navigate to Accounts -> Sign-in options. Just select the Windows Hello PIN option and click on Remove.

Click on Remove again to confirm.

Enter your current password and click OK. This will remove your current PIN sign-in option immediately.

Reboot your computer. The next time you sign into Windows 10, just open the Settings app again and add a new PIN. The PIN sign-in option should be working now.

That’s it!