Archive for May, 2022

3 Steps to Adjust Touchpad Sensitivity on Windows 11 Laptop

May 31st, 2022 by Admin

Touchpad is too sensitive and it is hard to control? How can I reduce the sensitivity for the built-in touchpad on my laptop? In this tutorial we’ll walk you through the steps of adjusting touchpad sensitivity on Windows 11 laptop.

How to Adjust Touchpad Sensitivity on Windows 11 Laptop

  1. Press the Windows logo key + I to bring up the Settings app. Choose Bluetooth & devices from the left pane, and then click Touchpad on the right.

  2. Under the Gestures & interaction section, click Taps to expand the settings.

  3. You can now click the “Touchpad sensitivity” drop-down box to change the sensitivity level of your touchpad. The available sensitivity levels include:
    • Most sensitive
    • High sensitivity
    • Medium sensitivity
    • Low sensitivity

That’s it!

3 Methods to Restart Start Menu in Windows 11 / 10

May 30th, 2022 by Admin

What to do if Start Menu stops working all of a sudden? Starting with Windows 10, Start Menu has been moved out of File Explorer, and it appears as a standalone process (StartMenuExperienceHost.exe). If the Start Menu freezes up or becomes unresponsive, here are 3 simple methods to restart Start Menu in Windows 11 / 10.

Method 1: Restart Start Menu Using Task Manager

Press the Ctrl + Shift + Esc keys together to bring up Task Manager. Select the Users tab, and then click the small arrow next to your account.

Choose the “Start” process from the list, and click End task.

The Start Menu process will stop and then start automatically.

Method 2: Restart Start Menu Using Windows PowerShell

Open Windows PowerShell as administrator, and then execute the below command:
Stop-Process -Name "StartMenuExperienceHost" -Force

The Start Menu process will exit and restart automatically.

Method 3: Restart Start Menu Using Command Prompt

Launch Command Prompt as administrator, and run the following command:
taskkill /f /im StartMenuExperienceHost.exe

You’ll get the message that says the StartMenuExperienceHost.exe process has been terminated. After a very short time, the Start Menu process will start on its own.

Fast Methods to Restart File Explorer in Windows 11

May 27th, 2022 by Admin

There are situations where File Explorer becomes unresponsive and you need to restart it. To apply a registry tweak, you may also need to restart File Explorer. In this tutorial we’ll show you some fast methods to restart File Explorer in Windows 11.

Method 1: Restart File Explorer Using Task Manager

Use the Ctrl + Shift + Esc keyboard shortcut to open up Task Manager. Choose the Users tab, then click the arrow next to your current account to expand a list of all running programs.

Select “Windows Explorer” and click the Restart button to restart File Explorer.

Method 2: Restart File Explorer Using Windows PowerShell

Open Windows PowerShell as administrator, and then run one of the following commands:

  • kill -n explorer
  • stop-process -name explorer -force

It will restart the File Explorer immediately.

Method 3: Restart File Explorer Using Command Prompt

Open Command Prompt as administrator, and execute these commands one by one:
taskkill /f /im explorer.exe
start explorer.exe

This will forcibly terminate the explorer.exe process and then start it.

Method 4: Restart File Explorer Using Keyboard Shortcut

Press and hold the Alt + Tab keys at the same time. When the Task Switcher appears, release the Tab key and then press F4. After a while, Windows Explorer will restart automatically.

Method 5: Create a Desktop Shortcut to Restart File Explorer

Right-click the empty space on your desktop and choose New -> Shortcut from the context menu that pops up.

Copy the following command and paste it in the location box, and click Next.
cmd.exe /c "taskkill.exe /f /im explorer.exe && start explorer.exe"

Type a meaningful name for this shortcut. Click Finish.

Whenever you need to restart Windows Explorer, simply double-click the desktop shortcut you just created.

That’s it!

Restore Old / Classic Ribbon back in Windows 11 File Explorer

May 26th, 2022 by Admin

Windows 11 comes with a new, simplified ribbon at the top of File Explorer. The new ribbon shows fewer icons and hides most of the icons, making it easier for touch-screen users to click with fingers.

If you don’t like the new, modern ribbon interface, you can restore the old / classic ribbon back in Windows 11 File Explorer with a simple registry tweak.

Updated: This method doesn’t work with Windows 11 22H2 or newer version. But you can still use other methods to open the classic File Explorer with ribbon.

How to Restore Old / Classic Ribbon back in Windows 11 File Explorer

  1. Open Registry Editor and navigate to the key: HKEY_LOCAL_MACHINE\SOFTWARE\Microsoft\Windows\CurrentVersion\Shell Extensions\Blocked. Right-click the blank area in the right pane and select New -> String Value.

  2. Rename the new string to {e2bf9676-5f8f-435c-97eb-11607a5bedf7}, and leave its value data empty.

  3. Log off and log back into your Windows account. The File Explorer with classic ribbon will come back.

    If you want to use the new, simplified ribbon later on, just delete the {e2bf9676-5f8f-435c-97eb-11607a5bedf7} string you created.

That’s it!

How to Show Drive Letter Before Drive Name in Windows 11 / 10

May 26th, 2022 by Admin

How can I make the drive letter appear before drive label in File Explorer? By default, File Explorer puts drive letters after drive names when listing the drives on the computer.

If you want to reverse the order and make File Explorer show drive letter first, here is a simple method to show drive letter before drive name in Windows 11 / 10.

How to Show Drive Letter Before Drive Name in Windows 11 / 10

  1. Open Registry Editor and navigate to: HKEY_CURRENT_USER\SOFTWARE\Microsoft\Windows\CurrentVersion\Explorer. Right-click the Explorer key in the left pane, then choose New > DWORD (32-bit) Value.

  2. Name the new DWORD ShowDriveLettersFirst, and then double-click it to modify.

  3. A small window will pop up. Enter 4 in the Value data box to make Windows show all drive letters before drive labels, and click OK.

    • 0 = (Default) Show all drive letters after drive labels
    • 1 = Show only network drive letters before drive labels
    • 2 = Hide all drive letters
    • 4 = Show all drive letters before drive labels
  4. Close Registry Editor. Restart File Explorer and you’ll see it show drive letters first.

That’s it!

2 Methods: Always Show Scrollbars in Windows 11

May 25th, 2022 by Admin

By default, the scrollbars in Windows 11 are hidden until activated by scrolling. This might cause you miss out on content because your system doesn’t tell you that you could scroll. In this tutorial we’ll show you 2 simple methods to make Windows 11 always show scrollbars, when there is content that must be scrolled to access.

Method 1: Set Scrollbars to Always Display Using Settings App

  1. Press the WIN + I keyboard combination to launch the Settings app. Choose Accessibility from the left navigation pane, and then click Visual effects on the right side.

  2. Turn on the “Always show scrollbars” toggle switch.

  3. Now the scrollbars will always appear in all of your applications, including the Settings app and Notepad.

Method 2: Set Scrollbars to Always Display Using Registry Editor

  1. Open Registry Editor and navigate to: HKEY_CURRENT_USER\Control Panel\Accessibility. On the right, double-click the 32-Bit DWORD value DynamicScrollbars.

  2. Change its value data from 1 to 0 to make Windows 11 always show scrollbars, click OK.

  3. Close Registry Editor and log off your account. The next time you sign back into your account, the scrollbar will always show up on windows.

That’s it!

4 Methods to Disable File Compression in Windows 11 / 10

May 24th, 2022 by Admin

Windows 11 keeps compressing files in the C: drive? How do I stop Windows from automatically compressing files? This problem usually happens when your PC is running out of disk space. In this tutorial we’ll show you 4 methods to disable file compression in Windows 11 / 10.

Method 1: Disable File Compression Using Group Policy

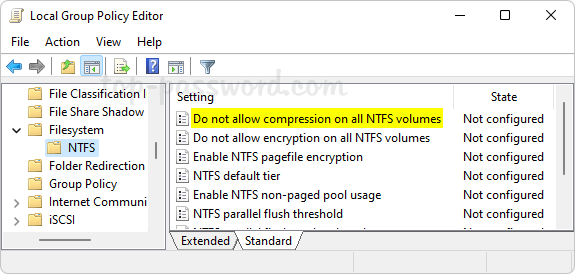
Open Local Group Policy Editor and browse to: Computer Configuration\Administrative Templates\System\Filesystem\NTFS. On the right pane, double-click the policy “Do not allow compression on all NTFS volumes“.

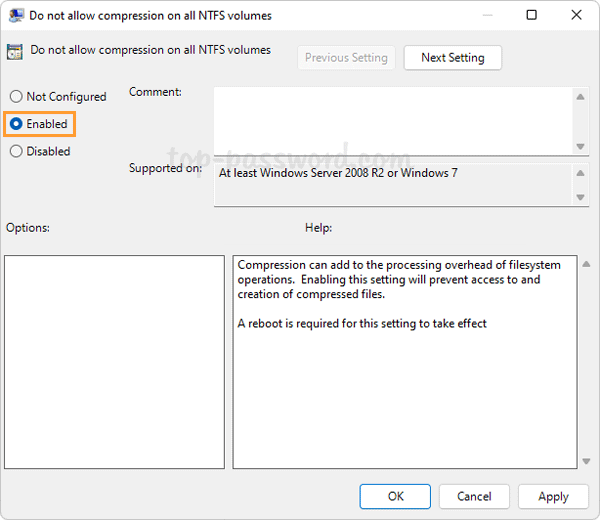
Select the Enabled option. Click Apply and then OK.

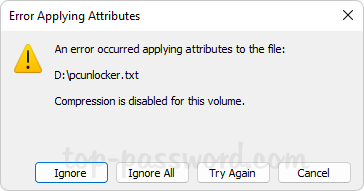
Reboot your computer to make the changes take effect. The next time you try to enable file compression, you’ll get the error message “Compression is disabled for this volume“.

Method 2: Disable File Compression Using Registry Editor

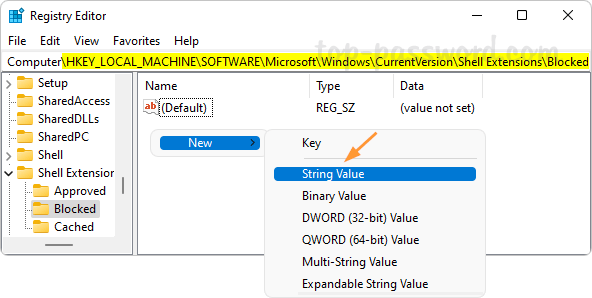
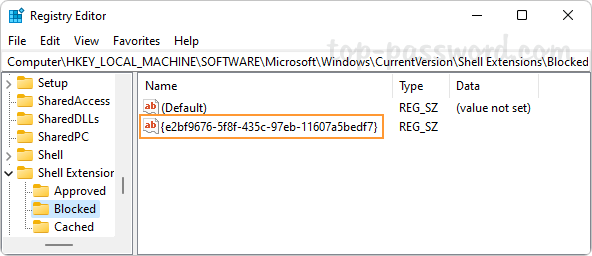
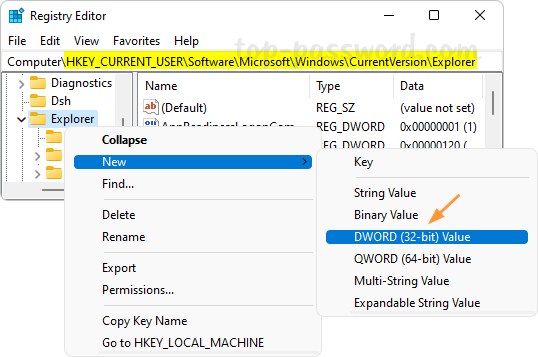
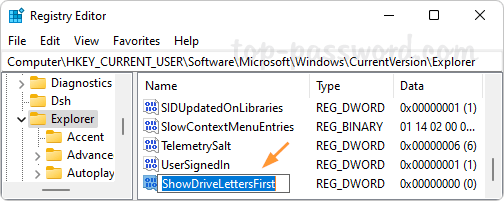
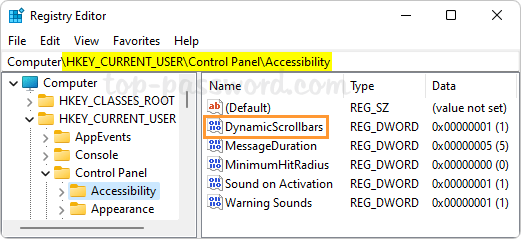
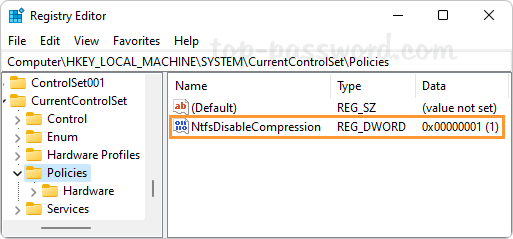
Open Registry Editor and navigate to: HKEY_LOCAL_MACHINE\SYSTEM\CurrentControlSet\Policies. In the right pane, right-click the blank area and select New -> DWORD (32-bit) Value.

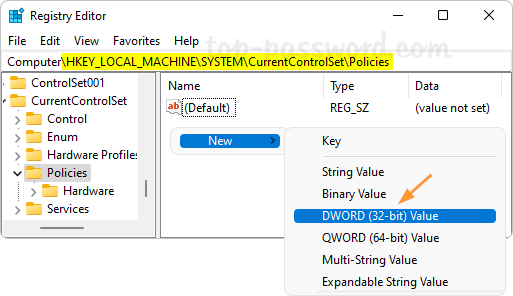
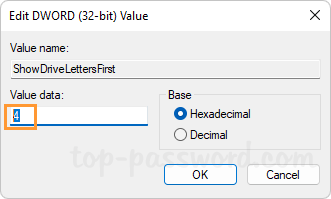
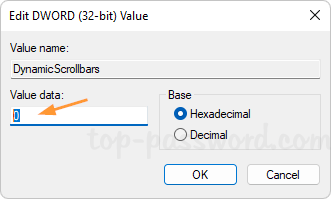
Name the newly-created DWORD NtfsDisableCompression, and then change its value data to 1 for turning off automatic file compression.

Close Registry Editor and restart your computer to apply the changes.

Method 3: Disable File Compression Using Command Prompt

Open the Command Prompt as administrator and then run this command to disable file compression:
fsutil behavior set disablecompression 1

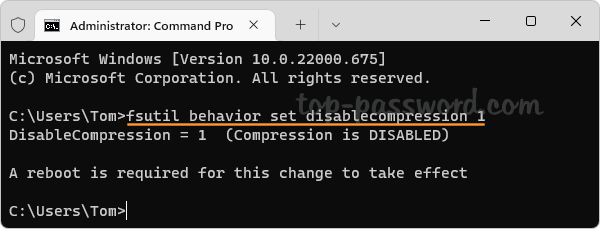
A reboot is required for this change to take effect. Whenever you need to enable file compression again, execute the following command:
fsutil behavior set disablecompression 0

Method 4: Uncompress Your Files in File Explorer

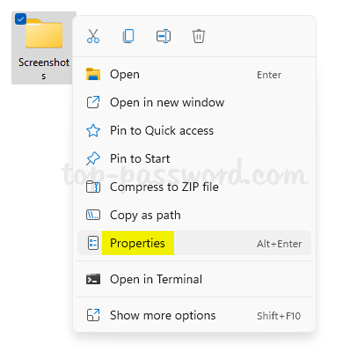
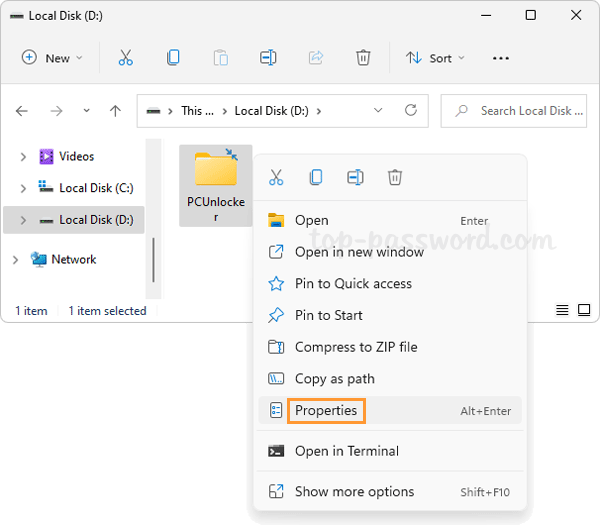
Right-click a compressed folder or file in File Explorer, and then select Properties from the context menu.

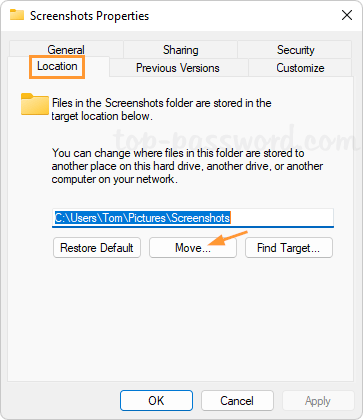
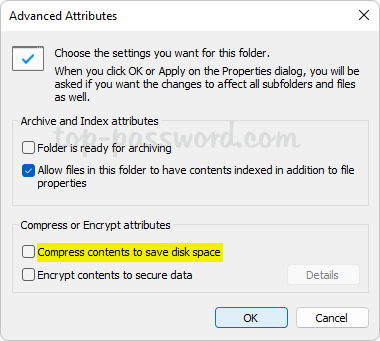
Under the General tab, click the Advanced button.

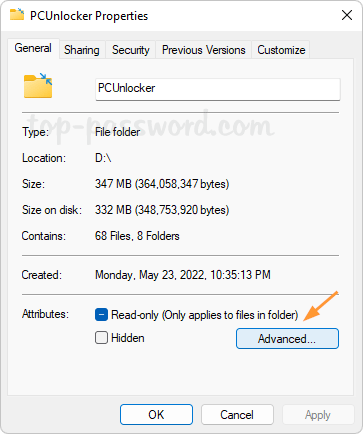
In the Advanced Attributes dialog, uncheck the box which says “Compress content to save disk space“. Click OK.

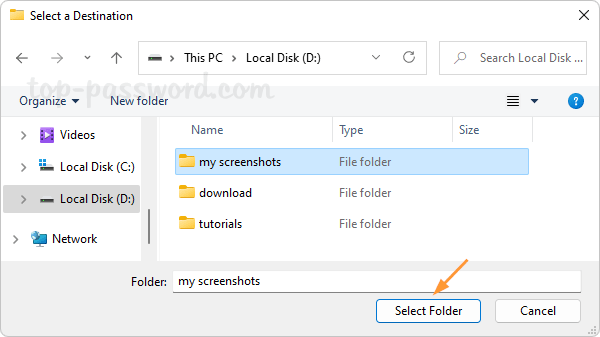
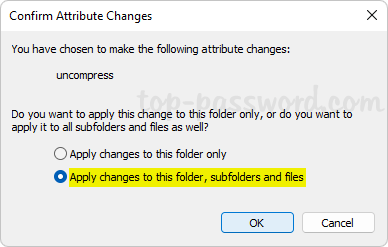
When you’re back to the Properties dialog, click Apply. A pop-up will appear, and you can choose “Apply changes to this folder, subfolders and files” and click OK.

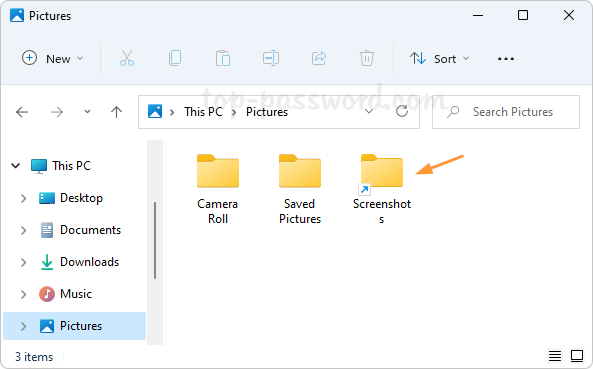
After uncompressing, two blue arrows will no longer show up in the icons of your folders or files.

2 Methods to Change Screenshot Location in Windows 11

May 23rd, 2022 by Admin

Windows 11 allows you to take screenshots by pressing the Windows + PrntScr keyboard shortcut. By default, the screenshots are automatically saved to C:\Users\user_name\Pictures\Screenshots. What to do if you want to save the screenshots to a different location? In this tutorial we’ll show you 2 methods to change the default screenshot location in Windows 11.

Method 1: Move Screenshot Location in Windows 11

  1. Open File Explorer and click “Pictures” in the left navigation pane, it will take you to the default screenshot location: C:\Users\user_name\Pictures.

    If you don’t see a folder called “Screenshots“, just press the Windows + PrntScr on your keyboard to take a screenshot.

  2. Right-click the “Screenshots” folder and select Properties.

  3. Go to the Location tab and click the Move button.

  4. Choose a new folder location where you want to save the screenshots.

  5. Click Apply. When Windows asks if you want to move existing screenshots to the new location, click Yes.

  6. The old “Screenshots” folder will disappear from C:\Users\user_name\Pictures, while the new folder you’ve chosen will be automatically renamed to “Screenshots”.


    From now on, all new screenshots will be saved to the new location.

Whenever you want to restore the original default screenshot location, right-click the “Screenshots” folder in the new location and choose Properties. Select the Location tab and click the “Restore Default” button.

Method 2: Redirect the Screenshot Location in Windows 11

  1. Before getting started, you need to create a new folder in your desired location for saving screenshots.

    Next, go to the default screenshot location: C:\Users\user_name\Pictures, and make sure the original “Screenshots” folder is deleted.

  2. Open the Command Prompt as administrator, and use the mklink command to redirect the original screenshots location to a new location.
    mklink /J "%USERPROFILE%\Pictures\Screenshots" "your_new_folder_location"

  3. The above command will create a special folder called “Screenshots” in the default location, which is redirecting to the new location of your choice.

  4. The next time you take a screenshot using Windows + PrntScr, the screenshot is actually saved in the new location, but you can also access it from the original location.

Whenever you need to cancel the folder redirection, just delete the “Screenshots” folder in the default location and you’re done.

How to Make Windows 11 Show Text Suggestions when Typing

May 21st, 2022 by Admin

When you type on the physical keyboard, Windows 11 can suggest the next word or phrase you are supposed to write. You can then use the right-arrow key to accept the suggestion. This can help you write more efficiently and reduce spelling errors. In this tutorial we’ll show you how to enable text suggestions in Windows 11.

How to Make Windows 11 Show Text Suggestions when Typing

  1. Press the Windows key + I to open the Settings app. Select Time & language on the left pane, then click Typing on the right side.

  2. Turn on the “Show text suggestions when typing on the physical keyboard” toggle switch.

  3. If you open Notepad or other application, you’ll see the text suggestions right away while typing.

Conclusion

This is how you can easily turn on text suggestions in Windows 11. If your regular text editor already has the functionality of text predictions, you can choose to disable Windows’s built-in text suggestions.

3 Quick Ways to Switch between Headphones and Speakers in Windows 11

May 19th, 2022 by Admin

How do I change the default audio devices quickly in Windows 11? If your PC has more than one audio output devices, sometimes you may need to switch back and forth between headphones and speakers. In this tutorial we’ll show you 3 quick methods to switch between headphones and speakers in Windows 11.

Method 1: Change the Default Sound Output Device from Settings App

Press the Windows logo key + I to launch the Settings app. Click System on the left section, and then click Sound on the right pane.

Under the Output section, click the “Choose where to play sound” drop-down list and you can choose either Headphones or Speakers as the default audio output device.

Method 2: Change the Default Sound Output Device from System Tray

Click on the Speaker icon in the system tray (lower-right corner of the screen) to open the Quick Settings panel. Next, click the small arrow icon located in the right corner of the volume slider.

You can then choose the desired sound output device from the list.

Method 3: Change the Default Sound Output Device from Sounds Applet

Press the Windows logo key + R to launch the Run box, then type mmsys.cpl and press Enter to open the classical Sounds applet.

Go to the Playback tab. You’ll see all of the available audio playback devices. A white tick on a green circle indicates the default device.

To switch between audio devices, just select the desired output device from the list, click the Set Default button and then click OK.

Conclusion

These methods should be very helpful, especially when you need to switch between headphones and speakers constantly. When changing the default sound output device, make sure both headphones and speakers are connected to your PC and turned on.