Windows 11 allows you to take screenshots by pressing the Windows + PrntScr keyboard shortcut. By default, the screenshots are automatically saved to C:\Users\user_name\Pictures\Screenshots. What to do if you want to save the screenshots to a different location? In this tutorial we’ll show you 2 methods to change the default screenshot location in Windows 11.
Method 1: Move Screenshot Location in Windows 11
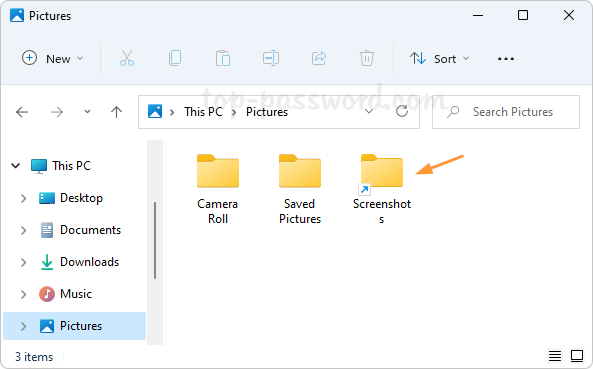
- Open File Explorer and click “Pictures” in the left navigation pane, it will take you to the default screenshot location:
C:\Users\user_name\Pictures.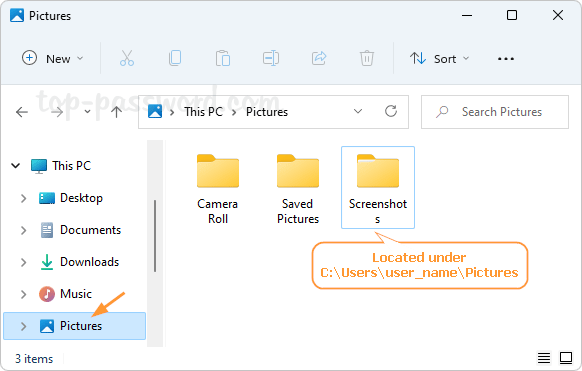
If you don’t see a folder called “Screenshots“, just press the Windows + PrntScr on your keyboard to take a screenshot.
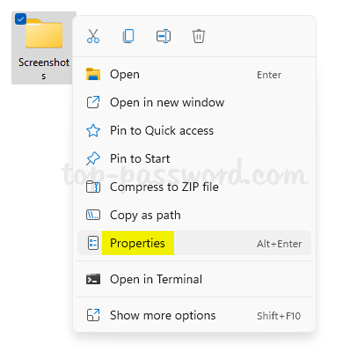
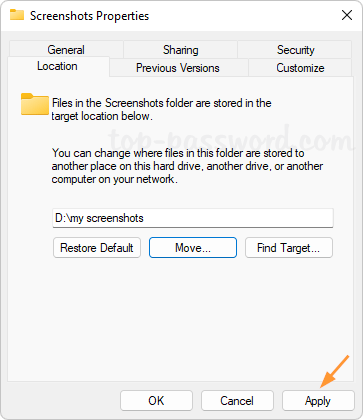
- Right-click the “Screenshots” folder and select Properties.
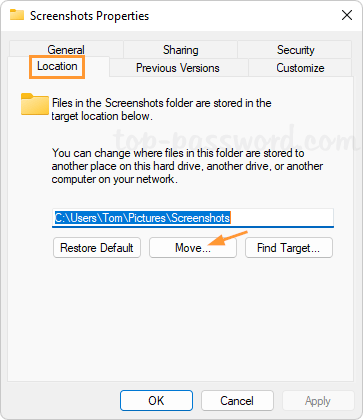
- Go to the Location tab and click the Move button.
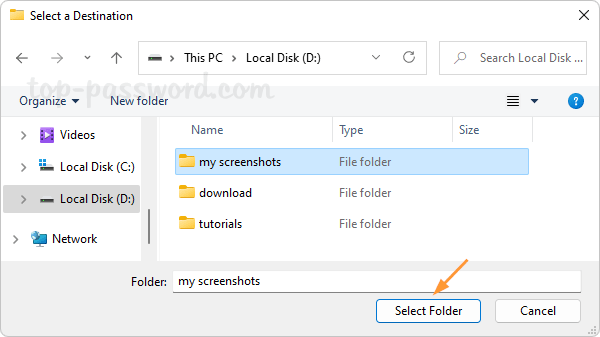
- Choose a new folder location where you want to save the screenshots.
- Click Apply. When Windows asks if you want to move existing screenshots to the new location, click Yes.
- The old “Screenshots” folder will disappear from
C:\Users\user_name\Pictures, while the new folder you’ve chosen will be automatically renamed to “Screenshots”.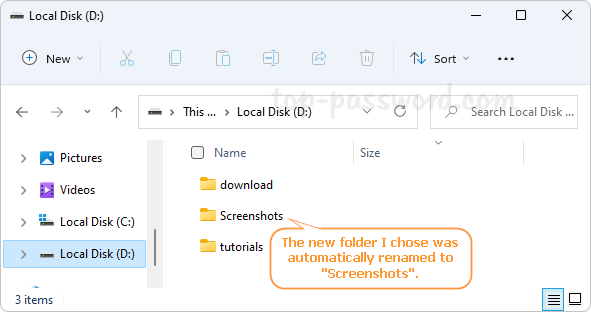
From now on, all new screenshots will be saved to the new location.
Whenever you want to restore the original default screenshot location, right-click the “Screenshots” folder in the new location and choose Properties. Select the Location tab and click the “Restore Default” button.
Method 2: Redirect the Screenshot Location in Windows 11
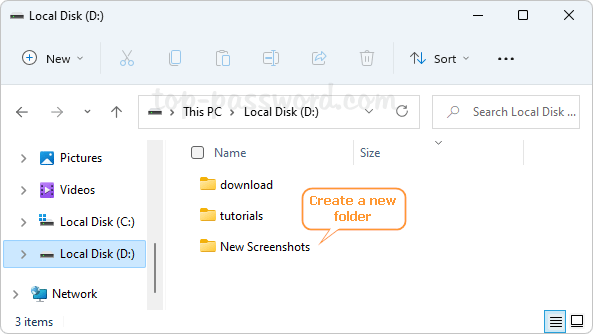
- Before getting started, you need to create a new folder in your desired location for saving screenshots.
Next, go to the default screenshot location:
C:\Users\user_name\Pictures, and make sure the original “Screenshots” folder is deleted. - Open the Command Prompt as administrator, and use the mklink command to redirect the original screenshots location to a new location.
mklink /J "%USERPROFILE%\Pictures\Screenshots" "your_new_folder_location"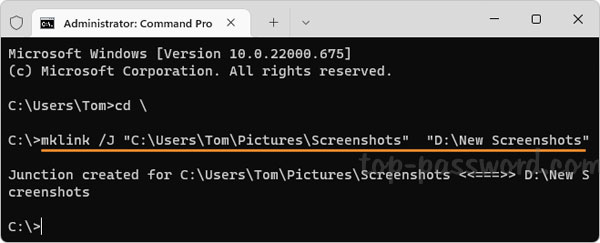
- The above command will create a special folder called “Screenshots” in the default location, which is redirecting to the new location of your choice.
- The next time you take a screenshot using Windows + PrntScr, the screenshot is actually saved in the new location, but you can also access it from the original location.
Whenever you need to cancel the folder redirection, just delete the “Screenshots” folder in the default location and you’re done.