Do you want to take a screenshot of your Surface Pro screen and share it with friends? In this tutorial we’ll show you 4 simple ways to take a screenshot on Surface Pro 4 tablet, without using third-party software.
Method 1: Take Screenshot Using Surface Hardware Buttons
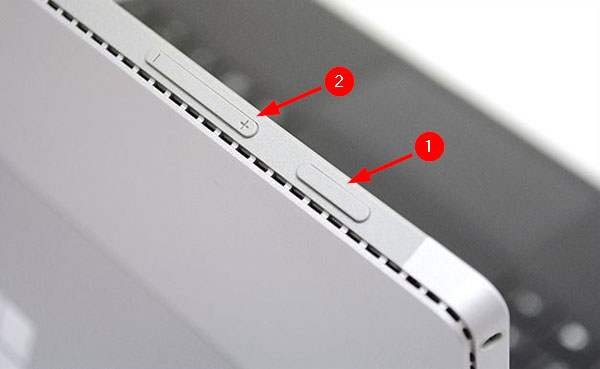
Press both the Power button and the Volume-up button simultaneously, and then release them. You’ll notice the screen briefly dim then brighten again to let you know a screenshot is taken.
All screenshots you took with this method, will be saved in your C:\Users\user_name\Pictures\Screenshots folder.
Method 2: Take Screenshot Using Keyboard Shortcut
First of all, check the FN key on your Type Cover to make sure that its light is off. Hold down the Windows key and then press the PrtSn key. This will capture your Surface screen and place the resulting screenshot in the same Screenshots folder under the Pictures library.
Method 3: Take Screenshot with Surface Pen
Double-clicking the eraser button on the top of your Surface Pen will take a screenshot that you can crop immediately, then save to the Screenshots folder under Pictures in OneDrive.
Method 4: Take Screenshot Using Snipping Tool
Windows comes with a built-in utility called Snipping Tool that makes taking screenshot easier than above methods. Once launching the Snipping Tool, you can take a screenshot of the full screen, specific program windows, or any area you want to capture. This tool lets you to save the screenshot as a JPEG, PNG, GIF, or HTML file as your desire.