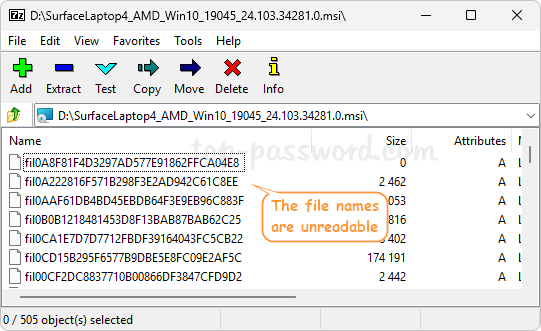
How could I extract drivers from a MSI file without installing them to a machine? Need to get files inside a .msi package? Yesterday I got a help request from a client who wanted to import Surface laptop drivers into PCUnlocker, and the driver packages from Microsoft are in .msi format. When opening a single .msi file using the freeware 7-Zip, we found the filenames are totally unreadable.
Eventually we found the solution. In this tutorial we’d like to share the correct method of extracting drivers or files from a .MSI package without installing them to your system.
How to Extract Drivers or Files from .MSI without Installing
- Right-click the Start button in the taskbar and select Terminal (Admin).

- To extract files from a .msi package, type the following command and press Enter. Make sure you replace
path_to_msi_filewith the path of your .msi file, and replacepath_to_output_folderwith your destination folder.
MSIEXEC /a path_to_msi_file /qb TARGETDIR=path_to_output_folder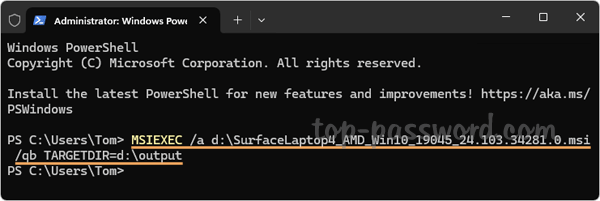
- The installer will display a simple progress UI while unpacking.
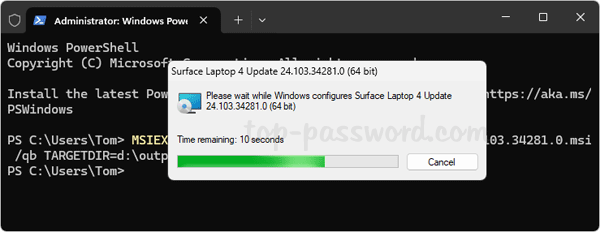
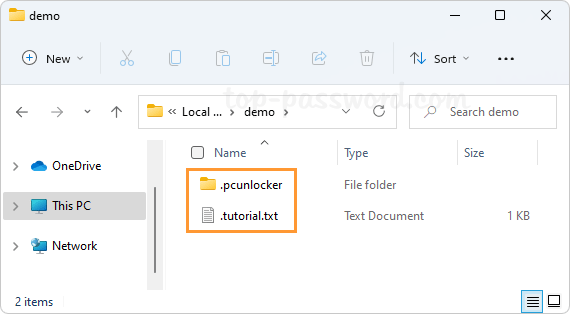
- When the unpacking is done, just open File Explorer and browse to your destination folder. You can then find the extracted drivers or files there.
That’s it!