How can I stop Windows 11 from automatically updating? Every time when we suffer unexpected problems caused by automatic Windows updates, it’s really difficult to find out exactly which updates should be to blame and we have to roll back the problematic updates. To keep your PC to run steadily without being disturbed by Windows updates, you can choose to disable automatic Windows updates completely or prevent others from manually checking for updates in Windows 11.
How to Disable Automatic Updates or “Check for updates” in Windows 11
- Open the Registry Editor. Copy and paste the following path into the address bar at the top and press Enter, it will take you to that registry location at once.
HKEY_LOCAL_MACHINE\SOFTWARE\Policies\Microsoft\Windows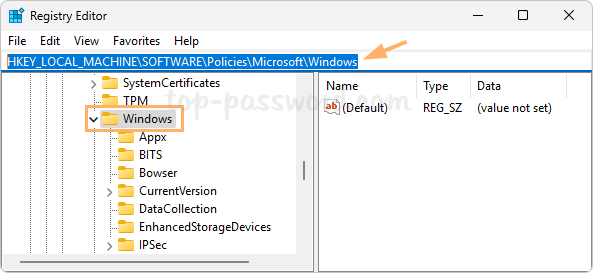
- Right-click the Windows key on the left-side pane, and choose New -> Key.
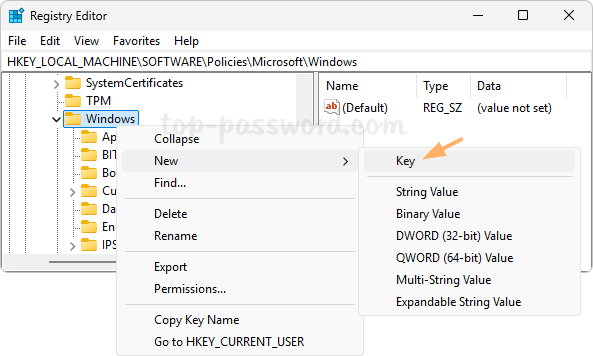
- Name the new key WindowsUpdate and press Enter.
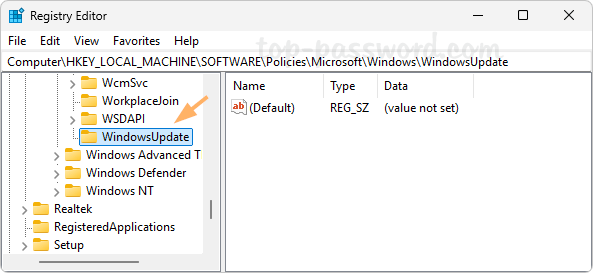
- When the WindowsUpdate key is selected, right-click the empty area on the right-side pane, and choose New -> DWORD (32-bit) Value.
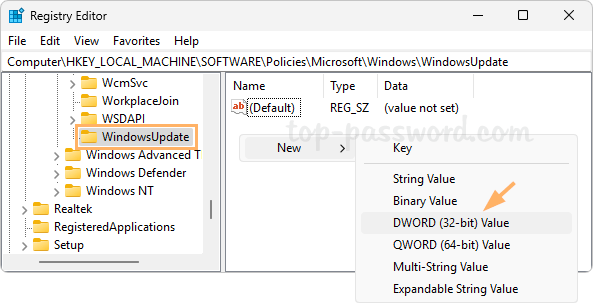
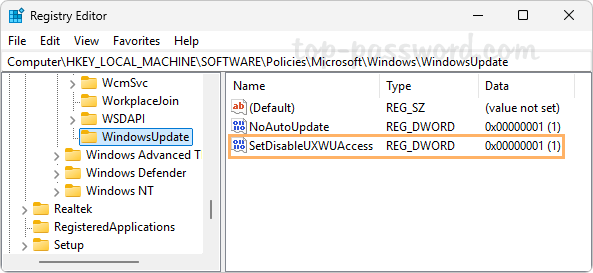
- Name the new DWORD NoAutoUpdate, and then double-click it to change its value data from 0 to 1. This will disable automatic Windows updates completely.

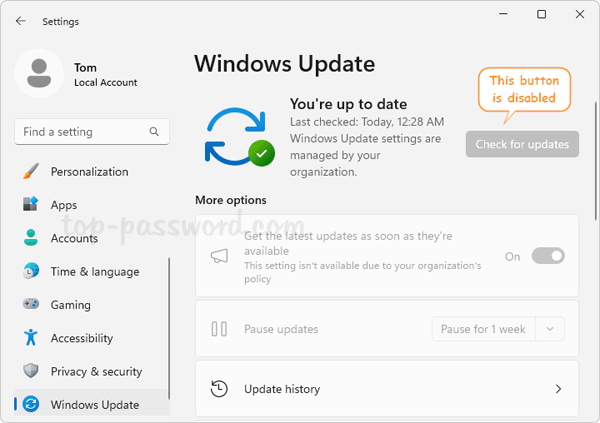
However, you’re still allowed to open the Settings -> Windows Updates, and click the “Check for updates” button to download & install Windows updates.
- If you’d like to disable the “Check for updates” button as well, create a new DWORD called SetDisableUXWUAccess at the same registry location, and set its value data to 1.
- Close Registry Editor and you’ll see that the “Check for updates” button is greyed out immediately.
Whenever you need to turn on automatic Windows 11 updates or enable the “Check for updates” button, just delete the corresponding DWORD entries we created.
That’s it!