When you right-click a file and select Delete, or press the Delete key on the keyboard, Windows will move the file to the Recycle Bin by default. To permanently delete that file, you have to empty the Recycle Bin. In this tutorial we’ll show you how to add “Permanently delete” to context menu in Windows 11 / 10, which can help you permanently delete files without sending them to Recycle Bin.
How to Add a Context Menu to Permanently Delete Files in Windows 11 / 10
- Open Registry Editor and navigate to the location:
HKEY_CLASSES_ROOT\AllFilesystemObjects\shell. In the left sidebar, right-click the shell key and select New -> Key.
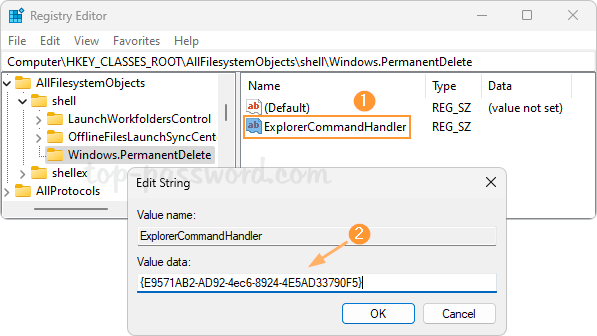
- Name the new key Windows.PermanentDelete and select it. In the right pane, right-click the blank area and choose New -> String Value.

- Name the new DWORD ExplorerCommandHandler, and then double-click it and set its value data to {E9571AB2-AD92-4ec6-8924-4E5AD33790F5}.
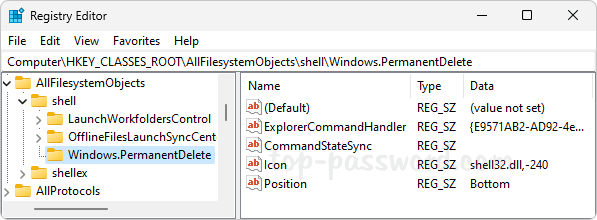
- Use the same method to create another three different string values: Icon, Position and CommandStateSync. Set the value data of Icon to shell32.dll,-240. The value data of Position could be Top or Bottom, while leaving the value data of CommandStateSync to be empty.
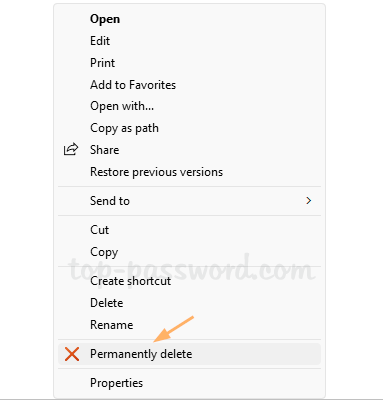
- Close Registry Editor. When you right-click any folder or file, you’ll see the “Permanently delete” option appear in the top or bottom of the context menu.
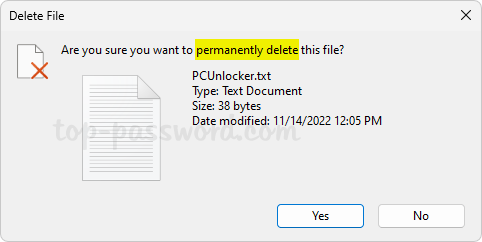
- When you click the “Permanently delete” option, a pop-up dialog will ask you to confirm before permanently deleting your chosen folder or file.
That’s it!