Archive for June, 2017

6 Ways to Open Power Options in Windows 10

June 29th, 2017 by Admin

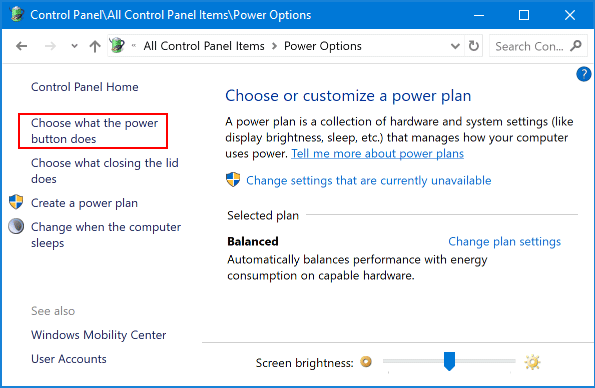
Power Options is a setting page in the Control Panel that allows you to change power-saving plan and adjust screen brightness on your computer. In this tutorial we’ll show you 6 methods to open Power Options in Windows 10.

power-options

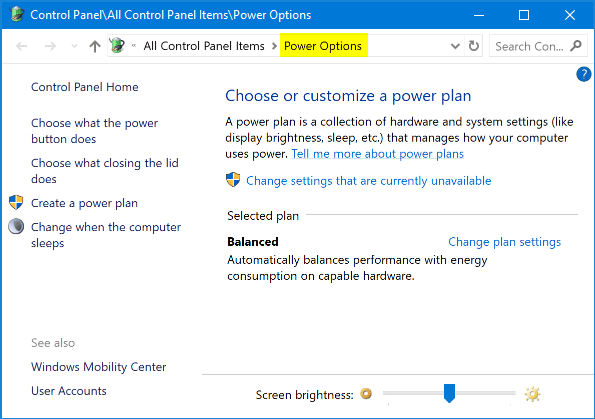
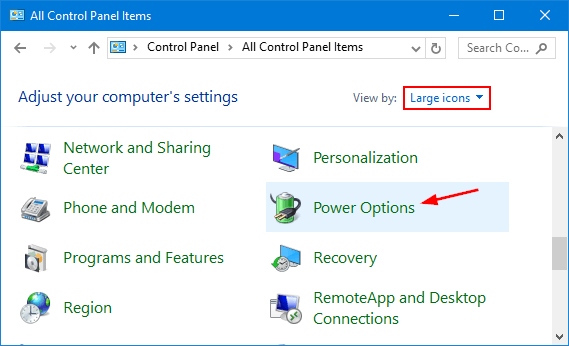
Method 1: Open Power Options from Control Panel

Open the Control Panel. Set the View by option to Large icons or Small icons, and then click Power Options.

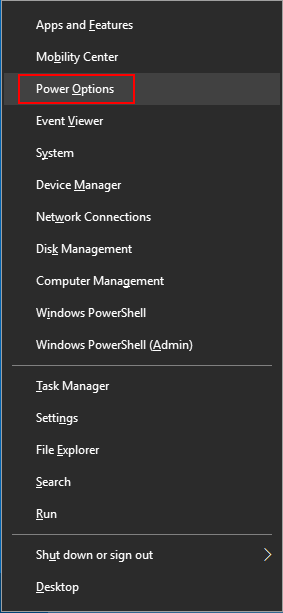
Method 2: Open Power Options Using WIN+X Shortcut

Press the Windows logo key + X keyboard shortcut, and you can then access Power Options from the pop-up menu.

open-power-options-via-winx

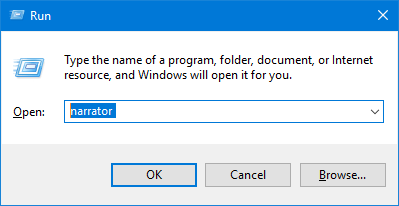
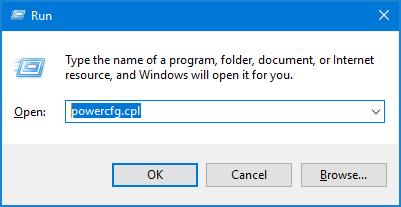
Method 3: Open Power Options via Run

Press the Windows logo key + R to open the Run command box. Type powercfg.cpl and press Enter.

powercfg

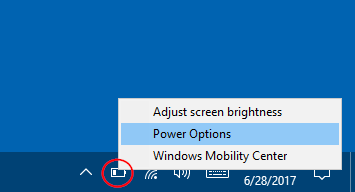
Method 4: Open Power Options from Windows 10 Taskbar

If you’re running Windows 10 on a laptop or tablet, just right-click the battery icon in the notification area on your taskbar. The pop-up menu gives you a quick way to access Power Options setting.

open-power-options-via-taskbar

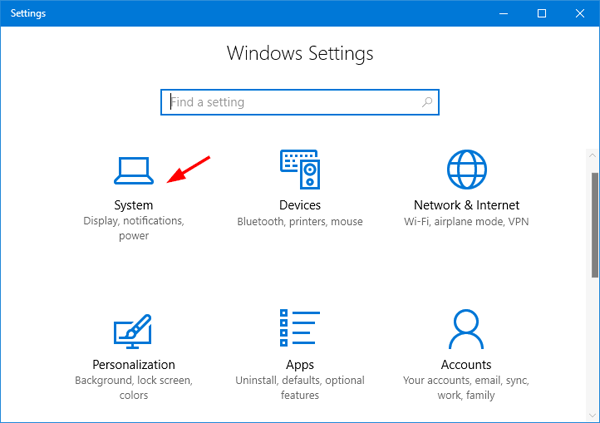
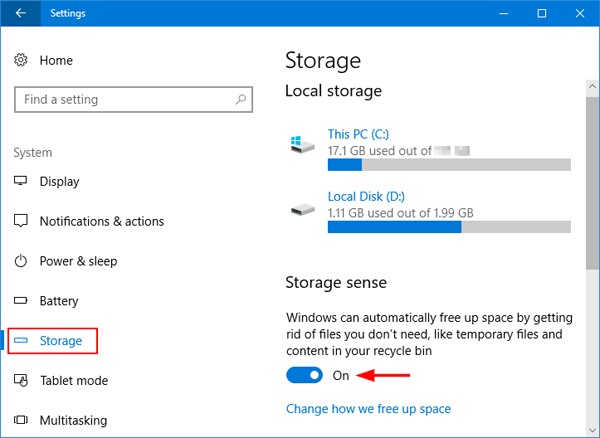
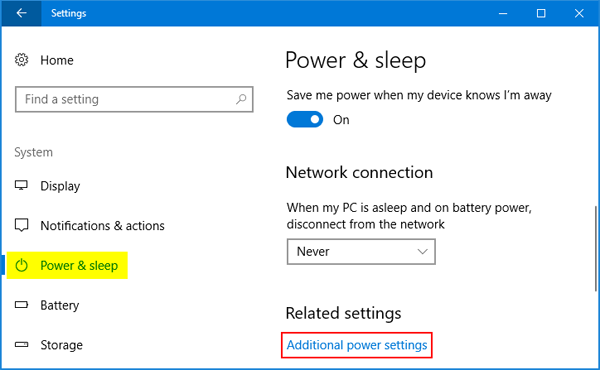
Method 5: Open Power Options from Settings

Press the Windows logo key + I to launch the Settings app. Navigate to System -> Power & sleep, and then click the Additional power settings link on the right side.

additional-power-settings

Method 6: Open Power Options from Command Prompt

Open the Command Prompt and type in the following command:

%windir%\system32\control.exe /name Microsoft.PowerOptions

open-power-options-from-command-line

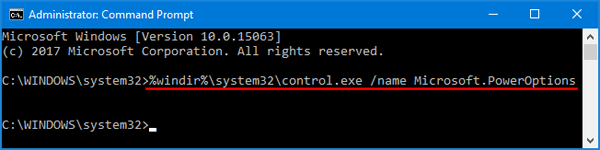
Once you press Enter, it will open the Power Options window immediately.

Fix: Hibernate Option Missing in Windows 10 Power Options

June 29th, 2017 by Admin

Hibernate option is missing from the Power Options in the Control Panel? Did you install driver updates but still couldn’t get the Hibernate option back? Hibernate is one of the power saving modes that saves your current system state to hard drive, then power off the system. When you start the PC, it restores that state, letting you resume from where you left off.

hibernate-missing-in-power-options

If you prefer to use the hibernate feature on your Windows 10 PC, here is a simple way to restore the missing Hibernate option back to the Power Options.

How to Fix: Hibernate Option Missing in Windows 10 Power Options?

  1. Click the Cortana Search box on your taskbar, type cmd, right click on the Command Prompt and select Run as administrator.

    run-cmd-as-administrator

  2. Once the Command Prompt is launched, type in the following command to enable the Hibernate feature.

    powercfg /hibernate on

  3. Next, run the following command to change the hibernation file type to full.

    powercfg /h /type full

    restore-missing-hibernate-option

  4. Reboot your computer. You should see the Hibernate option show up in the Power Options.

    hibernate-option

    That’s it!

How to Change Power Button Action in Windows 10 / 8 / 7

June 29th, 2017 by Admin

How to change what power button does in Windows 10? Every desktop/laptop computer has a hardware power button without any exception whatsoever. By default, pressing the power button will put your computer to shut down, but in Windows 10/8 it just puts your PC into sleep. To shut down a computer running Windows 10/8, you might have to press the power button for long duration.

This tutorial shows you a simple way to change the default action of the hardware power button so that when it is pressed, Windows will go into sleep, hibernate, shut down, or even do nothing.

How to Change Power Button Action in Windows 10 / 8 / 7?

  1. Open the Control Panel in Large icons view, and then click Power Options.

  2. From the Power Options window, click the Choose what the power button does link from the left pane.

    choose-what-power-button-does

  3. Click on the Change settings that are currently unavailable link.

    change-settings-currently-unavailable

  4. You should see two drop-down menus to configure the default action when you press the power button. One is for when the laptop’s running on battery power, the other for when it’s plugged in.

    change-power-button-action

    Select the action you want (Do nothing, Sleep, Hibernate, Shut down or Turn off the display), and click Save changes.

  5. This change will take effect immediately. Press the hardware power button and it should now function as you expect. That’s it!

Fix: Windows 10 Store Not Working

June 27th, 2017 by Admin

The Store in Windows 10 won’t open? Windows Store apps not downloading or updating? So if you’ve been facing this issue, let see how you can fix it easily and get Windows 10 Store back to work.

Method 1: Clear the Windows Store Caches

  1. Press the Windows key + R to open the Run command box, or open the Command Prompt as administrator.
  2. Type wsreset and press Enter. After a few minutes, all Store cache and corrupt settings are reset, and your Windows Store shall open normally.

    wsreset

If the wsreset command doesn’t work, you can open File Explorer. Browse to the following directory and delete the local caches of Windows Store:
C:\Users\user_name\AppData\Local\Packages\Microsoft.WindowsStore_8wekyb3d8bbwe\LocalCache

Note: Replace user_name with the name of your Windows account. By default, the AppData directory is hidden and you need to set Windows to show hidden files.

Method 2: Re-register Windows Store Apps

  1. Type powershell in the Cortana search box on your taskbar. Right-click on the Powershell app from the result, and choose Run as administrator.

    run-powershell-as-administrator

  2. In the administrative PowerShell window, paste the following command and hit Enter to re-register the store apps.

    Get-AppXPackage -AllUsers | Foreach {Add-AppxPackage -DisableDevelopmentMode -Register “$($_.InstallLocation)\AppXManifest.xml”}

    register-store-apps

  3. Once the command is successfully executed, you can close Windows PowerShell. After restarting the system, problems with Windows 10 Store should be fixed.

Method 3: Official Troubleshooter to Fix Issues with Windows 10 Store

Microsoft has a troubleshooter that scans your system and automatically fixes any problems that might be preventing any Windows Store apps from working correctly. Windows Store Apps Troubleshooter isn’t built-in to Windows, you can easily download it for free from this link.

How to Create and Use Virtual Desktop in Windows 10

June 26th, 2017 by Admin

Have too many shortcuts and files on your desktop? Got too many apps or windows open on one screen? Windows 10 comes with a new built-in feature called Task View, which allows you to create multiple virtual desktops on a single monitor. In this tutorial we’ll show you how to create and use multiple virtual desktops in Windows 10.

Part 1: Create Virtual Desktop

Click the Task View button next to the Cortana search box on your taskbar. Alternatively, press the Windows+Tab keyboard shortcut to open Task View.

task-view

You’ll see a button in the bottom-right corner of your screen labeled “New desktop“. Just click this button to create a new virtual desktop. You can use this method to create an unlimited number of virtual desktops.

create-virtual-desktop

Part 2: Switch Between Virtual Desktops

Virtual desktops not only give you more desktop space for separate task-related windows, but also allow you to quickly and easily access what you need. For example, you can run productivity apps (such as Office, OneNote, email) on your first virtual desktop, and use the second desktop for gaming.

To switch between virtual desktops, click the Task View button on the taskbar and then select the desktop you want to switch to.

switch-between-virtual-desktops

You can also quickly switch virtual desktops by using the keyboard shortcuts: Windows key + Ctrl + Left Arrow, Windows Key + Ctrl + Right Arrow.

Part 3: Move Application from One Virtual Desktop to Another

Click the Task View button on the taskbar. From Task View, you can drag-and-drop open program windows from the current desktop into a different one, or right-click the app you want move, select Move to, and select the desktop you want to move the app.

move-applications-between-virtual-desktops

Part 4: Close Virtual Desktop

To close your current desktop, just press the keyboard shortcut: Windows key + Ctrl + F4. That’s about all there is to Windows 10 virtual desktops.

2 Methods to Disable Narrator in Windows 10, 8 and 7

June 22nd, 2017 by Admin

How to turn off Narrator permanently or disable Narrator shortcut key in Windows? When you accidentally press the Windows + Enter (or Windows + Ctrl + Enter in Windows 10) hotkey, this will open up the built-in Narrator app, which puts a blue box to the button or text with keyboard focus.

narrator-blue-box

If you want to quickly exit Narrator, press Caps Lock+Esc. In this tutorial we’ll show you 2 easy methods to turn off / disable Narrator completely in Windows 10, 8 and 7.

Method 1: Disable Narrator Shortcut Key

  1. Press the Windows key + R to open the Run box. Type regedit and press Enter.

    regedit

  2. When the Registry Editor opens up, navigate to the following key:
    HKEY_CURRENT_USER\SOFTWARE\Microsoft\Narrator\NoRoam

    disable-narrator-shortcut

    Double-click the WinEnterLaunchEnabled value in the right pane.

  3. When the Edit DWORD (32-bit) Value dialog box opens, type 0 in the Value data field and click OK.

    WinEnterLaunchEnabled

  4. Now you’ve successfully disabled Narrator shortcut key. Try to press the Windows + Enter or Windows + Ctrl + Enter shortcut, it won’t start Windows Narrator any longer.

After disabling Narrator hotkey, you can still open Windows Narrator using other methods descried in this tutorial. If you want to turn off Narrator permanently, proceed to the next method.

Method 2: Turn Off Narrator Permanently

  1. Open Windows Explorer and navigate to the directory C:\Windows\System32.
  2. The Narrator.exe file is protected by system, and you need to take ownership of it before making any changes. If you don’t know how to change ownership, you can take use of the freeware TakeOwnershipPro.

    take-ownership-narrator

  3. Right-click on the Narrator.exe file and then select Properties from the context menu.
  4. When the Properties window opens, choose the Security tab and click the Edit button to change permissions.

    change-file-permissions

  5. Choose your own user from the list, and then deny the Read & Execute and Read permissions and click OK.

    deny-execute-narrator

  6. Now you’ve turned off Narrator on your Windows computer.

6 Ways to Access Narrator in Windows 10 – Tutorial

June 22nd, 2017 by Admin

Narrator is a screen reader utility that is built into Windows 10, which can read text on the screen aloud so you can use the computer without a display. This is especially useful for the visually impaired. In this tutorial we’ll show you 6 quick ways to access Narrator in Windows 10.

windows-narrator

Method 1: Access Narrator in Windows 10 Using Keyboard Shortcut

The fastest way of opening Narrator is to press the Windows logo key + Ctrl + Enter keyboard shortcut. Press the shortcut again and it will close Narrator immediately.

Method 2: Access Narrator in Windows 10 via Run or Command Prompt

Press the Windows logo key + R to open the Run box, or open a Command Prompt. Type narrator and hit Enter. This will open Narrator in no time.

run-narrator

Method 3: Access Narrator in Windows 10 Using Cortana

Click the Cortana Search box in the taskbar, and type narrator. Click the Narrator desktop app from the result.

open-narrator-via-cortana

Method 4: Access Narrator in Windows 10 from Start Menu

Click the Start button. Once the Start Menu is opened, expand Windows Ease of Access and you can then access Narrator.

open-narrator-from-start-menu

Method 5: Access Narrator in Windows 10 Using Settings App

Open the Settings app in Windows 10, and then click Ease of Access.

ease-of-access-settings

Select the Narrator tab in the left. Locate Narrator in the right pane and then toggle it to On.

turn-on-narrator

Method 6: Access Narrator in Windows 10 Using Control Panel

Open Control Panel and set the View by option to Large icons, and then click Ease of Access Center.

ease-of-access-center

Click Start Narrator and it will open Narrator app immediately.

start-narrator

That’s all there is to it.

Fix: Missing “Open command window here” in Windows 10 Creators Update

June 19th, 2017 by Admin

After upgrading to Windows 10 Creators Update, you may find that the “Open command window here” option is not showing up in the context menu of File Explorer, and it was replaced with “Open PowerShell window here“. In this guide, we’ll walk you through the steps to add the missing option “Open command window here” back to the context menu in Windows 10 Creators Update.

open-command-window-here-windows-10

How to Add “Open command window here” Back to Windows 10 Creators Update?

  1. Press the Windows key + R keyboard shortcut to open the Run command. Type regedit and hit Enter.

    regedit

  2. In the Registry Editor, navigate to HKEY_CLASSES_ROOT\Directory. By default, the Directory key is protected from changes. You’ll need to take ownership of it firstly. Follow this tutorial to take ownership of the Directory key before proceeding with the steps below.

    registry-permissions

  3. Browse to the following key:
    HKEY_CLASSES_ROOT\Directory\shell\cmd

    HideBasedOnVelocityId

    Right-click the HideBasedOnVelocityId value on the right pane, and select Rename. Rename it to ShowBasedOnVelocityId.

  4. Next, browse to this key:
    HKEY_CLASSES_ROOT\Directory\Background\shell\cmd

    rename-HideBasedOnVelocityId

    Rename a DWORD value HideBasedOnVelocityId to ShowBasedOnVelocityId.

  5. Once done, hold down the SHIFT key and then right-click on a folder in File Explorer, you’ll see the “Open command window here” option is back to the context menu. The option will also be available when using SHIFT + right-click on an empty space within a folder.

PCUnlocker – Best Alternative to Password Reset Disk

June 16th, 2017 by Admin

Password reset disk is a special disk that could be used to reset your Windows password if you forget it. Just go to Control Panel > User Accounts and Family Safety > User Accounts, you can click the “Create a password reset disk” link on the left pane to create such a disk.

create-password-reset-disk

A password reset disk contains a single file named userkey.psw, which is an encrypted backup version of your password. You can only make a password reset disk while you still know your password. The process of creating a password reset disk is just like writing down your password on a piece of paper. So, if you’ve already forgotten your password, it’s too late to create a password reset disk. Still have questions about password reset disk? Please check out this article: FAQs for Password Reset Disk in Windows.

What to do if you forget Windows password but you don’t have a password reset disk? This happens so many times because we only aware that a password reset disk must be created before we forget the password. Fortunately, there are several good alternatives to password reset disk. PCUnlocker is the best alternative that could hep you reset forgotten Windows 10 / 8 / 7 / Vista / XP password instantly.

When you’re locked out of your own computer, just use an alternative PC to download PCUnlocker and create a bootable CD/USB drive. Next, boot your locked PC from CD/USB and it allows you to bypass & reset lost admin password easily.

Automatically Delete Temporary Files with Windows 10 Storage Sense

June 15th, 2017 by Admin

C: Drive is constantly running out of space? Tired of cleaning up temporary files on Windows manually? Starting with Windows 10 Creators Update, there is a new feature called Storage Sense which can automatically free up disk space on your computer, by deleting temporary files and content in your recycle bin older than 30 days.

How to Automatically Delete Temporary Files with Windows 10 Storage Sense?

  1. Open the Settings app by pressing Windows + I keyboard shortcut, and then click the System category.

    system

  2. Select the Storage tab on the left. You’ll see the new Storage sense feature on the right. It’s disabled by default, so switch the toggle to On to start using it.

    storage-sense

  3. If you want to change what Storage Sense cleans up, click the “Change how we free up space” link.
  4. On the next page you can choose to “Delete temporary files that my apps aren’t using” and “Delete files that have been in the recycle bin for over 30 days“.

    free-up-windows-10-disk-space

    A little further down the page, there’s also an option that allows you to manually run a disk cleanup. If you click on the Clean now button, Storage Sense will free up your disk space immediately.