Cannot authenticate using the sa account credential? The default sa password does not work? If you cannot establish a connection using SQL Server Management Studio or restore the master.mdf database, doing a password reset should be the fastest way to regain access to your SQL Server instance. In this tutorial we’ll walk you through the steps of resetting lost sa password for SQL Server 2022.
Part 1: Stop SQL Server Service
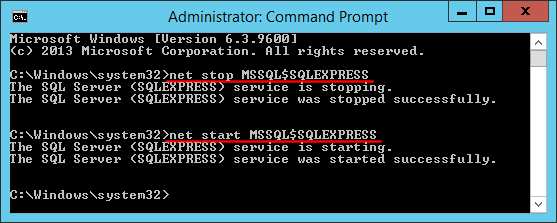
To get started, we need to stop the SQL Server service and find where the master.mdf database is located using File Explorer. Follow these steps:
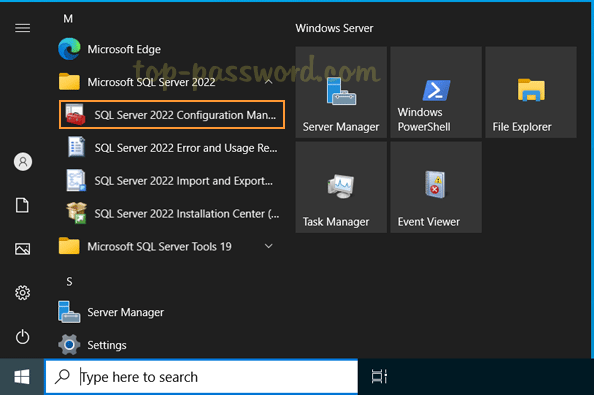
- Click the Start button. When the Start menu appears, expand the “Microsoft SQL Server 2022” folder and click “SQL Server 2022 Configuration Manager“.
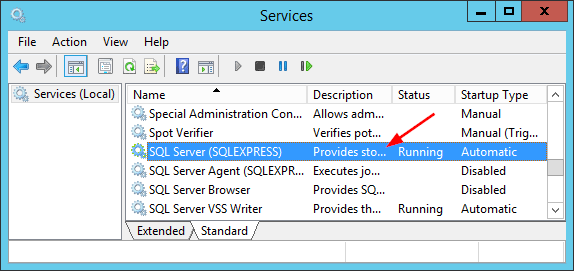
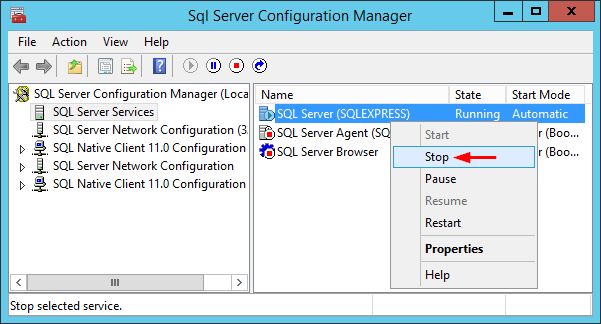
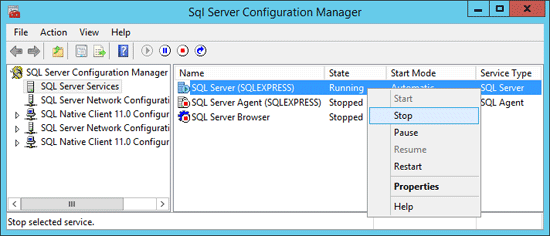
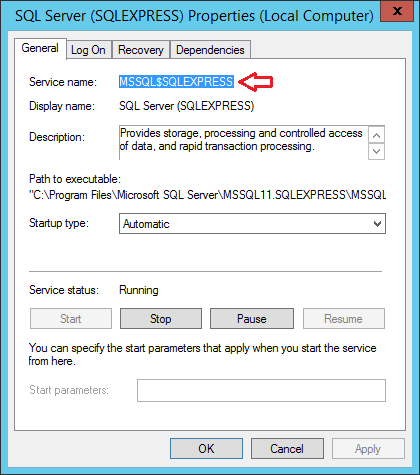
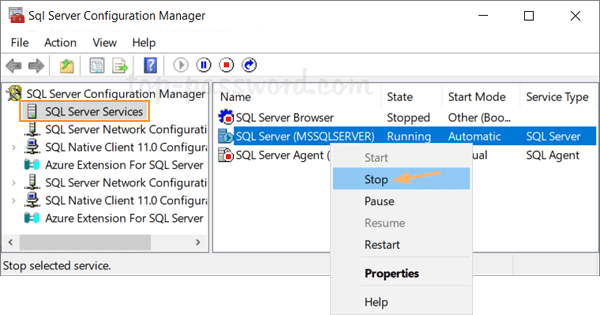
- In the left-hand side of the window, click the “SQL Server Services” entry. In the right pane, right-click “SQL Server (MSSQLServer)” or a named instance, and then choose Stop.
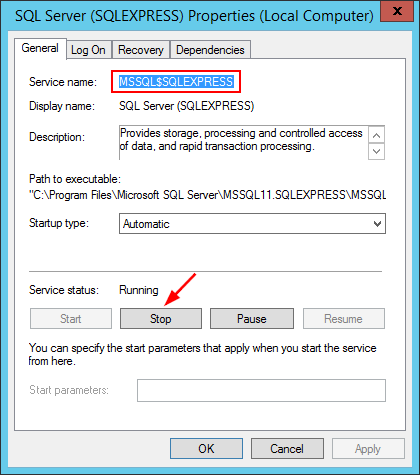
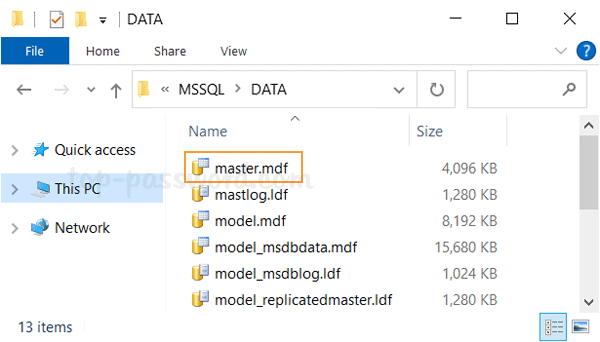
- Next, double-click the “SQL Server (MSSQLServer)” service to open the Properties dialog. Go to the “Startup Parameters” tab, and you’ll see the full path of the master.mdf file which is displayed in the “Existing parameters” list box.

For SQL Server 2022, the default location is
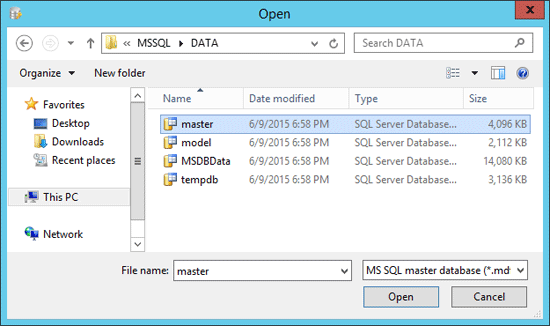
C:\Program Files\Microsoft SQL Server\MSSQL16.MSSQLSERVER\MSSQL\DATA. - Open File Explorer and browse to the above location, and check if the master.mdf file can be found.
Part 2: Reset Lost SA Password for SQL Server 2022
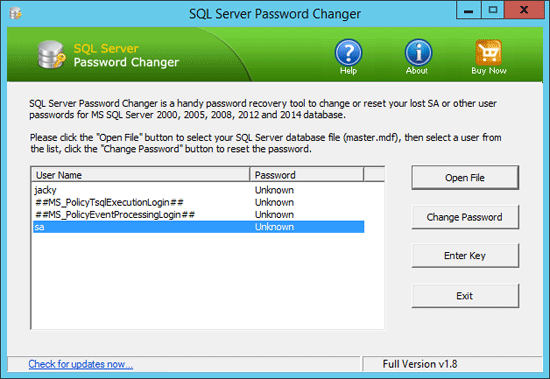
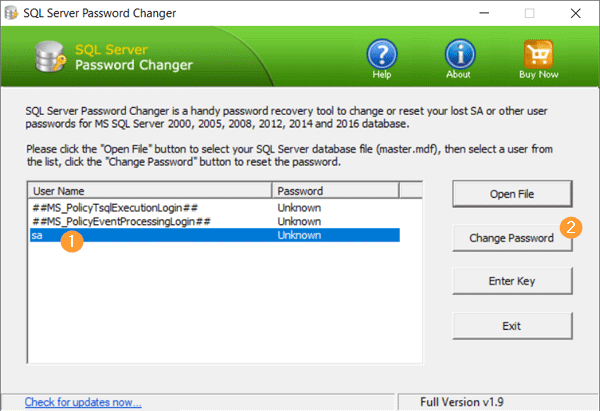
- After opening the SQL Server Password Changer utility, click the Open File button in the right side.
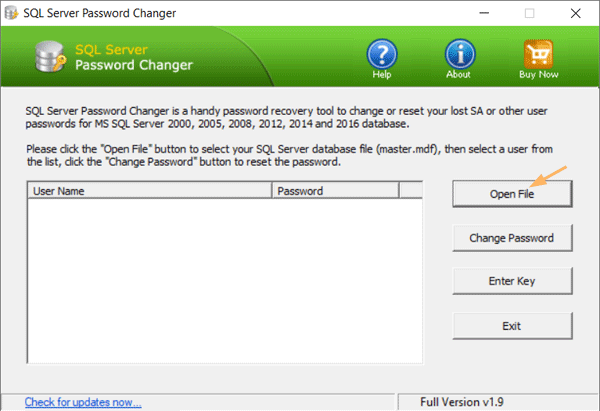
- Choose the master.mdf file for your SQL Server 2022 instance, and then click Open.

- You’ll get the list of all database users. Simply choose the sa account and click the “Change Password” button.
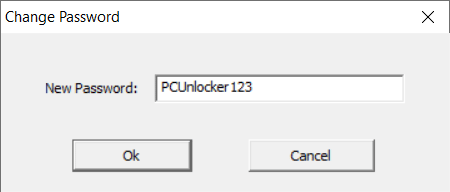
- Enter a new sa password and click OK. Close the SQL Server Password Changer utility.
Part 3: Connect to SQL Server 2022 with New SA Password
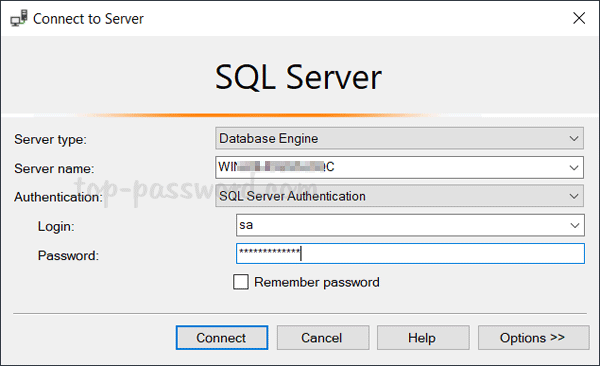
Open the SQL Server 2022 Configuration Manager and start the SQL Server service, then launch the SQL Server Management Studio, you can then log in to the sa account with your new password!
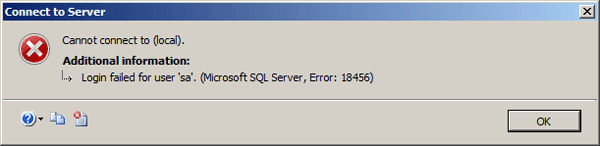
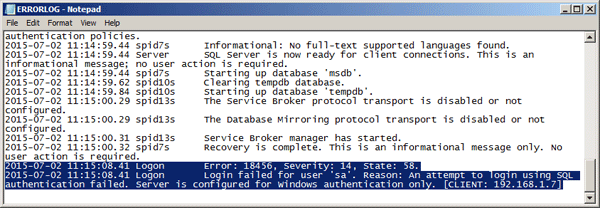
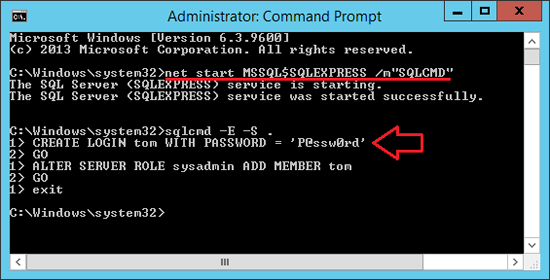
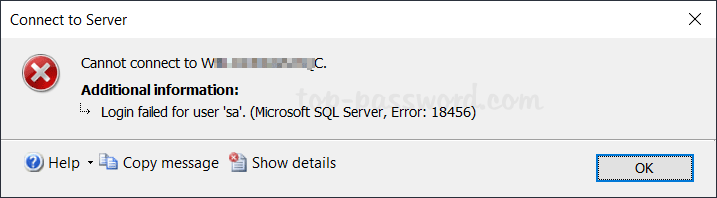
If you get the error message “Login Failed for User (Microsoft SQL Server, Error: 18456)“, it’s possible that the authentication method of the SQL server is not properly configured. You need to use the second method descried in this article to enable mixed mode authentication.
That’s it!