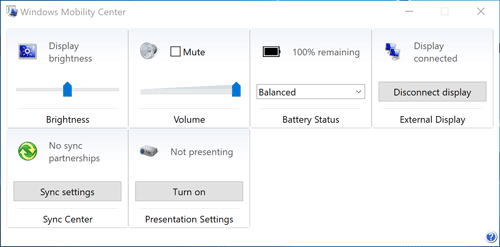
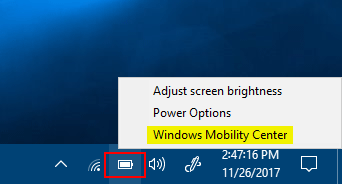
Windows Mobility Center keeps popping up? Is there a registry hack that could prevent Windows Mobility Center from popping up? The Windows Mobility Center is very convenient for laptop / tablet users, but it could also be annoying if it pops up uninvited. This tutorial will show you 2 different ways to disable Windows Mobility Center in Windows 10, 8, 7.
Method 1: Disable Windows Mobility Center Using Group Policy
- Press the Windows key + R to open the Run dialog box. Type gpedit.msc and press Enter.

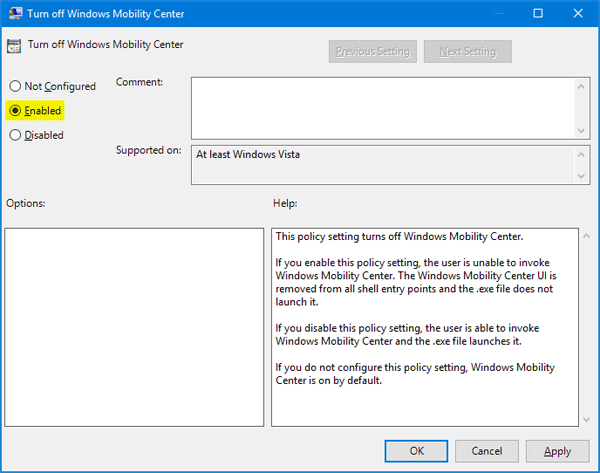
- Once the Local Group Policy Editor opens, expand to: Computer Configuration -> Administrative Templates -> Windows Components -> Windows Mobility Center. In the right pane, double-click on the Turn off Windows Mobility Center policy to edit it.
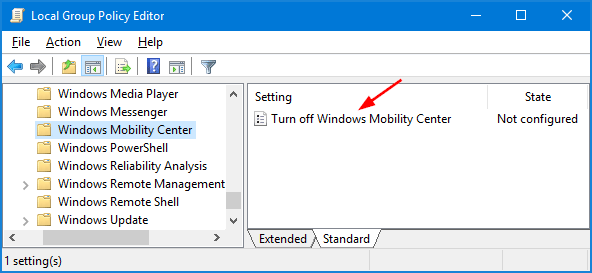
- Select the Enabled option and click OK.
- Reboot your computer and you’ll be unable to open Windows Mobility Center using any methods described in this tutorial: 5 Ways to Open Mobility Center in Windows 10.
Method 2: Disable Windows Mobility Center Using Registry Editor
- Press the Windows key + R to open the Run dialog box. Type regedit and press Enter.

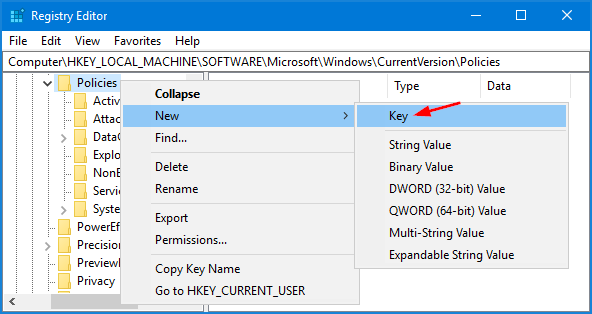
- Once in the Registry Editor, navigate to the following key:
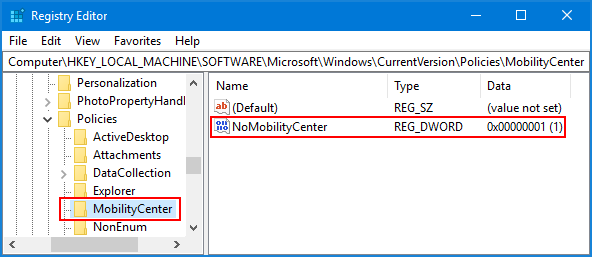
HKEY_LOCAL_MACHINE\SOFTWARE\Microsoft\Windows\CurrentVersion\Policies\MobilityCenterIf the MobilityCenter key doesn’t exist, right-click the Policies key in the left-hand pane and create a new key called MobilityCenter.
- Next, right-click blank area in the right-hand pane to create a DWORD (32-bit Value) entry called NoMobilityCenter and give it a value of 1.
- Close the Registry Editor window and restart your computer. The user can not invoke Windows Mobility Center any more. If you want to re-enable the Windows Mobility Center, just change the Value data of NoMobilityCenter to 0.