Archive for July, 2023

How to Use the Find My Device Feature in Windows 11

July 31st, 2023 by Admin

Any way to find a lost Windows device? How can I remotely lock a stolen laptop? Luckily, there is a feature called Find My Device available in Windows 11, which can help you remotely track and lock a lost or stolen computer. In this tutorial we’ll show you how to enable the Find My Device feature in Windows 11 and then use it to locate or lock your device in case it’s lost or stolen.

Part 1: Enable Find My Device in Windows 11

Before getting started, make sure you’re signed in to Windows 11 using your Microsoft account. Follow these steps to turn on the Find My Device feature.

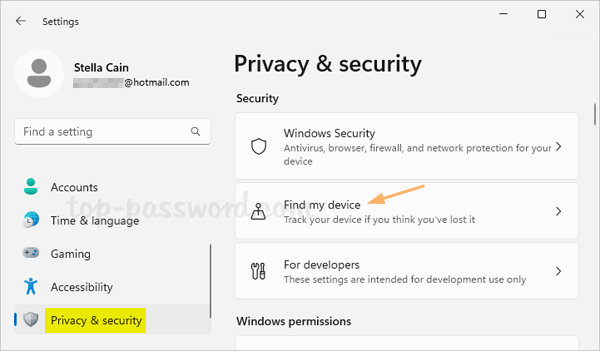
  1. Press the Windows key + I to launch Settings. Select Privacy & security from the left-hand side, then click Find my device on the right pane.

  2. Toggle the “Find my device” switch to On. If the Location services is turned off, you need to turn it on beforehand by navigating to Settings -> Privacy & security -> Location.

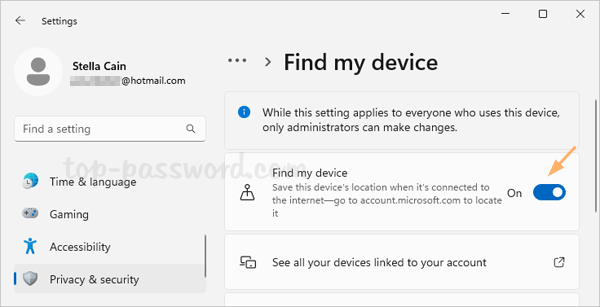
Part 2: Locate and Lock your Windows 11 Computer

Now you can use another device (computer or mobile phone) to track and lock your missing or stolen Windows 11 computer. Here’s how:

  1. Open the web browser and visit the Microsoft Devices page, sign in with the same Microsoft account that you are using on the Windows 11 computer. Next, click the “Find my device” option at the top.

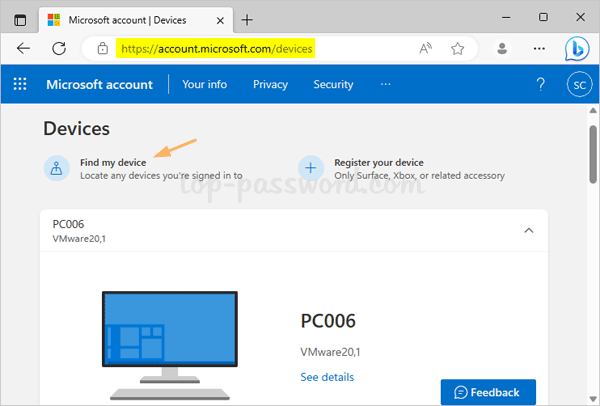
  2. You will see a map showing the device’s last known location. The Find button allows you to retrieve the current location. If you want to remotely lock down your Windows 11 PC, simply click the Lock button.

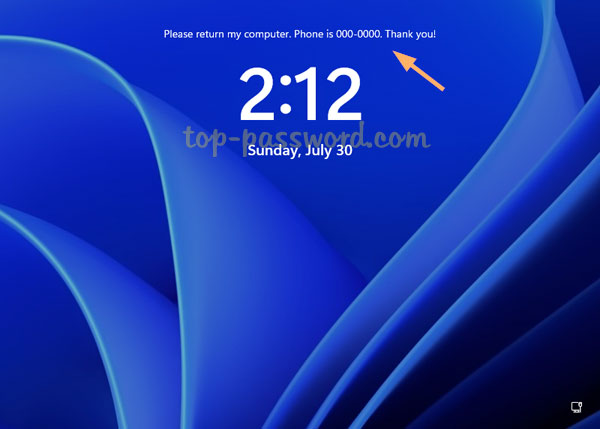
  3. Type in a message which will appear on the lock screen of your Windows 11 computer, and click the Lock button at the bottom.

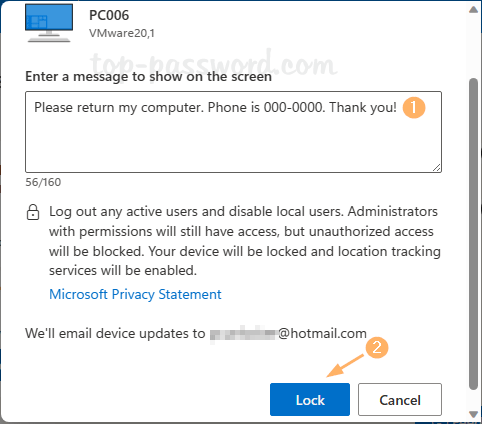
  4. Wait a minute and Microsoft will lock down the device if it’s online.

  5. When your Windows 11 PC is locked remotely, your message will be displayed on the lock screen and all Windows accounts are blocked.

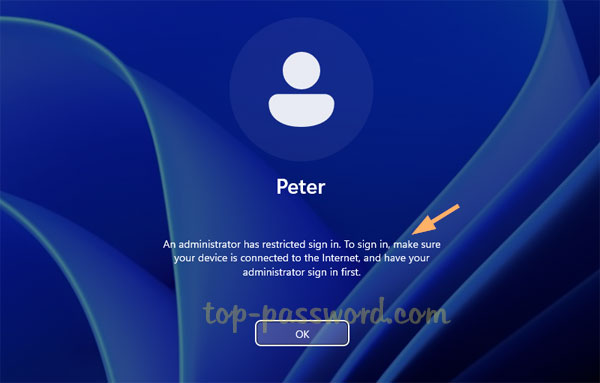
    If a guy tries to log in with a local account, he will get the error message “An administrator has restricted sign in. To sign in, make sure your device is connected to the internet, and have your administrator sign in first“.

Once you found your lost Windows 11 computer, you may need to perform a factory reset or remove the login restrictions by using the PCUnlocker utility.

3 Ways to View All Shared Folders in Windows 11

July 24th, 2023 by Admin

How can I see a list of the folders I have shared? Looking for a way to find all hidden or suspicious network shares on your computer? It’s a good security strategy to remove network shares when you no longer need to share files over a network. In this tutorial we’ll show you 3 ways to view all shared folders in Windows 11.

Method 1: View All Shared Folders in Windows 11 Using File Explorer

  1. Open File Explorer. Type \\localhost in the address bar and press Enter.

  2. It will list all the folders you have shared with anybody on the network.

Method 2: View All Shared Folders in Windows 11 Using Computer Management

  1. Right-click the This PC icon on your desktop, and then choose “Show more options“.

  2. Proceed to choose Manage from the pop-up menu.

  3. Once Computer Management opens, expand System Tools -> Shared Folders, and then click Shares.

  4. You’ll see all network shares in the right pane, including the hidden administrative shares for each drive on your system ( C$ for the C drive). Additionally, you can click the “Open Files” (or “Session“) node from left navigation pane to see who is accessing which shared folders on your computer.

Method 3: View All Shared Folders in Windows 11 Using Terminal

  1. Right-click the Start button on the taskbar and select “Terminal (Admin)“.

  2. Type the net share command and press Enter. You will see a list of shared folders on your computer.

That’s it!

How to Export and Import a Power Plan in Windows 11 / 10

July 5th, 2023 by Admin

Is there any way to backup power plans before reinstalling Windows 10? How can I apply a custom power plan on multiple PCs at once? In this tutorial we’ll show you an easy way to export a power plan to a .pow file, and then import the .pow file to restore the power plan on Windows 11 / 10.

How to Export and Import a Power Plan in Windows 11 / 10

  1. Before getting started, you need to open an elevated Command Prompt, Windows PowerShell or Windows Terminal. Run the powercfg -list command to display all the power plans available in your system. Each power plan has its own unique GUID.

  2. Execute the following command to export a power plan to the file d:\demo\Balanced.pow. The Your_GUID needs to be replaced with the actual GUID of the power plan you want to export.

    powercfg -export d:\demo\Balanced.pow Your_GUID

  3. Open File Explorer and browse to the location where your .pow file is stored. It’s actually a binary registry file which saves all your power scheme settings such as display, sleep, etc. You can transfer this file to other Windows PCs for restoring your power plan.

  4. To import a power plan, simple type the following command and hit Enter. Replace d:\demo\Balanced.pow with the location where your .pow file is saved.

    powercfg -import d:\demo\Balanced.pow

  5. Once you complete the above step, open Control Panel and go to Power Options, your imported power plan should appear and you can set it as active.

That’s it!

Fix: Your power plan information isn’t available in Windows 11

July 4th, 2023 by Admin

When you try to edit or create a power plan from the Control Panel, you may receive the error message “Your power plan information isn’t available. Why can’t Windows retrieve this information?

In this tutorial we’ll show you a simple method to quickly fix the error “Your power plan information isn’t available” in Windows 11.

How to Fix: Your power plan information isn’t available in Windows 11

  1. Right-click the Start button on the taskbar, and then select Terminal (Admin) from the WinX menu. Next, click Yes when the User Account Control dialog box opens.

  2. Execute the following command to restore the default power plans in Windows 11.
    powercfg –restoredefaultschemes

  3. Close the Terminal window. Now you can open the Control Panel to create a new power plan or edit the existing ones without experiencing the error “Your power plan information isn’t available“.

That’s it!