Archive for April, 2016

How to Reset Start Menu Layout to Default in Windows 10

April 27th, 2016 by Admin

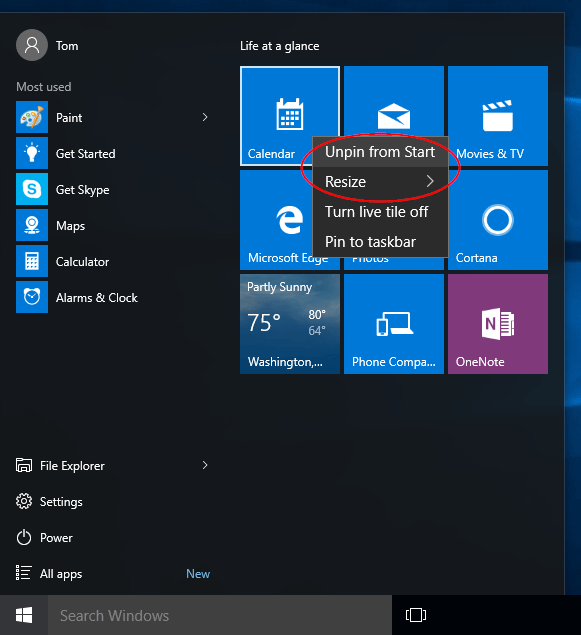
Start Menu is messed up and how to restore it to default? If your Start Menu has gotten overly cluttered, or want to restore the tiles that you’ve unpinned from Start Menu, here is a simple way to reset the Start Menu layout to default in Windows 10.

start-menu-mess-up

How to Reset Start Menu Layout to Default in Windows 10?

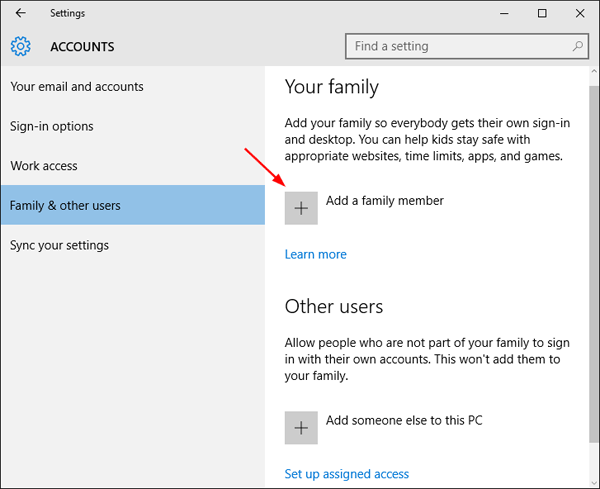
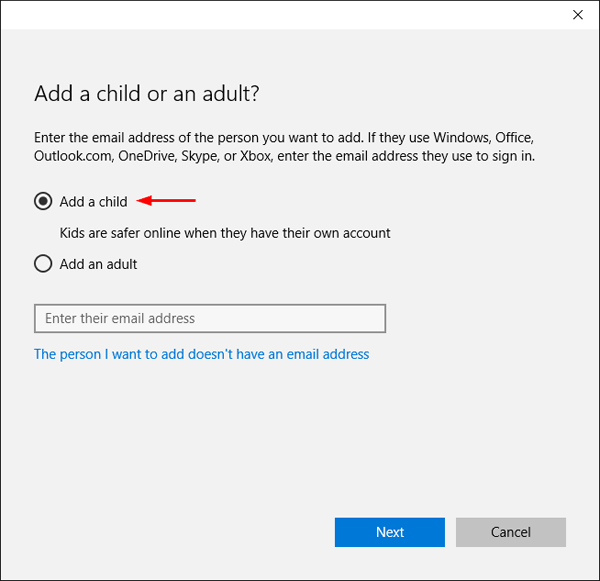
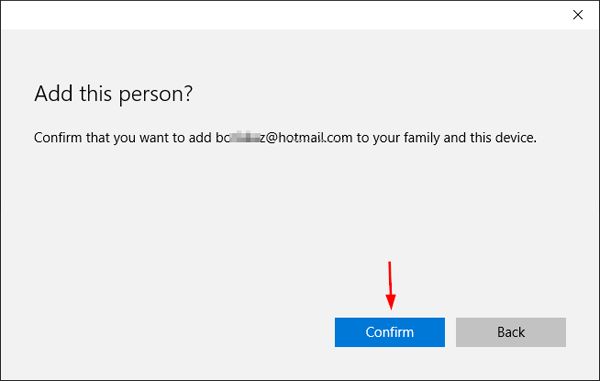
Before getting started, you need to create a new administrator account in Windows 10. If you haven’t enabled the built-in Administrator account before, just activate it if you don’t want to create a new administrator account.

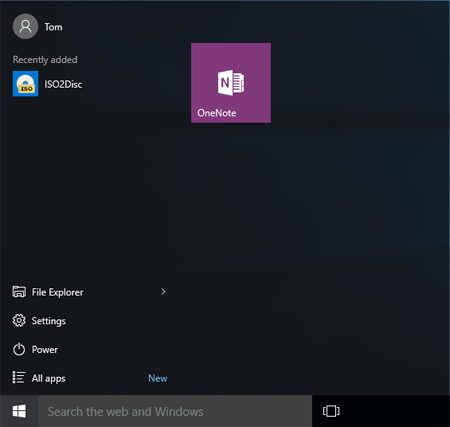
The first time you log into the new administrator account (In my example, it’s Administrator), Windows 10 will set up the default apps, programs, tiles for the Start Menu. Windows 10 keeps almost all data related to Start Menu in the following directory:
C:\Users\{new_administrator_account}\AppData\Local\TileDataLayer

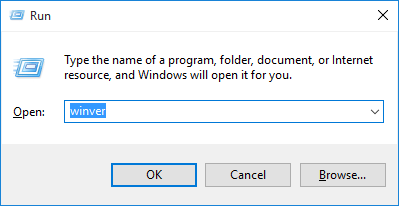
Note: You need to configure Windows 10 to show hidden files if you want to see the TileDataLayer folder.

Now log off the new administrator account, and log in with your regular account (In my example, it’s Tom). Browse to the folder: C:\Users\{new_administrator_account}\AppData\Local, and copy the TileDataLayer folder to the root path of C:\ drive for backuping.

copy-tiledatalayer

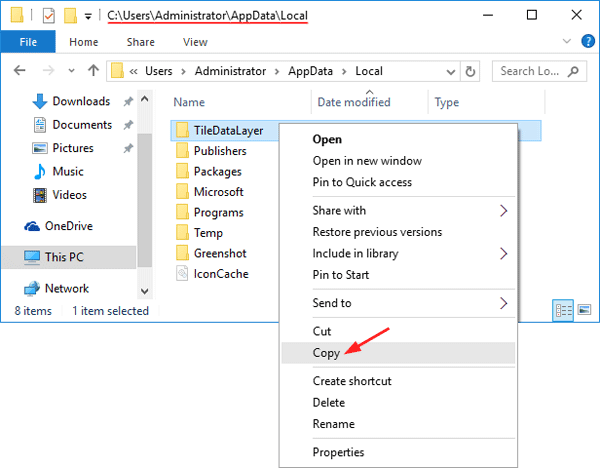
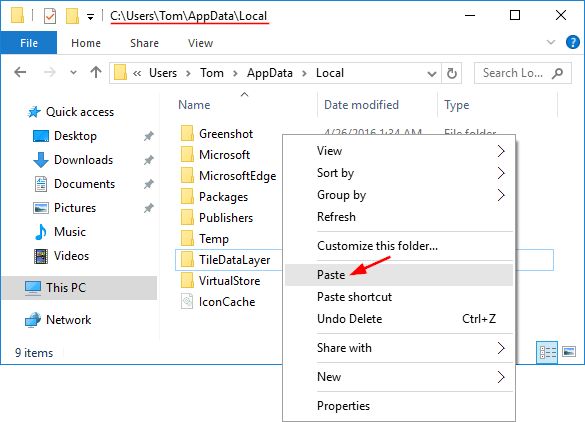
Log off your regular account, and log in with the new administrator account. Copy the backup folder C:\TileDataLayer and paste it into the directory C:\Users\{regular_account}\AppData\Local. When prompting to replace the file or skip copying, click on “Replace the files in the destination“.

paste-tiledatalayer

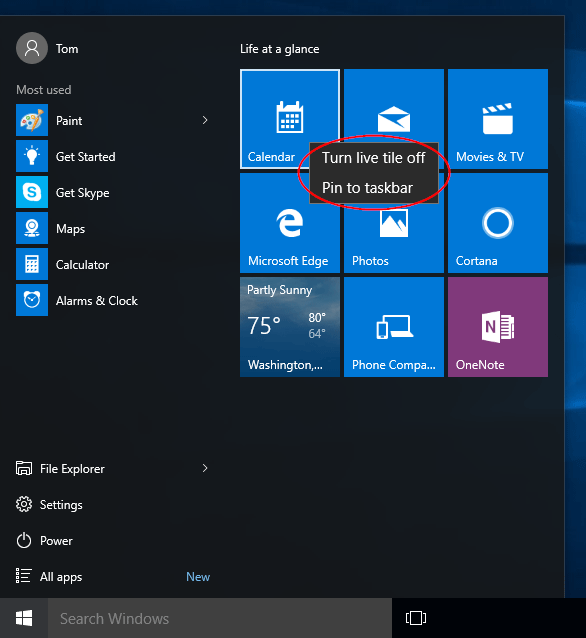
When it’s done, log out and log back into your regular account, you will find that your Start Menu is magically back to defaults, and only the tiles of the built-in / predefined apps are pinned to the Start Menu.

Windows 10 Start Menu: Restrict User from Rearranging or Unpinning Tiles

April 26th, 2016 by Admin

Is there a way to prevent users unpinning tiles (apps/programs) from Start Menu? You need to lock the Start Menu layout in order to restrict users from customizing or altering it. In previous post we’ve covered a registry hack to lock the Start Menu layout. Here we’ll show you another two ways to restrict users from rearranging, pinning or unpinning tiles from Start Menu in Windows 10.

unpin-from-start

Method 1: Lock Start Menu Layout via Group Policy

The Group Policy Editor is not available in Windows 10 Home. If you’re running the Home edition, please check out Method 2 below.

  1. Press the Windows key + R to open the Run box. Type gpedit.msc and hit Enter to access the Local Group Policy Editor.
  2. If you want to lock the Start Menu layout for all users, navigate to:
    Computer Configuration > Administrative Templates > Start Menu and Taskbar

    computer-start-layout

    If you just want to lock the Start Menu layout for the currently logged on user, navigate to:
    User Configuration > Administrative Templates > Start Menu and Taskbar > Start Layout

    user-start-layout

  3. On the right-side of Local Group Policy Editor, double-click the entry labelled Start Layout to open its properties, select Enabled, and then click Apply.

    enable-start-layout

  4. Reboot your PC to apply the changes. From now on, you couldn’t alter the Start Menu layout, pin a program to Start Menu, or unpin a tile.

    locked-start-menu

Method 2: Lock Start Menu Layout via Registry Editor

  1. Press the Windows key + R to open the Run box. Type regedit and hit Enter to access the Registry Editor.
  2. If you want to lock the Start Menu layout for all users, navigate to:
    HKEY_LOCAL_MACHINE\Software\Policies\Microsoft\Windows\Explorer

    If you just want to lock the Start Menu layout for the currently logged on user, navigate to:
    HKEY_CURRENT_USER\Software\Policies\Microsoft\Windows\Explorer

    Note: If the Explorer subkey doesn’t exist, create it (from the Edit menu, select New > Key and type “Explorer” without the quotes).

  3. From the right pane, right-click in the empty area and select New > DWORD (32-bit) Value. Give the new registry value a name: LockedStartLayout. Double-click the created value, set it to 1, then click OK.

    LockedStartLayout

  4. Restart the Explorer or reboot your PC to apply the changes. That’s it!

How To Shrink & Expand Partition in Windows 10 / 8 / 7

April 25th, 2016 by Admin

Keep getting low disk space on C:\ drive even if you’ve deleted all files you can delete? There is no spare partition for another operating system? In this tutorial we’ll show you how to use the built-in Disk Management to shrink & expand partition in Windows 10, 8 and 7.

Part 1: Open Disk Management

To access Windows build-in Disk Management tool, just press the Windows key + R to open the Run box. Type diskmgmt.msc and hit Enter. This will open the Windows Disk Management utility. From there you can resize (shrink or expand) your hard drive partition without data loss.

disk-management

Part 2: Shrink Partition

Need to create a new partition but you don’t have unallocated space? Just shrink an existing partition to free up space from which you can create a new partition. Here’s how to shrink a partition:

  1. Right-click the partition you want to shrink (C: in our example) and select Shrink Volume.

    shrink-volume

  2. Windows will take a moment to query the volume for available shrink space. Enter the amount of space you want to shrink. For example if want to free up 15GB space, enter 15000 Mb (1000 MB = 1 GB) in the text box. Next click Shrink.

    space-to-shrink

  3. When the process is complete, you will see a new unallocated partition right next to your shrinked partition.

Part 3: Expand Partition

Run out of space on one of your Windows partitions? You can also expand disk partitions, as long as there is free (unpartitioned) space available only after the partition you’re trying to expand. Here’s how to expand a partition:

  1. Right-click the partition you want to expand (C: in our example) and select Extend Volume. Note that the Extend Volume option might be greyed out when there is no unallocated space right after your selected partition.

    extend-volume

  2. Now when the Extend Volume Wizard opens, click Next.

    extend-volume-wizard

  3. It will select the maximum number of unallocated space itself. But you can set any amount yourself too, keep in mind that it is calculated in MB not GB. After you are done here, click Next.

    select-disk-to-extend

  4. You’ll see a brief summary of the changes. Click Finish to apply them. Now you’ll see your partition is larger and the unallocated partition has been merged.

    complete-extend-wizard

6 Ways to Open Disk Management in Windows 10

April 24th, 2016 by Admin

Disk Management is the built-in partition tool that allows you to create, delete, format, extend or shrink partitions. In this article we’ll show you 6 simple ways to open Disk Management in Windows 10.

disk-management

Method 1: Open Disk Management from WinX Menu

  1. Press the Windows key + X to open the WinX menu, or right-click on the Start button to reveal the WinX menu.
  2. From there you can click Disk Management to open it.

    quick-access-menu

Method 2: Open Disk Management via Run

  1. Press the Windows key + R to open the Run box.
  2. Type diskmgmt.msc and press Enter. This will launch Disk Management.

    diskmgmt-via-run

Method 3: Open Disk Management in Computer Management

  1. Right-click the This PC icon on your desktop and then select Manage from the context menu.

    manage-pc

    If the This PC icon is not shown, open File Explorer and right-click This PC in the left navigation panel, then select Manage.

  2. In the left pane of Computer Management, expand Storage and then click Disk Management to open Windows Disk Management window.

    disk-management

Method 4: Open Disk Management from Command Prompt

  1. Press the Windows key + X to open the WinX menu, and then click Command Prompt (Admin).
  2. Type diskmgmt and press Enter. Disk Management will launch quickly.

    diskmgmt-via-cmd

Method 5: Open Disk Management via Search

  1. Click the Cortana search box from the taskbar. If the search box is hidden, press the Windows key + X to open the WinX menu, then click on Search.
  2. Type partition in the Search box. Once the search results are shown, click on Create and format hard disk partitions.

    cortana-search

Method 6: Open Disk Management from Settings

  1. Click on the Start button, and then select Settings from the Start menu.
  2. From the Settings window, click the Search box in the upper right corner and type partition.

    settings

  3. Once the search results start to show, click “Create and format hard disk partitions“.

6 Ways to Open Local Group Policy Editor in Windows 10

April 23rd, 2016 by Admin

Local Group Policy Editor lets you control all kinds of Windows settings via a simple user interface, without playing with the Registry. In this article we’ll show you 6 simple ways to open Local Group Policy Editor in Windows 10.

Option 1: Open Local Group Policy Editor from Command Prompt

  1. Press the Windows key + X to open the Quick Access menu. Click on Command Prompt (Admin).

    command-prompt-admin

  2. Type gpedit at the Command Prompt and press Enter.

    gpedit-command-prompt

  3. This will open the Local Group Policy Editor in Windows 10.

Option 2: Open Local Group Policy Editor Using Run

  1. Press the Windows key + R to open the Run box.
  2. Type gpedit.msc and press Enter.

    gpedit

  3. If prompted by UAC, click on Yes. This should be the easiest and quickest way to launch the Local Group Policy Editor.

Option 3: Open Local Group Policy Editor from Control Panel

  1. To access the Control Panel, press the Windows key + R to open the Quick Access menu and then click on Control Panel.

    open-control-panel

  2. You’ll see a search box in the top right-hand corner of the Control Panel window. Type group policy and press Enter.

    control-panel

  3. Click the Edit group policy link from the search result.

Option 4: Open Local Group Policy Editor via Windows 10 Search

  1. Click the Cortana search box from the taskbar. If the search box is hidden, press the Windows key + X to open the Quick Access menu, then click on Search.
  2. Type edit group policy in the Search box. Once the search results are shown, click on Edit group policy.

    edit-group-policy

Option 5: Open Local Group Policy Editor from Settings Charm

  1. Press the Windows key + I to open the Settings charm. Or click Settings from Windows 10 Start Menu.
  2. Once the Settings app is displayed, click the Search box in the upper right corner and type group policy.

    settings-app

  3. Click the Edit group policy link from the search result.

Option 6: Create A Shortcut to Open Local Group Policy Editor

If you need to access the Local Group Policy Editor frequently, you can create a desktop shortcut by following these steps:

  1. Open Windows Explorer, and then navigate to the directory: C:\Windows\System32.
  2. Right-click on the gpedit.msc file and choosing for Send To -> Desktop (create shortcut).

    gpedit-file

  3. This will create a shortcut on your desktop. Just double-click on the shortcut and you can access the Local Group Policy Editor with ease.

How to Disable Caps Lock Key in Windows and Mac

April 14th, 2016 by Admin

“Whenever I type, my baby finger hits the Caps Lock key and all my typing ends up in caps. I want to disable it completely and just use the Shift key for capitals. How do I disable the Caps Loks key in Windows 10? Please help!”

Without the Caps Lock key, you can still type the letter you want to capitalize by holding down the Shift key. Pressing the Shift key once is much more efficient than pressing the Caps Lock key twice. If you don’t need to use the Caps Lock key, you can disable it permanently. In this tutorial we’ll show you how to disable Caps Lock key in Windows 10/8/7/Vista/XP and Mac OS X.

Part 1: Disable Caps Lock in Windows 10/8/7/Vista/XP

There is no built-in settings available in Windows that allow you to disable Caps Lock key, so we have to use a registry hack to map the Caps Lock key to doing nothing. Follow these steps:

  1. Press the Windows key + R to open the Run box. Type notepad and press Enter.
  2. Copy the lines below and then paste them into the NotePad:
    Windows Registry Editor Version 5.00
    [HKEY_LOCAL_MACHINE\SYSTEM\CurrentControlSet\Control\Keyboard Layout]
    "Scancode Map"=hex:00,00,00,00,00,00,00,00,02,00,00,00,00,00,3a,00,00,00,00,00

    notepad

  3. Click the File menu and select Save as. Select “All Files” from the “Save as type” drop-down box. Type the file name as Disable_Caps_Lock.reg. Click Save.

    save-as

  4. Double-click the .reg file, or right-click on it and select “Open with” -> “Registry Editor“. If prompted by UAC, click on Yes.

    open-with-registry-editor

  5. Registry Editor will confirm if you want to import the registry settings in your .reg file, click Yes.

    import-into-registry

    Now log out (and back in) or reboot to make this registry trick to take effect.

If you want to enable the Caps Lock key again, open the Registry Editor and navigate to HKEY_LOCAL_MACHINE\SYSTEM\CurrentControlSet\Control\Keyboard Layout, then delete the Scancode Map entry entirely.

enable-caps-lock

Part 2: Disable Caps Lock in Mac OS X

It’s pretty easy to actually turn the Caps Lock key off if you’re using a Mac. Here’s how:

  1. Click the Apple icon in the top-left corner of your desktop, then select System Preferences from the drop-down menu.

    system-preferences

  2. Click on the Keyboard icon to launch the preferences pane.

    keyboard-utility

  3. Click the Modifier Keys button in the bottom-right corner.

    modifier-keys

  4. A new window will slide down with a setting for the Caps Lock key at the top. click on the drop-down menu next to the Caps Lock Key title, and choose No Action.

    disable-mac-caps-lock

  5. Click OK. Now, whenever you hit the Caps Lock key by mistake, nothing will happen.

4 Ways to Find What Version & Build Number of Windows 10 You’re Running

April 13th, 2016 by Admin

How to determine which edition of Windows 10 is running on your computer? You probably know the version but do you know exactly which build number it is? In this article we’ll show you 4 simple ways to find what version & build number of Windows 10 you’re running.

Method 1: Using Windows + R

  1. Just press the Windows key + R to open the Run box.
  2. Type winver and press Enter.

    winver

  3. This will open the About Windows window displaying the Windows version and the build number in it.

    about-windows

Windows 10 has the following versions:

Microsoft Code Name Threshold 1 (TH1) Threshold 2 (TH2) Redstone 1 (RS1) Redstone 2 (RS2) Redstone 3 (RS3)
Release Date July 2015 November 2015 August 2016 April 2017 October 2017
Windows 10 Version 1507 1511 1607 1703 1709
Marketing Name  – – – – – –  – – – – – – Anniversary Update Creators Update Fall Creators Update
OS Build 10240.xxx 10586.xxx 14393.xxx 15063.xxx 16299.xxx

Method 2: Using the Command Prompt

  1. Just press the Windows key + R to open the Run box.
  2. Type cmd and press Enter.
  3. At the Command Prompt, type systeminfo and press Enter.

    systeminfo

  4. This will display detailed information about your computer, including Windows version, build number, OS install date, hotfixes installed, etc.

Method 3: Using the Settings App

  1. Press the Windows key + I to open the Settings app, or click Settings from the Start menu.
  2. From the Settings window, click on System.
  3. Click About tab in the left pane. Here you’ll see your Windows 10 version, and know you’re running 32-bit or 64-bit version of Windows 10.

    system-settings

Method 4: Right-clicking This PC

  1. Right-click on This PC shortcut on your desktop and select Properties from the context menu. The This PC shortcut could also be found at the left pane of Windows Explorer.

  2. The “Windows edition” section at the top of the window displays which edition of Windows 10 you’re running, while the “System type” entry here displays whether you’re using a 64-bit or 32-bit edition of Windows 10.

    basic-system-info