Windows 10 comes with the most customizable Start Menu than ever. It allows you to resize the Start Menu itself, pin, unpin or resize the tiles, etc. Over time, your Start Menu might get all messed up and you want to restore the layout. Here’s two simple ways to backup and restore Start Menu layout in Windows 10.
Note: This method is not applicable to Windows 10 build 1703 or earlier version. To reset or restore your Start Menu on the previous version, please click here.
Manually Backup Start Menu Layout in Windows 10
- Open Registry Editor. Just copy and paste the following registry location into the address bar and hit Enter.
HKEY_CURRENT_USER\Software\Microsoft\Windows\CurrentVersion\CloudStore\Store\Cache\DefaultAccount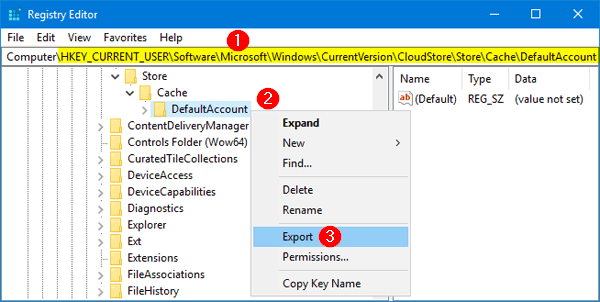
Right-click on the DefaultAccount key, and select Export in the context menu.
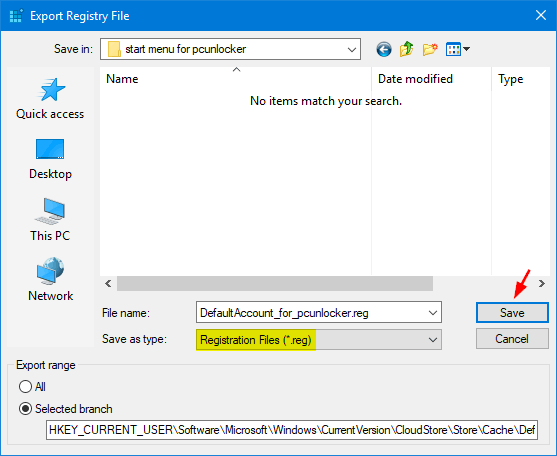
- Type a file name and save this .reg file to a backup location.
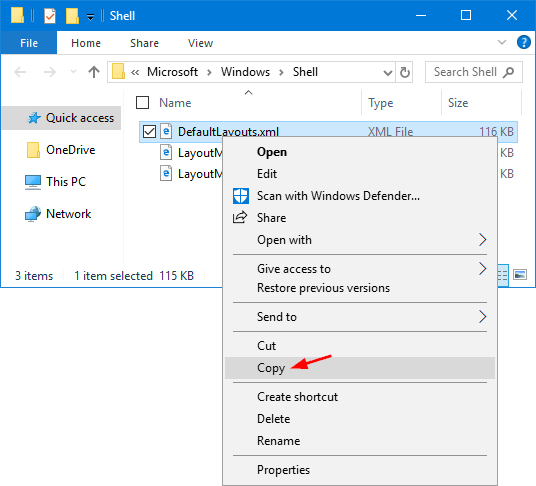
- Next, press the Windows key + R to open the Run command. Copy and paste the following path, and then press Enter to open that folder in File Explorer.
%LocalAppData%\Microsoft\Windows\Shell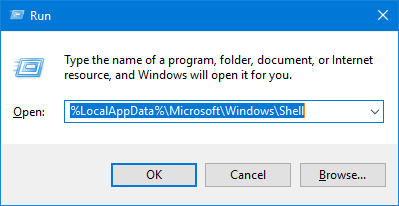
- Copy the DefaultLayouts.xml file to the same folder where you stored the .reg file.
At this point you’ve successfully backed up the Start Menu layout.
Manually Restore Start Menu Layout in Windows 10
- Whenever you need to restore the Start Menu layout, open Registry Editor and navigate to the “DefaultAccount” key as outlined above.
HKEY_CURRENT_USER\Software\Microsoft\Windows\CurrentVersion\CloudStore\Store\Cache\DefaultAccount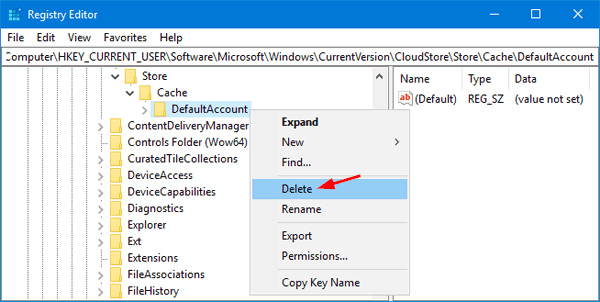
Right-click on the DefaultAccount key in the left pane and select Delete.
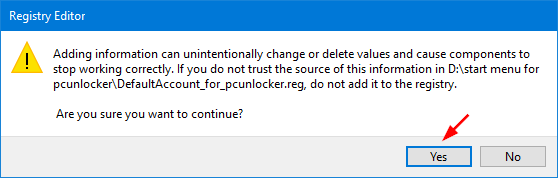
- Open File Explorer and browse to the location where you stored the Start Menu layout backup. Double-click on the .reg file to import it into Windows Registry.
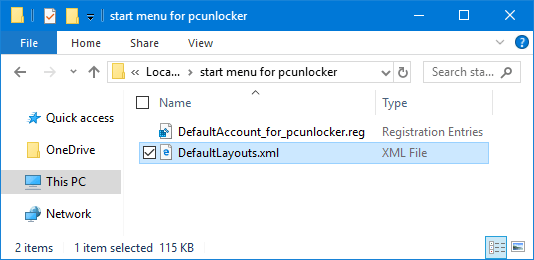
- Now, right-click on the DefaultLayouts.xml file and select Copy. Paste it to the folder %LocalAppData%\Microsoft\Windows\Shell.
- Log off and then log back into your Windows account. The Start menu should return to the original layout it was when you created the backup.
Use Command Prompt to Backup and Restore Start Menu Layout
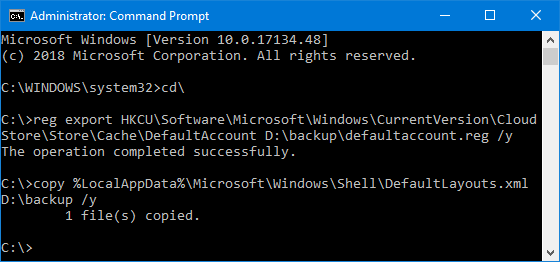
To simplify the steps above, you can use Command Prompt to perform essentially the same job quickly and quietly. When you want to backup the Start Menu layout and save it to D:\backup, just open an elevated Command Prompt and run the following commands:
reg export HKCU\Software\Microsoft\Windows\CurrentVersion\CloudStore\Store\Cache\DefaultAccount D:\backup\defaultaccount.reg /y

copy %LocalAppData%\Microsoft\Windows\Shell\DefaultLayouts.xml D:\backup /y
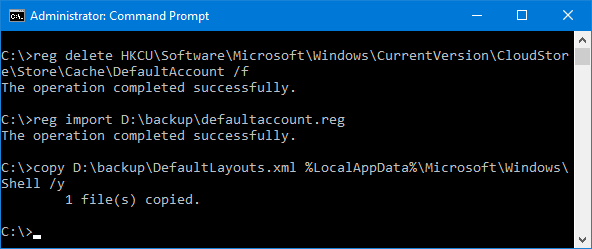
To restore a backup of the start menu, execute the following commands instead:
reg delete HKCU\Software\Microsoft\Windows\CurrentVersion\CloudStore\Store\Cache\DefaultAccount /f

reg import D:\backup\defaultaccount.reg

copy D:\backup\DefaultLayouts.xml %LocalAppData%\Microsoft\Windows\Shell /y
That’s it!