Archive for November, 2021

How to Change Default Drag and Drop Action in Windows 11 / 10

November 30th, 2021 by Admin

How can I change default file drag-and-drop action to copy instead of move? In Windows 11 / 10, when you drag a file and drop it to a folder on a different drive, File Explorer will perform the copy action. If you drag a file and drop it to a folder on the same drive, the default action is move.

Actually, you can let Windows perform the same action for every drag-and-drop operation, regardless of whether you’re dragging files to the same or different drive. In this tutorial we’ll show you a simple method to change the default drag and drop action in Windows 11 / 10.

How to Change Default Drag and Drop Action in Windows 11 / 10

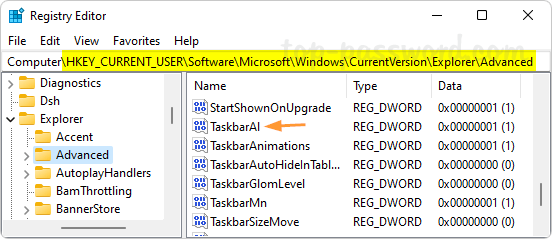
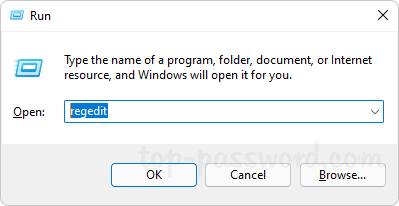
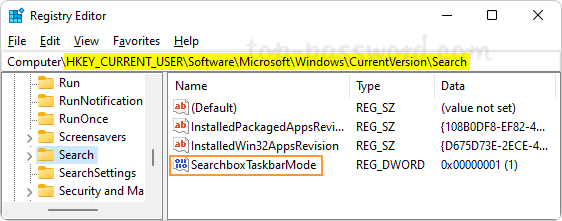
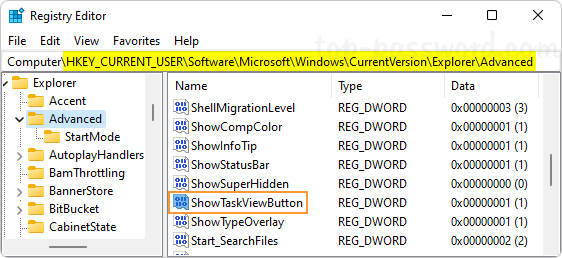
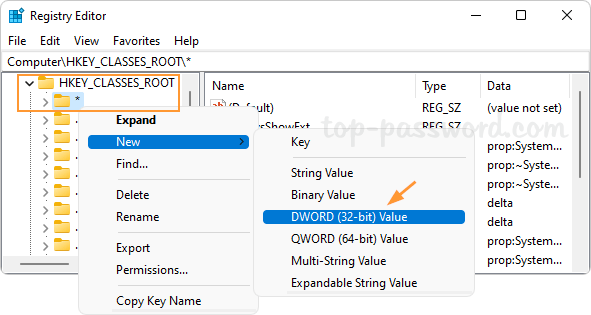
  1. Open Registry Editor. In the left pane, expand the HKEY_CLASSES_ROOT key and right-click the * sub-key and select New -> DWORD (32-bit) Value.

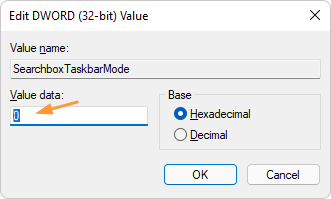
  2. Name the value DefaultDropEffect. Next, double-click it to modify its value data.

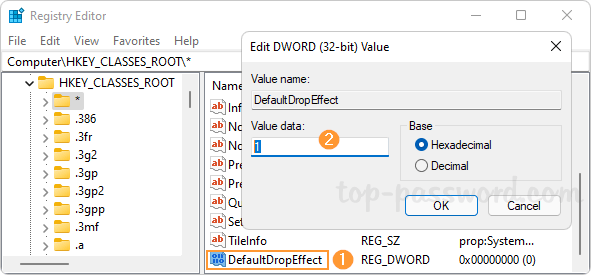
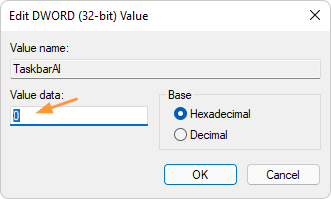
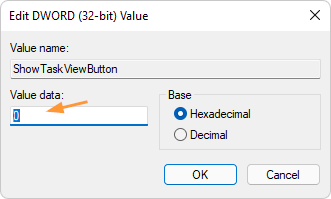
  3. Change the value data to one of the following values, depending on which type of drag and drop behavior you would like to apply.
    • Default action (0): Let Windows decide to copy or move files/folders when you drag and drop it into place.
    • Always copy (1): A copy of the file/folder will always be placed at the destination.
    • Always move (2): The file/folder will move to the destination.
    • Always create a shortcut (4): A link to the original file/folder will always be placed at the destination.
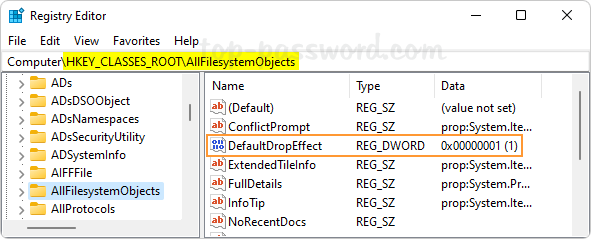
  4. Next, navigate to another sub-key AllFilesystemObjects and use the same method to create a new 32-bit DWORD value DefaultDropEffect with the same value data.

  5. Close Registry Editor. The new setting of drag and drop behavior will take effect immediately. If you’ve set DefaultDropEffect to 1, Windows will perform the copy action when you drag a file and drop it to a folder on the same drive.

    To undo the changes later, just delete the DefaultDropEffect value from both keys and you’re done.

That’s it!

How to Move the Start button to the Left Corner in Windows 11

November 25th, 2021 by Admin

How can I move the Start button back to the bottom left of my screen? After upgrading to Windows 11, the first thing that comes to your mind should be the new macOS-Dock style taskbar. Microsoft has moved the Start button to the center position. In this tutorial we’ll show you 2 simple methods to move the Start button back to the left corner of your screen in Windows 11.

Method 1: Move the Start button to the Left Corner via Settings App

  1. Right-click any empty space on the taskbar and choose Taskbar settings from the pop-up menu.

  2. The Settings app will launch and open to the Personalization > Taskbar screen. On the right, scroll down to the bottom and click on the Taskbar behaviors section to expand it.

  3. Click the Taskbar alignment drop-down box, and change it from Center to Left.

  4. You should see that your Start button goes back to the bottom left corner of your screen.

Method 2: Move the Start button to the Left Corner via Registry Editor

  1. Open Registry Editor and navigate to: HKEY_CURRENT_USER\Software\Microsoft\Windows\CurrentVersion\Explorer\Advanced. On the right pane, double-click the DWORD entry TaskbarAl to modify its value data.

  2. Enter 0 in the Value data box and click OK.

  3. Close Registry Editor. The taskbar and the Start button will be immediately aligned to the left side of the screen. Whenever you need to put the Start button in the center of the taskbar, just change the value of TaskbarAl to 1 and you’re done.

That’s it!

Set Windows Terminal to Open Command Prompt Instead of PowerShell

November 24th, 2021 by Admin

Is there a way to change the default shell in Windows Terminal? Windows Terminal allows you to access different types of shells all in one application: PowerShell, Command Prompt, Azure Cloud Shell. When opening a new Windows Terminal, it opens up PowerShell by default. In this tutorial we’ll show you how to change the default shell of Windows Terminal from PowerShell to Command Prompt in Windows 11.

How to Set Windows Terminal to Open Command Prompt Instead of PowerShell

  1. After opening Windows Terminal, click the down-arrow button located in the title bar. Next, choose the Settings option from the drop-down menu.

  2. This will open the Settings tab. On the Startup page, click the drop-down menu labeled “Default profile” on the right side. You can then change the default shell of Windows Terminal to Command Prompt.

  3. Click the Save button in the bottom right corner. The next time you launch Windows Terminal or create a new terminal tab, it will open Command Prompt instead of PowerShell by default.

That’s it!

5 Ways to Open Windows Terminal as Admin in Windows 11

November 22nd, 2021 by Admin

Windows Terminal is a multi-tabbed terminal emulator in Windows 11, which lets you run Command Prompt, PowerShell, Azure Cloud Shell in separate tabs. In this tutorial we’ll show you 5 easy ways to open Windows Terminal as administrator in Windows 11.

Method 1: Open Windows Terminal as Admin via WinX Menu

Right-click the Start button on the taskbar or press the Windows key + X on your keyboard, then choose “Windows Terminal (Admin)” from the WinX menu.

It will open Windows Terminal as administrator.

Method 2: Open Windows Terminal as Admin via Run

Press the Windows key + R to bring up the Run dialog. Type wt, then hold down the CTRL and SHIFT keys, and click OK.

or type wt in the text field, then press CTRL + SHIFT + ENTER keyboard shortcut to launch an elevated Windows Terminal.

Method 3: Open Windows Terminal as Admin via Search

Click the Search button on the taskbar. Type terminal in the text field at the top. Next, right-click the Windows Terminal app under Best Match section and choose “Run as administrator“.

Method 4: Open Windows Terminal as Admin via Start Menu

Click the Start button on the taskbar. When the Start Menu appears, click the All apps button on the top right corner.

Scroll down to the “W” section and you’ll see the Windows Terminal shortcut. Right-click on it and select More -> Run as administrator.

Method 5: Open Windows Terminal as Admin via Task Manager

To get started, press the keyboard shortcut CTRL + SHIFT + ESC to launch the Task Manager. Click the File menu and select “Run new task“.

Enter wt in the text field. Check the box next to “Create this task with administrator privileges” and click OK.

That’s it!

Fix: ‘Play Windows Startup Sound’ is Greyed out in Windows 11

November 19th, 2021 by Admin

Can’t turn off Windows startup sound? If you find that the “Play Windows Startup sound” option is greyed out and you’re unable to modify it, here are two methods to fix this issue in Windows 11.

Method 1: Fix ‘Play Windows Startup Sound is Greyed out’ Using Group Policy

  1. Open Local Group Policy Editor and browse to: Computer Configuration\Administrative Templates\System\Logon, next double-click the “Turn off Windows Startup sound” policy in the right side.

  2. Change the setting to “Not Configured” and click OK.

  3. Close the Local Group Policy Editor. Now you should be able to tick or untick the “Play Windows Startup sound” option.

Method 2: Fix ‘Play Windows Startup Sound is Greyed out’ Using Registry Editor

  1. Press the Windows key + R together to open the Run command box, type regedit and press Enter.

  2. When the Registry Editor window appears, navigate to: HKEY_LOCAL_MACHINE\SOFTWARE\Microsoft\Windows\CurrentVersion\Policies\System, delete the DWORD DisableStartupSound in the right pane.

  3. Close Registry Editor and the “Play Windows Startup sound” option should be clickable.

That’s it!

How to Disable Windows Startup Sound in Windows 11

November 17th, 2021 by Admin

How can I turn off the startup sound in Windows 11? By default, Windows 11 will play the startup sound before the login screen appears. You can disable it if you think it is annoying and unnecessary. In this tutorial we’ll show you how to disable Windows Startup sound in Windows 11.

How to Disable Windows Startup Sound in Windows 11

  1. Right-click on the sound icon in the bottom-right corner of your taskbar, and then choose “Sound settings” from the pop-up menu.

  2. The Settings app will launch and open to System -> Sound. In the right pane, scroll down to the bottom and click the “More sound settings” option.

  3. When the Sound dialog box opens up, go to the Sounds tab. Uncheck the “Play Windows Startup sound” box and click OK. This setting will apply to all accounts.

  4. The next time you turn on your PC, Windows 11 will no longer play a startup sound.

That’s it!

2 Ways to Hide or Remove Search Button from Windows 11 Taskbar

November 16th, 2021 by Admin

Looking for a way to remove the Search icon from Windows 11 taskbar to make more space for the icons you care about? In Windows 11, the new Start Menu comes with a search box at the top, which lets you search directly. I think it is not necessary to keep the Search button on the taskbar. In this tutorial we’ll show you 2 quick methods to hide or remove the Search button from the taskbar in Windows 11.

Method 1: Hide or Remove Search Button from Taskbar via Settings App

  1. Right-click any empty space on the taskbar and choose Taskbar settings.

  2. This will launch the Settings app and take you to the page: Personalization -> Taskbar. In the right pane, toggle the Search switch to Off.

  3. The Search button will no longer appear on your taskbar.

Method 2: Hide or Remove Search Button from Taskbar via Registry Editor

  1. Open Registry Editor and navigate to: HKEY_CURRENT_USER\Software\Microsoft\Windows\CurrentVersion\Search. In the right pane, double-click the DWORD SearchboxTaskbarMode.

  2. Enter 0 in the Value data field and click OK. The Search button on your taskbar will disappear immediately.

    Whenever you need to bring the missing Search button back to Windows 11 taskbar, just change its value data to 1 and you’re done.

That’s it!

2 Methods to Remove Task View Button from Windows 11 Taskbar

November 15th, 2021 by Admin

How can I remove the Task View icon from the taskbar in Windows 11? If you never use the Task View feature, you can hide the Task View button to free up space on your taskbar. In this tutorial we’ll show you 2 methods to quickly remove Task View button from Windows 11 taskbar.

Method 1: Remove Task View Button via Settings App

  1. Right-click any blank area in the taskbar and then select Taskbar settings.

  2. When the Settings app opens to Personalization -> Taskbar, turn off the Task view toggle switch.

  3. The Task View button will immediately disappear from the taskbar.

Method 2: Remove Task View Button via Registry Editor

  1. Open Registry Editor and browse to: HKEY_CURRENT_USER\Software\Microsoft\Windows\CurrentVersion\Explorer\Advanced, then double-click the DWORD ShowTaskViewButton in the right pane.

  2. Change its value data to 0 and click OK.

    If you change the value data back to 1, the Task View button will be back on your taskbar.

  3. Close Registry Editor. You’ll instantly see the Task View button is hidden and removed from Windows 11 taskbar.

That’s it!

How to Restore Old Right-click Context Menu in Windows 11

November 12th, 2021 by Admin

How can I get back the classic full context menu in Windows 11? Windows 11 comes with a new context menu which is drastically simplified. It hides the less frequently used functionalities under a sub-menu named “Show more options“. If you’re already accustomed to the old context menu, you can bring it back easily. In this tutorial we’ll show you how to restore the old right-click context menu in Windows 11.

Updated: Starting with Windows 11 build 22572, you can now hold down the Shift key while you right-click anywhere in File Explorer, it will directly bring up the classic context menu.

How to Restore Old Right-click Context Menu in Windows 11

  1. Right-click on the Start button in the taskbar, and then select “Windows Terminal (Admin)“.

  2. Copy the following command and paste it in the Terminal window, and then press Enter.
    reg.exe add "HKCU\Software\Classes\CLSID\{86ca1aa0-34aa-4e8b-a509-50c905bae2a2}\InprocServer32" /f /ve

  3. Close Windows Terminal. Log out of your account and log back in, you’ll find that the old right-click context menu is back, which displays the full list of options directly.

    Whenever you prefer to enable the new right-click context menu again, just open Windows Terminal and run this command:
    reg.exe delete "HKCU\Software\Classes\CLSID\{86ca1aa0-34aa-4e8b-a509-50c905bae2a2}" /f

That’s it!

Most Common Ways to Open Settings App in Windows 11

November 9th, 2021 by Admin

Starting with Windows 11, more Control Panel features are being migrated to the Settings app. In this tutorial we’ll show you the most common ways to open Settings app in Windows 11.

Method 1: Open Windows 11 Settings App Using Keyboard Shortcut

Hold down the Windows Logo key and the I key on your keyboard at the same time, this will open the Settings app directly. This is the quickest way to launch Settings app for fans of keyboard shortcuts.

Method 2: Open Windows 11 Settings App via Search, Start Menu or Taskbar

Click the Search button on the taskbar, type settings in the search field at the top. From the search result, you can then click Open from the right pane to start the Settings app.

Or click “Pin to taskbar” for adding the shortcut of the Settings app to the taskbar.

If you have clicked the “Pin to Start” option, the Settings app will appear under the Pinned section of the Start Menu.

Method 3: Open Windows 11 Settings App via WinX Menu

Right-click on the Start button on the taskbar to open up the WinX menu, and then choose Settings to run the Settings app.

Method 4: Open Windows 11 Settings App from Desktop

Right-click any blank area on your desktop and choose either “Display settings” or “Personalize” from the context menu.

When the Settings app launches, you can use the left navigation pane to find the settings you need.

Method 5: Open Windows 11 Settings App via Run, Command Prompt or PowerShell

Press the Windows key + R together to Open the Run box, type the following command and press Enter to access the Settings app.
ms-settings:

Or run the above command in the Command Prompt, PowerShell or Terminal window.

Method 6: Open Windows 11 Settings App from Quick Settings

Click the battery icon, speaker icon or network icon in the system tray to open Quick Settings panel, next click the gear icon located in the lower-right corner to access the Settings app.

That’s it!