Archive for October, 2022

2 Ways to Disable Safeguards for Feature Updates in Windows 11

October 31st, 2022 by Admin

Windows 11 won’t upgrade from 21H2 to 22H2? Even if you run Windows Updates several times, Windows 11 22H2 update doesn’t show up and you don’t see it offered for download? This problem happens if your computer doesn’t meet the minimum system requirements. In order to bypass the upgrade block, you need to disable safeguards for Feature Updates in Windows 11.

Method 1: Disable Safeguards for Feature Updates via Group Policy

  1. Open Local Group Policy Editor and browse to:
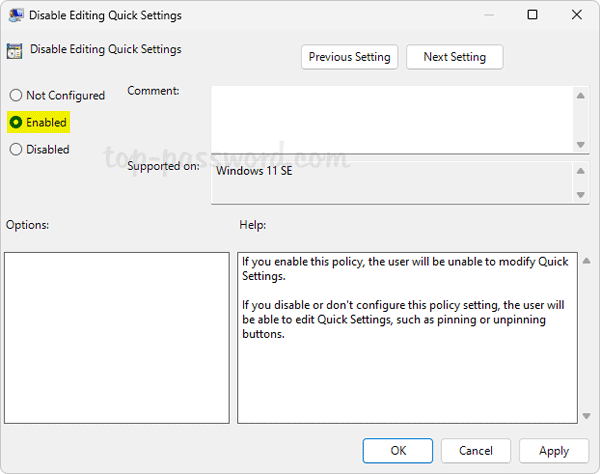
    Computer Configuration -> Administrative Templates -> Windows Components -> Windows Update -> Manage updates offered from Windows Updates, then double-click the “Disable safeguards for Feature Updates” policy in the right pane.

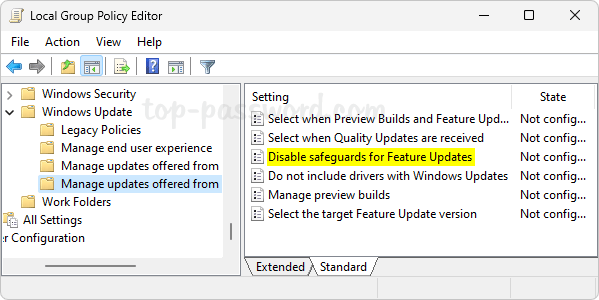
  2. Choose the Enabled option, click Apply and then OK.

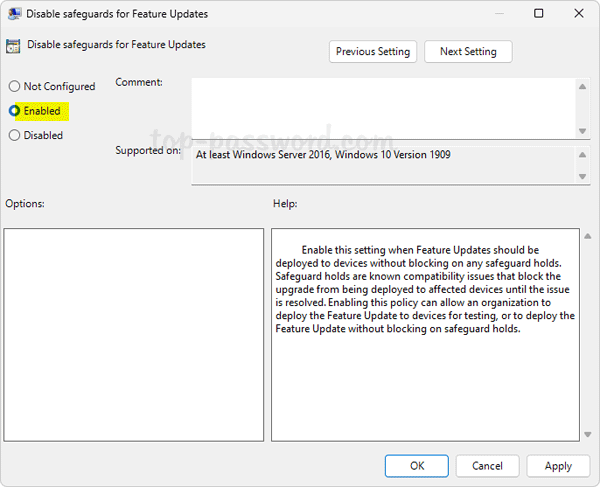
  3. After restarting your computer, you’ll be able to use the Windows Update to download and install the latest feature updates.

Method 2: Disable Safeguards for Feature Updates via Registry Editor

  1. Open Registry Editor and navigate to: 
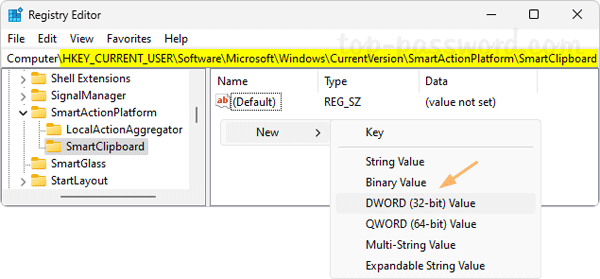
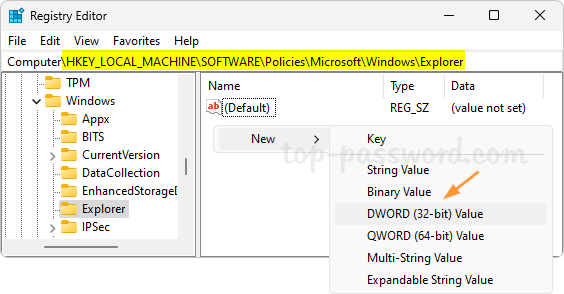
HKEY_LOCAL_MACHINE\SOFTWARE\Policies\Microsoft\Windows. Right-click the Windows key in the left sidebar and choose New -> Key.

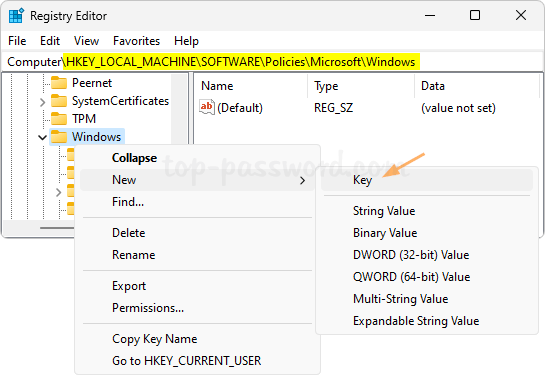
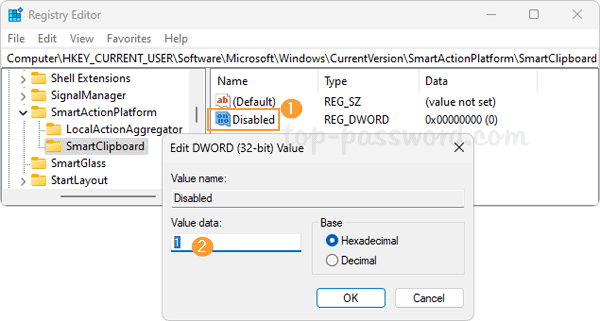
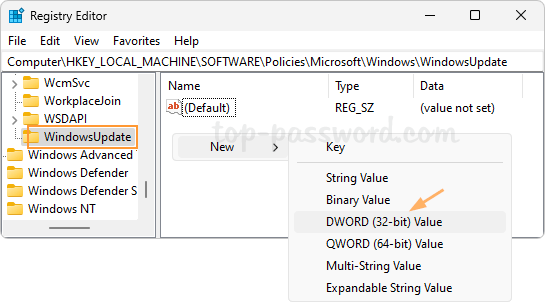
  2. Name the new key WindowsUpdate and make sure it’s selected. Next, right-click the blank area in the right pane, and select New -> DWORD (32-bit) Value.

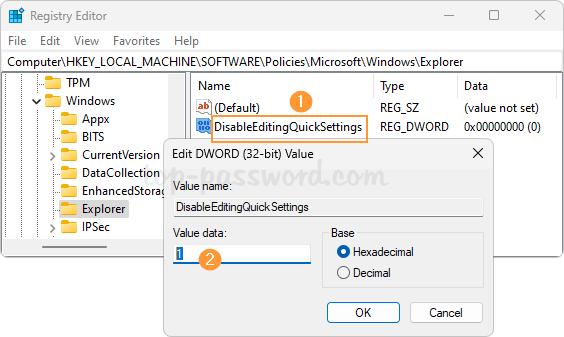
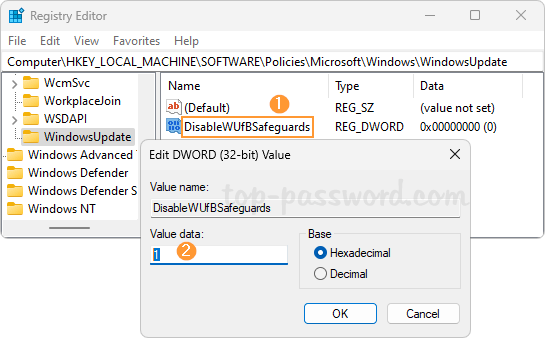
  3. Name the new DWORD DisableWUfBSafeguards, and then double-click it. Set its value data to 1. Click OK.

  4. Close Registry Editor and reboot your system. The next time you run Windows Update, the latest feature updates should become available and you can install it.

That’s it!

How to Disable Suggested Actions when Copying data to Clipboard in Windows 11

October 21st, 2022 by Admin

When you copy a phone number, date or time from web browser, Notepad or other apps, Windows 11 will predict the suggested actions based on the clipboard contents, and you’ll see options to make a phone call or create a calendar event.

If you don’t want to be disturbed by suggested actions, you can turn off this feature with ease. In this tutorial we’ll show you 2 methods to disable suggested actions when copying data to clipboard in Windows 11.

Method 1: Disable Suggested Actions in Windows 11 via Settings App

  1. Use the Windows + I keyboard shortcut to open the Settings app. Select System on the left, and then click Clipboard on the right.

  2. Click the “Suggested actions” toggle to turn the feature off. Windows 11 should no longer show suggested actions based on the text you’ve copied into the clipboard.

Method 2: Disable Suggested Actions in Windows 11 via Registry Editor

  1. Open Registry Editor and browse to: HKEY_CURRENT_USER\Software\Microsoft\Windows\CurrentVersion\SmartActionPlatform\SmartClipboard. In the right pane, right-click the empty space and select New -> DWORD (32-bit) Value.

  2. Name the DWORD as Disabled, and then double-click it and set its value data to 1 for turning off suggested actions.

    Whenever you need to enable suggested actions, just change its value data to 0.

  3. Close Registry Editor. Log off and then log back in to see the changes.

That’s it!

Prevent Windows Update from Asking for BitLocker Recovery Key upon Reboot

October 13th, 2022 by Admin

BitLocker keeps asking for recovery key at startup? After installing a Windows update which updates UEFI or TPM firmware, it may cause your computer to prompt for BitLocker recovery key on the first or second restart. In such situation, there is almost no other choice than to find your BitLocker recovery key.

To save yourself a potential headache, you can prevent Windows update from asking for BitLocker recovery key upon reboot.

How to Prevent Windows Update from Asking for BitLocker Recovery Key

Before installing certain updates (such as KB5012170) which may cause BitLocker issue, you need to temporarily suspend BitLocker by following the below steps. It’s still not late if you’ve installed such update but have not yet restarted your computer.

  1. Open an elevated Command Prompt. Enter this command and press Enter to suspend BitLocker immediately. BitLocker will automatically resume after two reboots.
    manage-bde -protectors -disable %systemdrive% -rebootcount 2

    If you’re using Windows PowerShell (admin), enter this command instead:
    Suspend-BitLocker -MountPoint "C:" -RebootCount 2

  2. Now, you can install Windows updates to update or flash the BIOS or TPM firmware on your computer, and it should never prompt you to enter BitLocker recovery key during boot. After a reboot, you can open an elevated Command Prompt and run this command to get the number of reboots remaining before automatically resuming BitLocker.
    manage-bde -status %systemdrive%

  3. After the second reboot, BitLocker should automatically be enabled and the protection status is On.

    If you want to manually resume BitLocker to verify that it is enabled, use the following command:
    manage-bde -protectors -enable %systemdrive%

    For Windows PowerShell, run this command:
    Resume-BitLocker -MountPoint "C:"

That’s it!

3 Methods to Change File Sharing Encryption Level in Windows 11

October 10th, 2022 by Admin

By default, Windows 11 uses 128-bit encryption to help protect file sharing connections, which is more secure than 40- or 56-bit encryption. If you need to share files between your PC and an old PC or MacBook which still uses 40- or 56-bit encryption, it’s necessary to adjust the encryption level and make them match each other. In this tutorial we’ll show you 3 methods to change file sharing encryption level in Windows 11.

Method 1: Change File Sharing Encryption Level via Settings App

  1. Press the Windows + I keys to bring up the Settings app. In the left sidebar, choose Network & internet. Next, click Advanced network settings on the right.

  2. Under the “More settings” section, click the “Advanced sharing settings” option.

  3. Expand the “All networks” section, you’ll see the “File sharing connections” drop-down menu. From there, you can choose to use 128-bit encryption (Recommended) or 40- or 56-bit encryption.

Method 2: Change File Sharing Encryption Level via Registry Editor

  1. Open Registry Editor and navigate to: HKEY_LOCAL_MACHINE\SYSTEM\CurrentControlSet\Control\Lsa\MSV1_0. In the right pane, you should see two DWORD entries: NtlmMinClientSec, NtlmMinServerSec. We need to change their value data.

  2. Double-click each of them and change their value data to 0 for using 40- or 56-bit encryption, or set their value data to 20000000 (in Hexadecimal) for using 128-bit encryption.

  3. Close Registry Editor.

Method 3: Change File Sharing Encryption Level via Control Panel

  1. Open Control Panel in Large icons view, click on the Network and Sharing Center category.

  2. Click the “Change advanced sharing settings” link in the left side pane.

  3. Expand the “All Networks” section. Under File sharing connections, you can then choose “Use 128-bit encryption to help protect file sharing connections” or “Enable file sharing for devices that use 40- or 56-bit encryption“.

  4. Click on the “Save changes” button.

That’s it!

2 Methods to Prevent Editing Quick Settings in Windows 11

October 9th, 2022 by Admin

Quick Settings (previously known as “Action Center”) allows you to quickly access basic settings such as Volume, Brightness, Wi-Fi, Bluetooth, Airplane mode. When the Quick Settings panel opens up, you can click the pencil icon in the bottom-right corner to add, remove or rearrange items.

If you don’t allow others to edit or customize Quick Settings, here are 2 simple methods to prevent editing Quick Settings in Windows 11.

Method 1: Prevent Editing Quick Settings in Windows 11 via Group Policy

  1. Open Local Group Policy Editor and navigate to: Computer Configuration -> Administrative Templates -> Start Menu and Taskbar​. On the right pane, find the “Disable Editing Quick Settings” policy and double-click it to modify.

  2. Choose the “Enabled” option. Click Apply and then OK.

  3. Restart your computer to apply the changes. The next time you open the Quick Settings panel, you can still see the edit button (pencil icon) but it doesn’t work any longer.

Method 2: Prevent Editing Quick Settings in Windows 11 via Registry Editor

  1. Open Registry Editor and browse to: HKEY_LOCAL_MACHINE\SOFTWARE\Policies\Microsoft\Windows\Explorer. In the right pane, right-click the empty area and choose New -> DWORD (32-bit) Value.

  2. Name the DWORD value as DisableEditingQuickSettings. Next, double-click it to give it a value of 1. Click OK.

  3. Close Registry Editor and reboot your system. The pencil icon in the bottom-right corner of the Quick Settings panel is still present, but it doesn’t respond when you click it.

That’s it!

How to Save File Explorer Search Results in Windows 11

October 8th, 2022 by Admin

Performing a search in File Explorer can take a long time depend on the number of files you have on your PC. If you need to repeat the same search again and again, it is very time wasting. You can improve productivity by saving the search results for future use. In this tutorial we’ll walk you through the steps to save File Explorer search results in Windows 11.

How to Save File Explorer Search Results in Windows 11

  1. Open File Explorer, then type your search query into the search field in the upper right corner and press Enter.

  2. After File Explorer shows you the results, right-click any blank area in the right pane of File Explorer, and choose “Show more options“.

  3. Next, select “Save search“.

  4. Navigate to the folder where you want to store the search and enter a search name, click on Save.

  5. You can see the saved .search-ms file in the destination folder, and it is XML format and can be opened with Notepad.

  6. The next time you need to repeat the same search in File Explorer, double-click on the saved search file, and the search results will show up in no time.

Conclusion

So this is how you can save the search results in File Explorer, so you can quickly bring them up without having to repeat the search again. If you just want to keep a list of the search result or print it out, simply select all results in File Explorer and choose “Copy as path“, you can then paste them in a text file.