Archive for May, 2021

How to Prevent Changing Color and Appearance in Windows 10

May 26th, 2021 by Admin

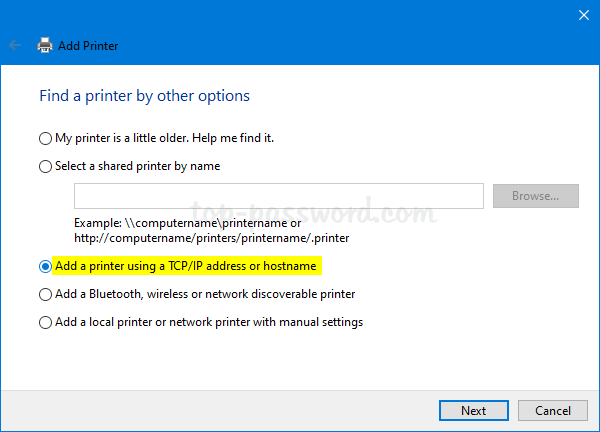
How can I prevent users from changing accent color in Windows 10? Is there a way to disable the accent color of Start Menu and taskbar? This tutorial will show you 2 methods to prevent changing color and appearance in Windows 10.

Method 1: Prevent Changing Color and Appearance via Group Policy

  1. Open Local Group Policy Editor and navigate to: User Configuration -> Administrative Templates -> Control Panel -> Personalization. Double-click on the “Prevent changing color and appearance” policy on the right side.

  2. Select the Enabled option. Click Apply and then OK.

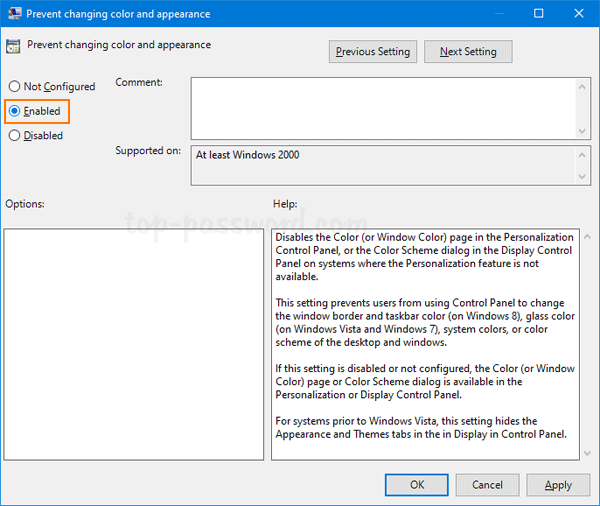
    If you need to allow changing color and appearance later, then choose Not Configured or Disabled.

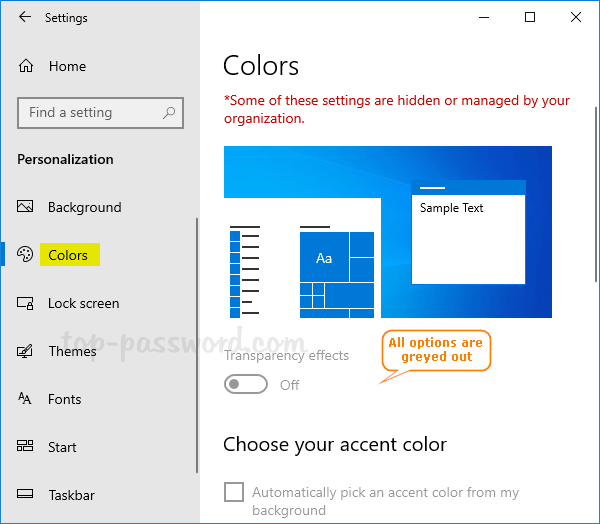
  3. Close Local Group Policy Editor and relaunch the Settings app. Navigate to Personalization -> Colors and you’ll find all options on that page are greyed out.

Method 2: Prevent Changing Color and Appearance via Registry Editor

  1. Open Registry Editor and browse to: HKEY_CURRENT_USER\SOFTWARE\Microsoft\Windows\CurrentVersion\Policies. In the left side, right-click on Policies and select New -> Key.

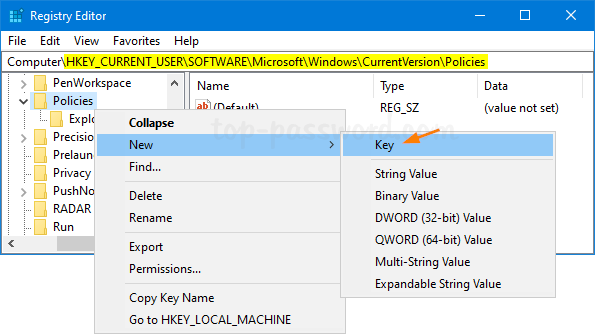
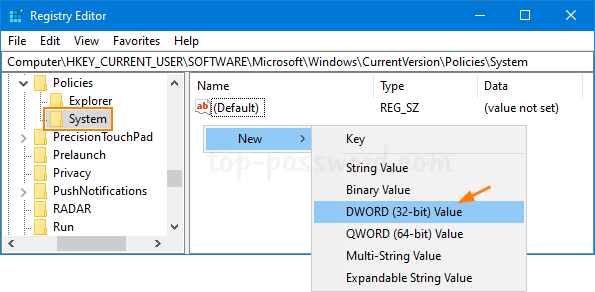
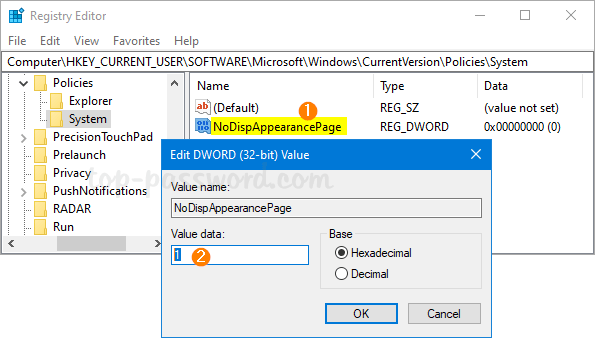
  2. Name this newly-created subkey as System, and then select it. In the right side, right-click any blank area and select New -> DWORD (32-bit) Value.

  3. Name the newly-created DWORD as NoDispAppearancePage, then double-click it and change its value data to 1. Click OK.

    Whenever you need to allow changing color and appearance again, just delete the NoDispAppearancePage entry.

  4. Close Registry Editor. The changes will take effect immediately.

That’s it!

How to Share your Printer over the Network in Windows 10

May 17th, 2021 by Admin

If you have a printer which is set up or plugged into your primary PC, it’s easy to share it with other computers on the same network. In this tutorial we’ll walk you through the steps to share your printer over the network in Windows 10.

Part 1: Share the Printer on your Primary PC

  1. Press the Win + I keyboard shortcut to open the Settings app. Navigate to Devices -> Printers & scanners. On the right side, select a printer you want to share and click the Manage button.

  2. In the next window, click on the “Printer properties” link.

  3. When the printer Properties window opens, select the Sharing tab. If all options are greyed out there, click on the “Change Sharing Options” button.

  4. Check “Share this printer” and type a meaningful share name.

    If you need to share the printer with computers running a mixture of Windows client architectures – 32 or 64 bit, click on the Additional Drivers button to install additional drivers.

  5. Go to the Security tab. You can deny all permissions for the “Everyone” group and grant printing permissions to desired users.

Part 2: Connect to Shared Printer over the Network

  1. On the network computer you want to access the shared printer, press the Win + R keyboard shortcut to open the Run box. Enter the IP address of your primary PC and press Enter.

  2. When prompted, enter the network credentials so that you can access shared resources (including shared printer) on your primary PC.

  3. Right-click on the shared printer and select Connect.

  4. It will download printer driver from your primary PC and then install it locally.

    After the installation is complete, the printer will show up under the Settings -> Devices -> Printers & scanners.

Conclusion

By setting up a shared printer, you’ll be able to print from any computer on the same network. The main disadvantage of this method is that the primary PC must always be turned on for other computers to use the printer.

How to Add / Install a Wireless Printer in Windows 10

May 10th, 2021 by Admin

Most wireless printers support Wi-Fi Direct, which lets you connect it to your PC directly even when a local network is unavailable. The printer serves as a Wi-Fi access point. After establishing peer-to-peer connection via Wi-Fi Direct, you can access the printer’s Web-based setup page and complete the network configuration. If your printer has a LCD screen, the on-screen Wi-Fi setup wizard lets you connect to your router much easier. Once your wireless printer is connected, you can add or install it on any Windows 10 computers you want to print from.

How to Add / Install a Wireless Printer in Windows 10

Open the Settings app with Win + I keyboard shortcut, and then navigate to Devices -> Printers & scanners. On the right side, click Add a Printers or scanner.

If your printer is detected, select it and click on Add device. Windows 10 will automatically download and install the printer driver. Just wait for it to complete and you’re done.

When Windows doesn’t detect your printer, click on “The printer that I want isn’t listed” link.

The pop-up wizard gives you a list of different options to help you find the printer. I recommend you choose the “Add a printer using a TCP/IP address or hostname” option.

Enter the IP address of your printer and leave other settings as they were. Click Next.

The next window allows you to rename the printer. Click Next if you don’t want to change it.

Choose “Do not share this printer” and you’ll then get to the last page of the installation wizard. You can click “Print a test page” to see whether your printer and computer can communicate with each other.

That’s it!