Archive for April, 2021

4 Steps to Reinstall Wireless Drivers in Windows 10 / 8 / 7

April 27th, 2021 by Admin

Wireless connection stops working suddenly? Windows 10 does not show available Wi-Fi networks? To fix any of such wireless connection issues, an easy first step is to reinstall wireless drivers. This article shows you how to reinstall wireless drivers in 4 steps on Windows 10 / 8 /7.

How to Reinstall Wireless Drivers in Windows

  1. Hold the Windows key and the R key down at the same time, type devmgmt.msc in the pop-up box and hit Enter to open Device Manager.

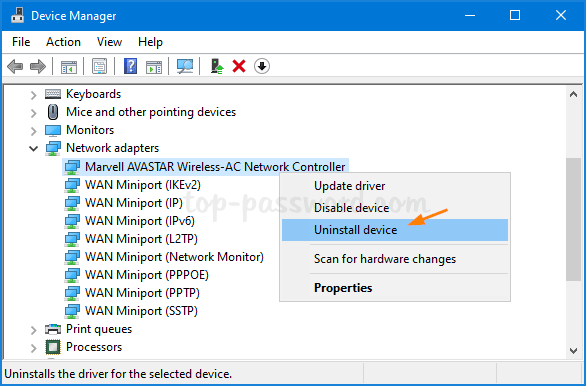
  2. Expand the Network adapters category, right-click on your wireless adapter and then select Uninstall device.
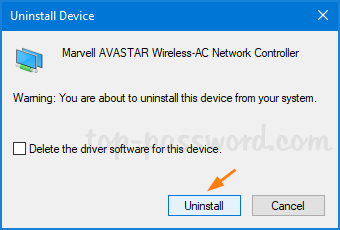
  3. A new window will pop up. Click Uninstall to confirm. If you see the “Delete the driver software for this device” checkbox, make sure you leave it unchecked.
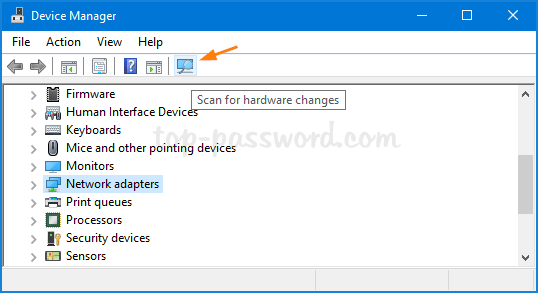
  4. Click the “Scan for hardware changes” icon on the toolbar to automatically search and reinstall wireless drivers.
    Restart your computer to see if your connectivity issue has been resolved.

That’s it!
3 Steps to Add Control Panel to ‘This PC’ in Windows 10 File Explorer

April 20th, 2021 by Admin

If you need to frequently use Control Panel, you can add it to the “This PC” section of File Explorer for quick access. In this tutorial we’ll walk you through the steps of adding Control Panel to File Explorer in Windows 10.

How to Add Control Panel to File Explorer in Windows 10

  1. Open Registry Editor, copy and paste the following path in the address bar and then press the Enter key on your keyboard to get there.
    HKEY_LOCAL_MACHINE\SOFTWARE\Microsoft\Windows\CurrentVersion\Explorer\MyComputer\NameSpace

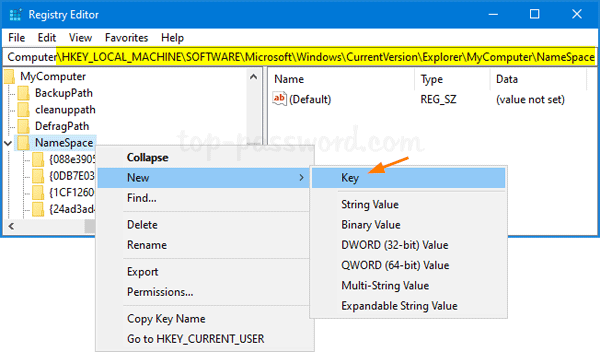
    Next, right-click on the NameSpace key and choose New -> Key.

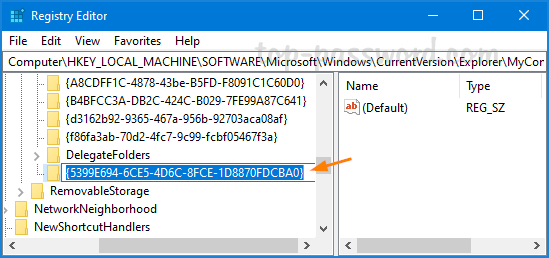
  2. Rename the newly-created key as {5399E694-6CE5-4D6C-8FCE-1D8870FDCBA0}.

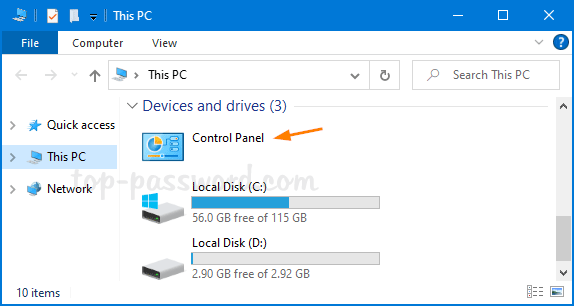
  3. Close Registry Editor and relaunch File Explorer. The “Control Panel” item will appear under the Devices and drives section.

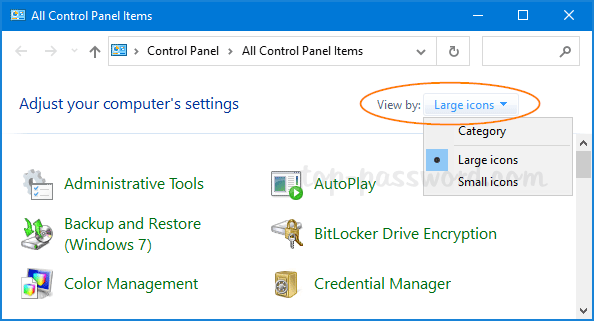
    You can click the “Control Panel” item and open it to either Category view or Large/Small icon view.

If you later want to remove Control Panel from the “This PC” section of File Explorer, just open the same registry location and delete the new key you created. That’s it!

How to Disable Steps Recorder in Windows 10 Home

April 19th, 2021 by Admin

Is there any way to turn off Steps Recorder in Windows 10 Home? Steps Recorder is an screen capture utility pre-installed on Windows 10, which can automatically record your steps with text and screenshots. If you want to get rid of it, you can follow this tutorial to disable Steps Recorder in Windows 10 Home.

How to Disable Steps Recorder in Windows 10 Home

  1. Open Registry Editor and go to the following registry path:
    HKEY_LOCAL_MACHINE\SOFTWARE\Policies\Microsoft\Windows

    In the left side, right-click on the Windows key and select New -> Key.

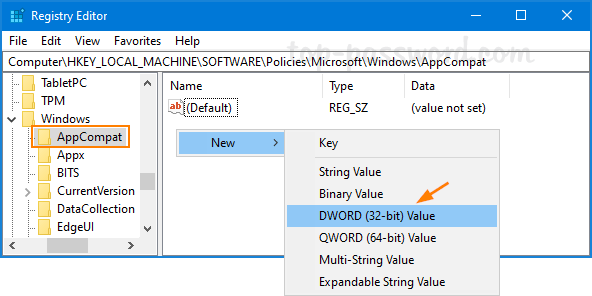
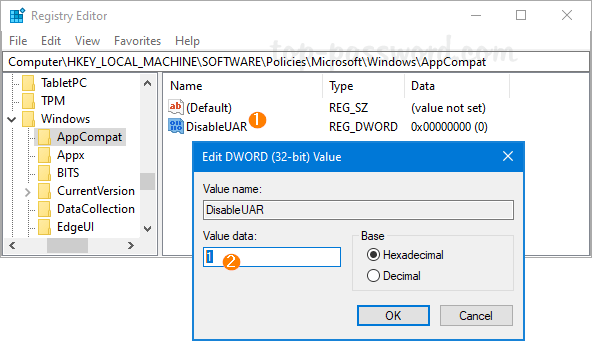
  2. Rename the newly-created key as AppCompat, and select it. On the right side, right-click on blank area and choose New -> DWORD (32-bit) Value.

  3. Rename the newly-created DWORD as DisableUAR, then double-click it and change the value data to 1.

  4. Close Registry Editor and now you can’t open Steps Recorder any longer. If you want to enable Steps Recorder again, just change the value data of DisableUAR to 0.

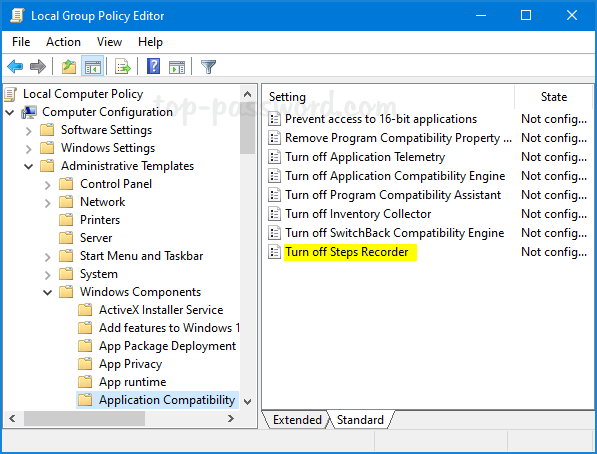
So this is how you can disable Steps Recorder with Registry Editor in Windows 10 Home. If you’re running Windows 10 Pro or Enterprise edition, there is a much simper way to achieve it. Just open the Local Group Policy Editor and browse to: Computer Configuration -> Administrative Templates -> Windows Components -> Application Compatibility, and double-click “Turn off Steps Recorder” to enable it.

That’s it!

How to View or Change Preferred Band for WiFi Adapter in Windows 10

April 10th, 2021 by Admin

How can I enable 5GHz WiFi network band on Windows 10 computer? WiFi is not appearing as available or network speed is very slow on 2.4GHz WiFi? 2.4 GHz connection travels farther at lower speed, while 5GHz provides faster speed at shorter range. If you’re experiencing problems with WiFi connection, you could try to change the preferred band. In this tutorial we’ll show you how to view or change preferred band for WiFi adapter in Windows 10.

Part 1: Check Which WiFi Band Your Computer is Connected to

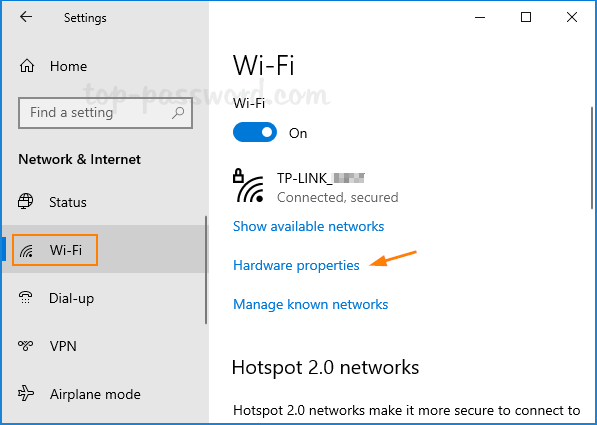
Press the Windows key + I to open the Settings app. Navigate to Network & Internet -> Wi-Fi. On the right side, click the “Hardware properties” link under your current WiFi connection.

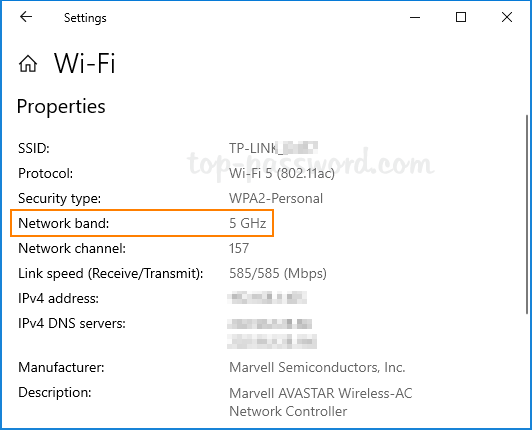
In the Properties page, you’ll see the band of your WiFi network connection, as well as SSID, protocol, security type, IP and MAC address.

Part 2: Change Preferred Band for WiFi Adapter via Device Manager

Press the Windows key + R to open the Run dialog, type devmgmt.msc and press Enter to launch Device Manager.

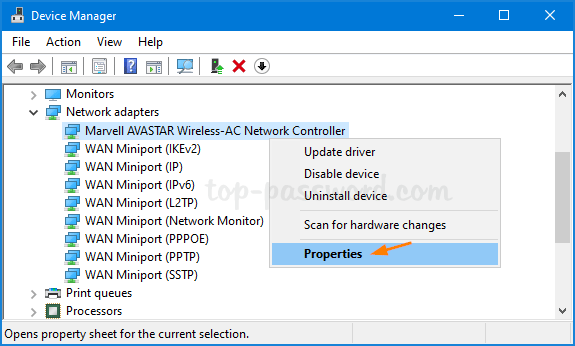
Expand Network adapters and right-click on your WiFi adapter, then select Properties.

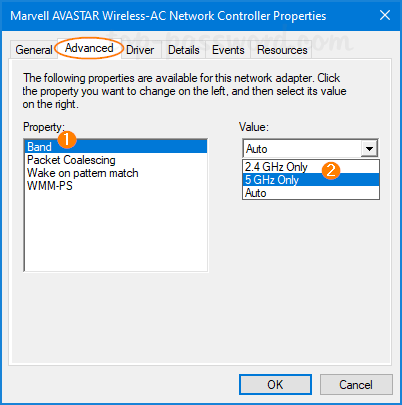
Go to the Advanced tab. Select the “Preferred Band” or “Band” property, change its value to 2.4GHz or 5GHz, and click OK. In my case, I would like to use 5GHz for a faster WiFi experience.

Note: If the “Band” property is missing, it’s possible that your WiFi adapter doesn’t support 5GHz.