Wireless connection stops working suddenly? Windows 10 does not show available Wi-Fi networks? To fix any of such wireless connection issues, an easy first step is to reinstall wireless drivers. This article shows you how to reinstall wireless drivers in 4 steps on Windows 10 / 8 /7.
How to Reinstall Wireless Drivers in Windows
- Hold the Windows key and the R key down at the same time, type devmgmt.msc in the pop-up box and hit Enter to open Device Manager.

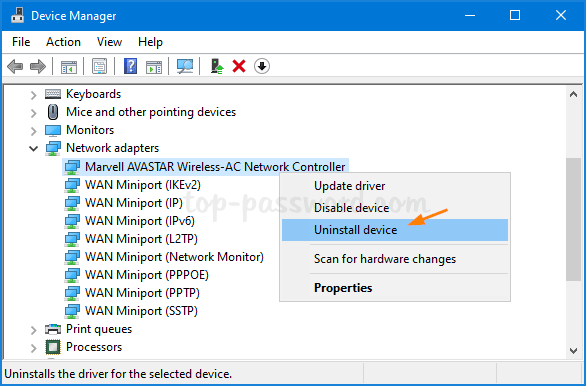
- Expand the Network adapters category, right-click on your wireless adapter and then select Uninstall device.
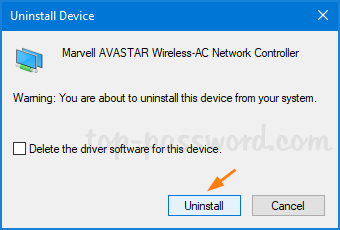
- A new window will pop up. Click Uninstall to confirm. If you see the “Delete the driver software for this device” checkbox, make sure you leave it unchecked.
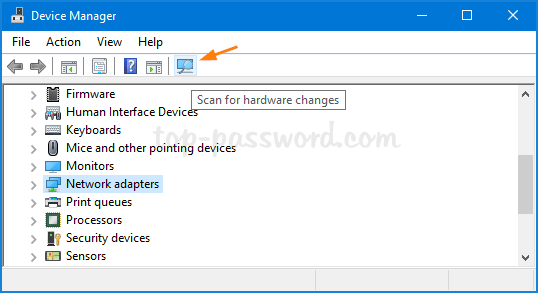
- Click the “Scan for hardware changes” icon on the toolbar to automatically search and reinstall wireless drivers.
Restart your computer to see if your connectivity issue has been resolved.
That’s it!