Archive for September, 2023

How to Remove Frequently Used Folders from Quick Access in Windows 11

September 26th, 2023 by Admin

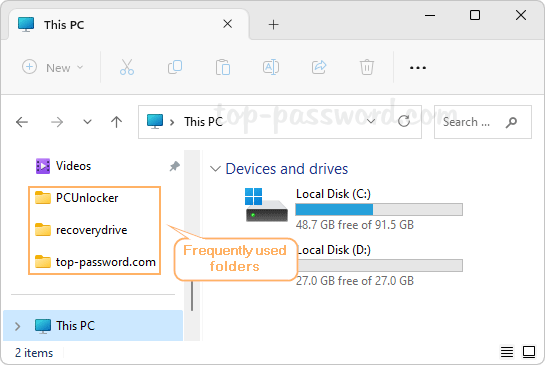
Is there any way to hide frequently used folders from the left navigation pane of File Explorer? By default, Windows 11 will automatically add the frequently used folders to Quick Access.

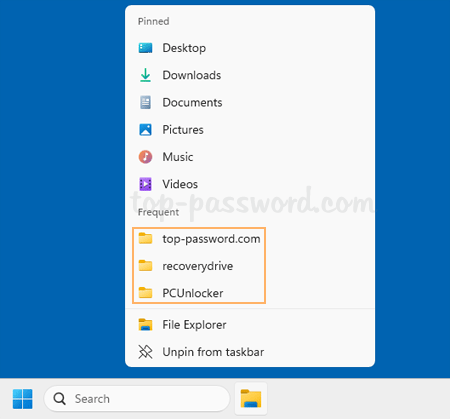
When you right-click the File Explorer icon on the taskbar, the frequently used folders will also appear under the “Frequent” section.

To protect your privacy, you can prevent frequently used folders from being added to Quick Access. In this tutorial we’ll show you two methods to remove frequently used folders from the Quick Access section of File Explorer in Windows 11.

Method 1: Manually Remove Frequently Used Folders in Windows 11

  1. Open File Explorer. Right-click one of the frequently used folders shown in the left navigation pane, and then choose “Remove from Quick access” from the pop-up menu.

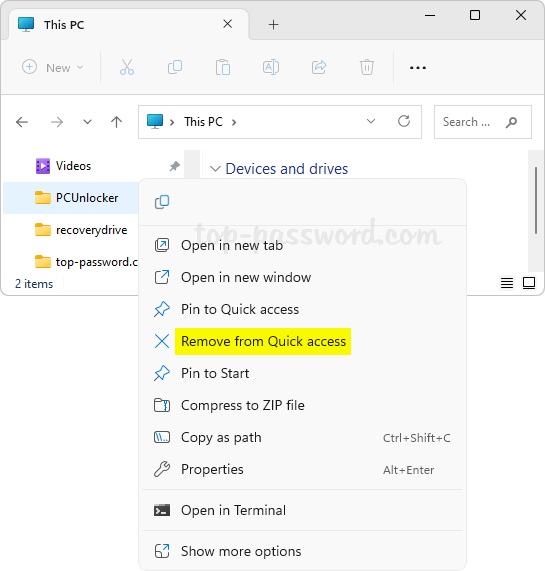
  2. This operation will remove your selected folder from the Quick Access section of File Explorer, and it does NOT delete the folder itself.

Method 2: Permanently Turn off Frequently Used Folders in Windows 11

  1. When File Explorer opens, click the “See more” button (three dots icon) on the toolbar and then choose Options.

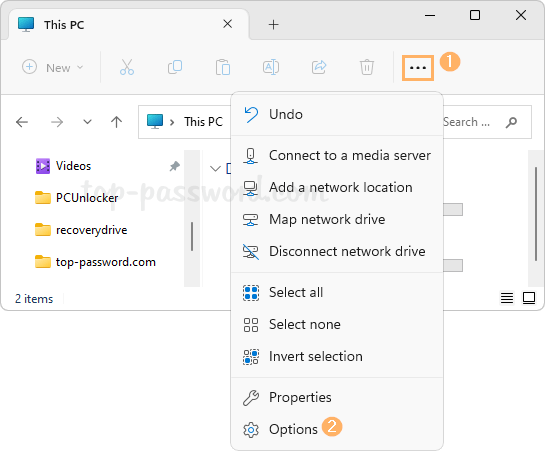
  2. Uncheck the “Show frequently used folders” option and click OK.

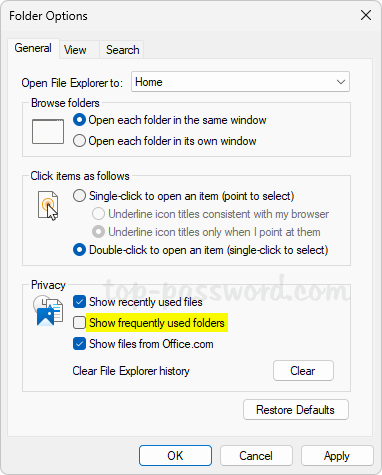
  3. It will remove the existing frequent folders history and permanently stop Quick Access from automatically adding any frequently used folders.

That’s it!

4 Ways to Open the Recovery Drive app in Windows 11

September 12th, 2023 by Admin

The Recovery Drive app is also called Recovery Media Creator, which allows users to create a USB recovery drive for reinstalling Windows or resetting the computer to factory defaults. In this tutorial we’ll show you 4 common ways to open the Recovery Drive app in Windows 11.

Method 1: Open the Recovery Drive app via Search

  1. Click the Search box in the taskbar and type in recovery drive.

  2. When the search results pop up, click the Recovery Drive App icon under the Best match section. The tool for creating a recovery drive will launch.

Method 2: Open the Recovery Drive app via Run Command

  1. Press the Windows key + R together to bring up the Run command box.

  2. Enter RecoveryDrive and click OK, it will run the Recovery Drive app immediately.

Method 3: Open the Recovery Drive app via Control Panel

  1. Open the Control Panel in Large icons view, and then click Recovery.

  2. Under the “Advanced recovery tools” section, click the “Create a recovery drive” option.

Method 4: Open the Recovery Drive app via Windows Terminal

  1. Right-click the Start button and choose Terminal (Admin) from the pop-up menu.

  2. When the Terminal opens to Windows PowerShell or Command Prompt, execute the “RecoveryDrive” command.

That’s it!

How to Delete Recovery Partition in Windows 11 / 10

September 11th, 2023 by Admin

Is it safe to remove the Recovery partition from Windows 11? How can I delete the Recovery partition without affecting the running OS? Recovery partition does the same thing as a USB recovery drive which could be used to refresh or reset your PC, so you can delete all the Recovery partitions without affecting your current operating system, especially useful when two partitions are separated by a Recovery partition. In this tutorial we’ll walk you through the steps to delete a Recovery partition in Windows 11 / 10.

How to Delete Recovery Partition in Windows 11 / 10

  1. Before getting started, open the Disk Management and find all the Recovery partitions available in your hard drive. The Recovery partition is hidden from File Explorer and it has no drive letter.

    You need to note down the disk number, partition number and capacity of each Recovery partition. In my example, both partition 1 and partition 6 associated with disk 0 are Recovery partitions.

  2. Next, open Windows Terminal as admin and run the diskpart command.

  3. Type select disk n and press Enter, replacing n with the disk number of the disk where your Recovery partitions are located. Next, run the list partition command to show all partitions on the selected disk.

    You need to check if the partition number and size of each Recovery partition are the same as what are shown in the Disk Management utility. Make sure you’re deleting the correct partitions.

  4. To delete a partition, run the following commands one by one. Replace # with the partition number of your Recovery partition.
    select partition #
    delete partition override

  5. When it’s done, close the Terminal window. Open Disk Management and you can take use of the unallocated space previously occupied by the Recovery partition. For example, expand the existing partition or merge two partitions.

Conclusion

Recovery partition is a special partition which is used to restore the system to factory settings in the event of system issues. You can delete one or two Recovery partitions using the above method or third-party software such as DiskGenius Free, without affecting your current Windows OS.