Archive for January, 2024

2 Methods to Disable or Enable Reserved Storage in Windows 11

January 23rd, 2024 by Admin

How can I reduce or turn off reserved storage in Windows 11? Disabling the reserved storage won’t affect the hibernation or virtual memory page file, and you can reclaim the reserved storage when your PC is running low on disk space. In this tutorial we’ll show you 2 methods to disable or enable reserved storage in Windows 11.

Method 1: Disable or Enable Reserved Storage via Windows Terminal

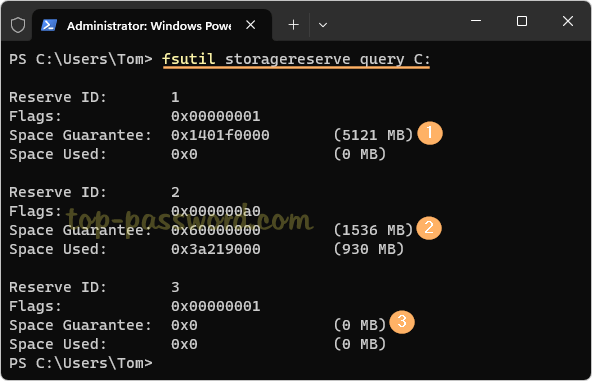
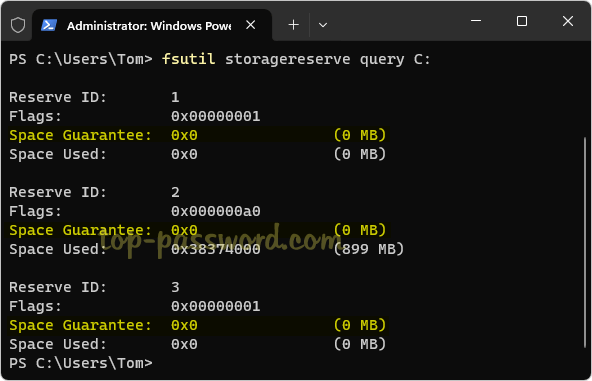
  1. Before getting started, open the Windows Terminal as administrator and then run the following command to check whether the reserved storage is already enabled or disabled on your system.
    DISM /Online /Get-ReservedStorageState

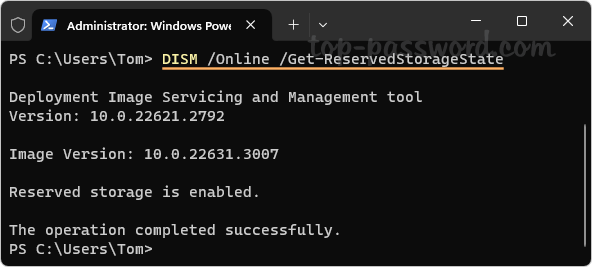
  2. To disable reserved storage, simply execute this command:
    Dism /Online /Set-ReservedStorageState /State:Disabled

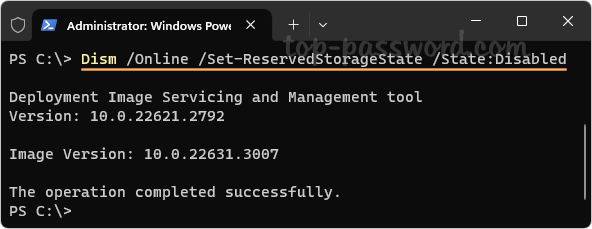
    If you want to enable reserved storage later, run this command:
    DISM /Online /Set-ReservedStorageState /State:Enabled

  3. After disabling reserved storage, your PC will perform smoothly as long as it has enough disk space to download and install Windows updates. If you open the Settings app and go to: 
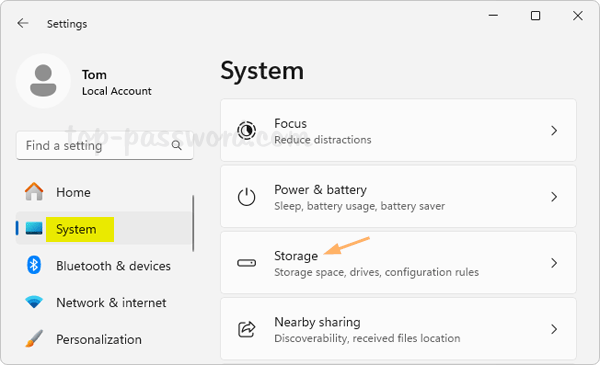
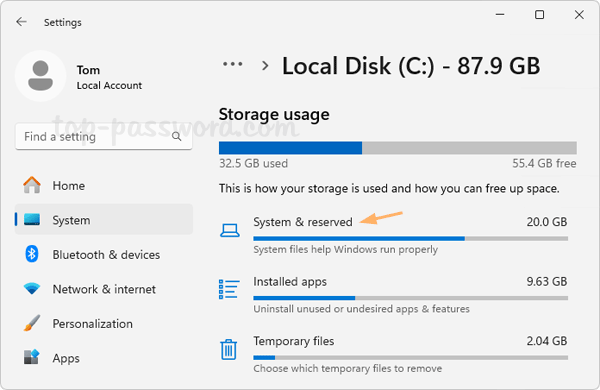
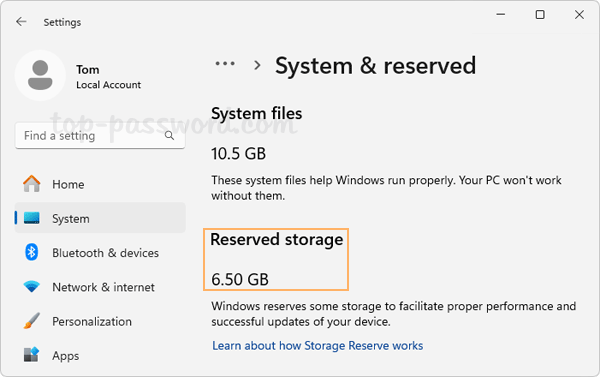
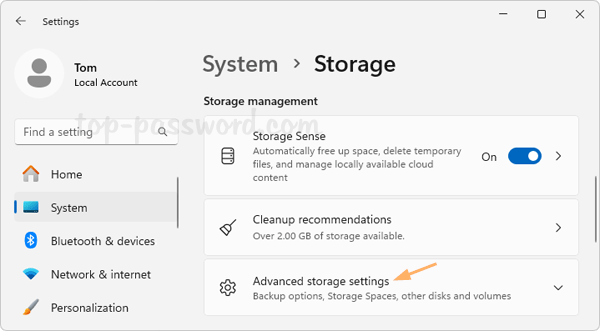
Storage -> System & reserved, the “Reserved storage” section will no longer show up.

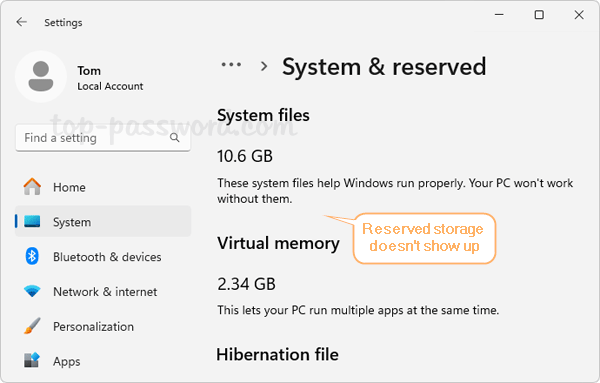
Method 2: Disable or Enable Reserved Storage via Registry Editor

  1. Open Registry Editor and navigate to the location: HKEY_LOCAL_MACHINE\SOFTWARE\Microsoft\Windows\CurrentVersion\ReserveManager. Next, we need to change the values for the DWORD MiscPolicyInfo and PassedPolicy on the right-side pane.

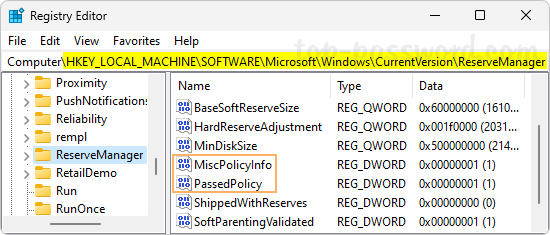
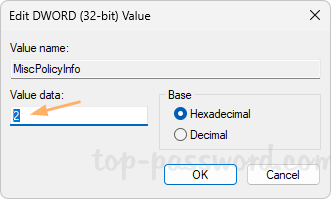
  2. In order to turn off reserved storage, just set MiscPolicyInfo to 2 and set PassedPolicy to 0. Whenever you need to turn on reserved storage, set the values of both MiscPolicyInfo and PassedPolicy to 1.

  3. Close Registry Editor and reboot your computer to see the changes.

That’s it!

2 Ways to View Reserved Storage Size in Windows 11

January 16th, 2024 by Admin

Reserved Storage is a portion of storage space which is used by Windows 11 to save temporary files for system processes like Windows Update, so you’ll no longer experience Windows Update issue because of low disk space. Note that reserved storage is completely different from system reserved partition, it should be some special folders which can be accessed only by Windows Update or other processes. In this tutorial we’ll show you 2 methods to view and find the current size of the reserved storage on your Windows 11 computer.

Method 1: View Reserved Storage Size from Settings App

  1. Open the Settings app. Select System from the left-hand menu and then click Storage on the right pane.

  2. Click the “Show more categories” link.

  3. Click the System & reserved option.

  4. Under the Reserved storage section, you can see how much storage Windows reserves to facilitate proper performance and successful updates of your device.

Method 2: View Reserved Storage Size from Windows Terminal

  1. Open Windows Terminal as administrator, and then run the following command:
    fsutil storagereserve query C:
  2. It will give you the details of each reserved space. Just add the sizes of each Space Guarantee and you can find out how much disk space is allocated for reserved storage.

    If reserved storage is disabled on your Windows 11 PC, all the sizes of Space Guarantee should be zero.

That’s all!

How to Check Hard Drive Health in Windows 11 with Ease

January 5th, 2024 by Admin

Is my hard drive still healthy? When should I replace my SSD? If there is a way to predict when a hard drive is about to die, we can take preventative actions before disk failure. Luckily, Windows 11 comes with a built-in feature to monitor the hard drive health, so you can get an estimated remaining life and temperature about your hard drive. Currently, this option is only available for NVM SSD. In this tutorial we’ll walk you through the steps of checking hard drive health in Windows 11.

How to Check Hard Drive Health in Windows 11 with Ease

  1. Open the Settings app. Choose the System category in the left-side pane and then click Storage on the right.

  2. Under the “Storage management” section, click the “Advanced storage settings” option.

  3. Click the “Disks & volumes” setting underneath.

  4. Click the Properties button next to your hard drive, not volumes.

  5. Scroll down to the “Drive health” section, you can see the current temperature and estimated remaining life about your disk.

    It might be able to help you catch a failing drive. You’ll get a warning when significant media-related errors or an internal error to the NVM subsystem is detected.

Conclusion

That’s how you can use the built-in feature in Windows 11 to check your hard drive status. However, it doesn’t work with SATA SSD or hard disk drives (HDD). If you need to perform a health check for USB, Intel RAID and NVMe, the freeware CrystalDiskInfo might be your good choice.