Archive for September, 2021

Easy Way to Uninstall Microsoft Edge in Windows 11 / 10

September 26th, 2021 by Admin

Microsoft Edge comes preinstalled as the default web browser in Windows 11 and Windows 10. When you try to uninstall Microsoft Edge using either Control Panel or the Settings app, you will find the Uninstall option is missing or greyed out. In this tutorial we’ll show you a simple way to uninstall Microsoft Edge in Windows 11 / 10.

How to Uninstall Microsoft Edge in Windows 11 / 10

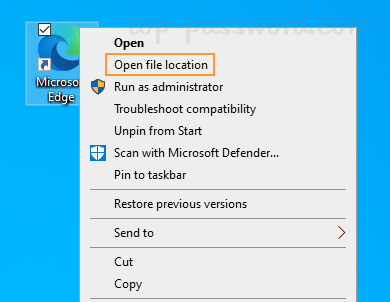
  1. Right-click on the Microsoft Edge shortcut on your desktop and then select “Open file location” from the context menu.

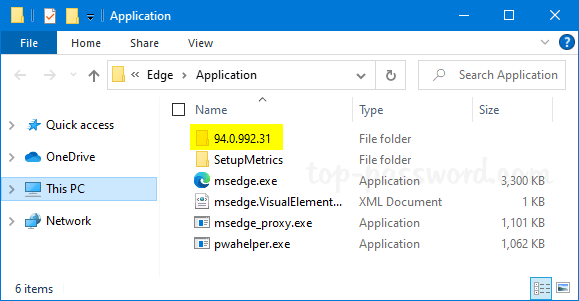
  2. File Explorer will open to the folder: C:\Program Files (x86)\Microsoft\Edge\Application. Simple double-click the folder which is named with the version number of your Microsoft Edge. In my case, it is 94.0.992.31.

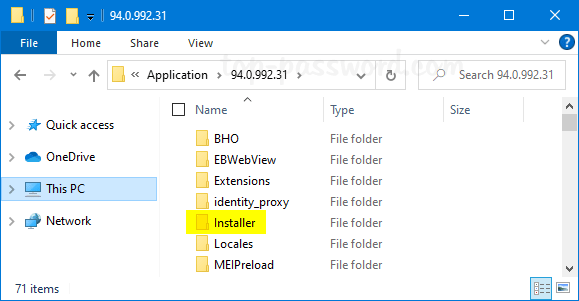
  3. Next, double-click and open the Installer folder.

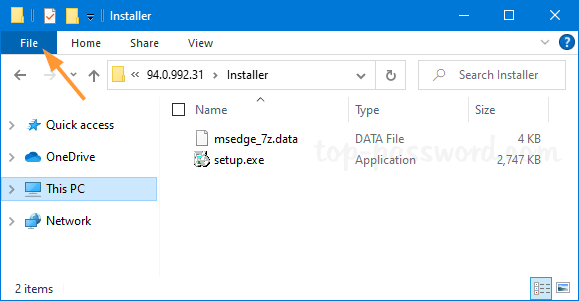
  4. We’ll later use the setup.exe file for uninstalling Microsoft Edge. To open an elevated PowerShell at this location, click the File menu in the top-left corner.

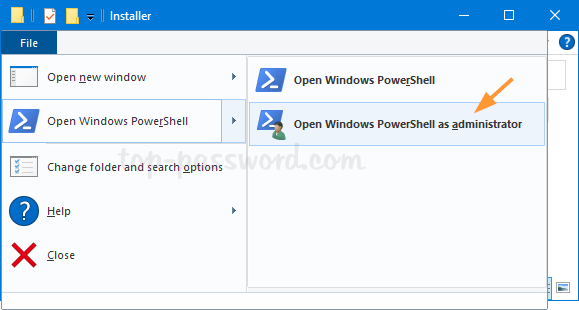
  5. select Open Windows PowerShell, and then Open Windows PowerShell as administrator. Click Yes if the UAC dialog appears.

  6. When a PowerShell window opens up, type the following command and press Enter. After a while, Microsoft Edge will be removed and uninstalled from your system.

    .\setup.exe -uninstall -system-level -verbose-logging -force-uninstall

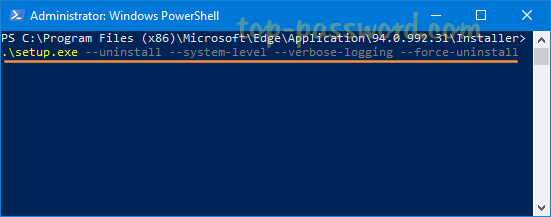
    Whenever you need to install Microsoft Edge later, you can download it from https://www.microsoft.com/en-us/edge.

That’s it!

Fix: The parameter is incorrect when changing drive letter in Windows 10

September 22nd, 2021 by Admin

Recently when I attempted to change drive letter using Disk Management, it kept giving out the error message “The parameter is incorrect” even though the new drive letter is unused.

It turns out that this problem happens with only drives which are holding page files. To fix the “The parameter is incorrect” issue in Windows 10, you need to temporarily disable paging files on the drive which you want to change the drive letter for.

How to Fix: The parameter is incorrect when changing drive letter

  1. Press the Windows key + R together to open the Run box, type sysdm.cpl and press Enter.

  2. When the System Properties window opens, select the Advanced tab. Click the Settings button under the Performance section.

  3. Go to the Advanced tab and click the Change button.

  4. Make sure the “Automatically manage paging file size for all drives” option is unchecked.

  5. Select the drive which you want to change the drive letter for. Choose the “No paging file” radio button and click the Set button.

  6. Click OK. Restart your computer and Windows will delete the paging file automatically. The next time you log back in to Windows 10, you should be able to change the drive letter successfully using Disk Management.

After changing drive letter, you can enable paging file again on your original drive if necessary. That’s it!

How to Block Chrome from Popping up Notifications in Windows 10 Taskbar

September 15th, 2021 by Admin

How can I stop Chrome from popping up annoying notifications in the lower right-hand corner of my screen? When visiting a new website, you may receive a pop-up saying “this website wants to show notifications“.

If you click on Allow unintentionally, that website’s ads or news will automatically pop up in Windows 10 notification area.

In this tutorial we’ll walk you through the steps to block Chrome from popping up notifications in Windows 10 taskbar.

How to Block Chrome from Popping up Notifications in Windows 10 Taskbar

  1. Open your Chrome browser, type chrome://settings/privacy in the address bar and hit Enter. Next, click Site Settings under the Privacy and security section.

  2. Click Notifications under the Permissions section.

  3. In order to prevent websites from asking permission to send you notifications, change the default behavior from “Sites can ask to send notifications” to “Don’t allow sites to send notifications“.

  4. Scroll down to the “Customized behaviors” section, you can remove any specific website from allowed list. Just click the more icon (three vertical dots) next to your target website, and select Remove from the pop-up menu.

That’s it!

How to Hide Only Shut down or Restart Option from Windows 10 Sign-in Screen

September 6th, 2021 by Admin

Is there a way to remove the ‘Restart‘ option from Windows 10 login screen? How can I disable ‘Shut down‘ option but keep ‘Restart‘? To prevent accidentally shutdown or restart, you can use a simple registry trick to hide only Shut down or Restart option from Windows 10 sign-in screen, as well as the Start Menu.

How to Hide Only Shut down or Restart Option from Windows 10 Sign-in Screen

  1. Open Registry Editor and navigate to one of the following paths, depend on which option you want to hide from Windows 10 sign-in screen. Next, double-click the “value” item in the right pane to edit it.

    Hide Shut down option:
    HKEY_LOCAL_MACHINE\SOFTWARE\Microsoft\PolicyManager\default\Start\HideShutDown

    Hide Restart option:
    HKEY_LOCAL_MACHINE\SOFTWARE\Microsoft\PolicyManager\default\Start\HideRestart

    Hide Sleep option:
    HKEY_LOCAL_MACHINE\SOFTWARE\Microsoft\PolicyManager\default\Start\HideSleep

    Hide the Power button completely:
    HKEY_LOCAL_MACHINE\SOFTWARE\Microsoft\PolicyManager\default\Start\HidePowerButton

  2. Change the value data from 0 to 1, and click OK.

    Note: whenever you need to restore the hidden Shut down/Restart or other options, just change the value data back to 0.

  3. Close Registry Editor. You’ll find your desired option is already removed from the Start Menu, Windows sign-in screen as well as the ALT + CTRL + DEL screen, but other options are still there.