Archive for April, 2016

Fix: “Burn disc image” Option Missing for ISO Context Menu

April 11th, 2016 by Admin

When you right-click on an ISO file in Windows 10/8/7, you should see the “Burn disc image” option in the context menu. What to do if the “Burn disc image” option is missing or no longer appears in the right-click context menu? To restore this context menu item, you have to set the built-in app – Windows Disc Image Burner – as the default program for opening an ISO file. Here’s how:

burn-disc-image

How to Fix: “Burn disc image” Option Missing for ISO Context Menu

  1. Open the Control Panel. Select Large icons from the View by option, then click on Default Programs.

    control-panel-items

  2. On the Default Programs window, click Set your default programs link.

    default-programs

  3. From the generated list of available programs in the left pane, select Windows Disc Image Burner, and then click on the Set this program as default option on the bottom right.

    set-default-programs

  4. Click on Choose defaults for this Program. You will get a window that displays the list of file extensions registered by the program. Check the boxes against the file extensions (*.iso, *.img) that you want the selected program to open by default. Click Save and you’re done.

    set-program-association

  5. Restart your computer and the “Burn disc image” option should now appear in the right-click context menu of an ISO file.

How to Delete Windows Update Cache to Free Space

April 9th, 2016 by Admin

The update cache is a temporary folder used by Windows Update to store the temporary installation files. By default, Windows Update automatically cleans out the cached updates at a regular interval. But the temporary files will not be deleted when Windows Update fails or refuses to install an update.

update-temp-file-size

Sometimes the obsolete update cache can take up Gigabytes of space and this can run out of disk space on C:\ drive. When you run into space issue or Windows Update doesn’t work properly, you can use this method to safely delete Windows Update cache in Windows 10, 8 and 7.

How to Delete Windows Update Cache to Free Space?

In previous post we’ve covered how to delete temporary Windows installation files ($WINDOWS.~BT) using Disk Cleanup. But that utility doesn’t include an option for purging Windows Update cache. So we need to delete the update cache manually. Before getting started, make sure no update process is running, or your update will fail to install.

  1. The first step is to temporarily turn off the Windows Update service. Press the Windows key + R to open the Run box. Type cmd and press Enter.
  2. When the Command Prompt opens, type the command below to stop the Windows Update service.
    net stop wuauserv

    stop-windows-update

  3. Open the Windows Explorer and navigate to the following folder and delete all its content (not the folder itself).
    C:\Windows\SoftwareDistribution\Download

    delete-update-temp-files

  4. Once you’ve deleted the update cache, open the Command Prompt again and run the following command to start the Windows Update service.
    net start wuauserv

2 Ways to Recover iTunes Backup Password on Mac OS X

April 7th, 2016 by Admin

“Hi! I’ve forgotten the password for the local iTunes backup on Mac OS X. How do I reset or recover my iTunes password? Please help!”

Forgotten iTunes backup password is a common problem, because the password is rarely used until we need to restore iPhone or iPad from iTunes backup. What should you do if you’ve lost the password for your iTunes backup? In this tutorial we’ll show you two simple ways to recover iTunes backup password on Mac OS X.

Method 1: Recover iTunes Backup Password with Keychain Access on Mac

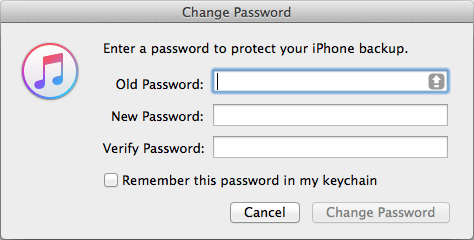
The Keychain Access application is Mac OS X’s built-in password manager. It stores a wide variety of passwords for email account, website, servers, itunes backup, etc. When you change or reset the password for iTunes backup, the password will also be stored in Keychain if you’ve checked the “Remember this password in my keychain” option.

If your iTunes backup password is stored in Keychain, you can recover it easily by following these steps:

  1. On your Mac, go to /Applications/Utilities/ and open Keychain Access app.
  2. Under the Keychains section on the left-hand side of the app, select login. You should now see a list of websites and applications that use Keychain Access to store login information. Scroll down through this list until you get to the login item named “iPhone Backup“.

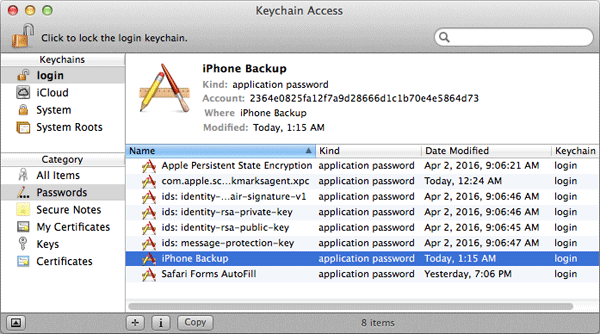
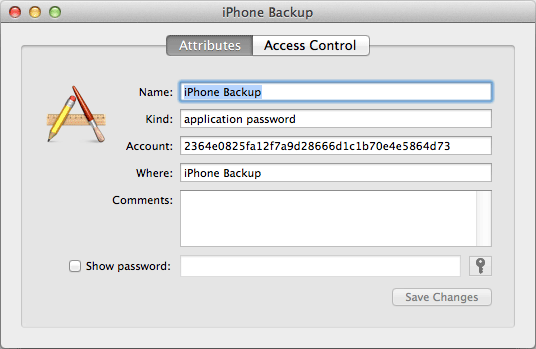
  3. Double-click the “iPhone Backup” login item. This will open a new window with more details about your iTunes backup account. From this screen, check the “Show password” checkbox.

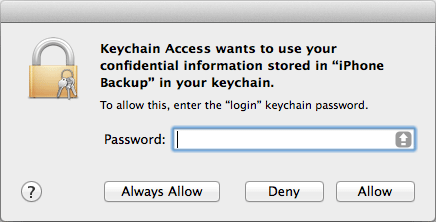
  4. You will be prompted to enter your Mac OS X user password to authenticate. Once entered, click the Allow button to continue.

  5. Once that’s done, you’ll return to the previous window showing all the details including the password in plain text. Make a note of it and ensure it’s kept somewhere secure so you can remember it the next time.

Method 2: Recover iTunes Backup Password with iTunesKey

What to do if your forgotten iTunes backup is not stored in Keychain access? Is there any hope? Luckily there is a handy iTunes password recovery tool – iTunesKey, which allows you to recover / decrypt iTunes backup password. But this program needs to run from within Windows. So if your iTunes backup is created and saved in Mac OS X, simply transfer the Manifest.plist file to a Windows-based PC and you can then use iTunesKey to recover your password. Here’s how:

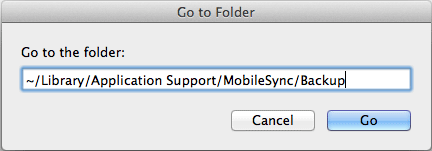
  1. To get started, we need to find the iTunes backup location in Mac OS X. Simply hit Command + Shift + G on keyboard to open the Go To Folder screen. Type the following path and click Go.

    ~/Library/Application Support/MobileSync/Backup/

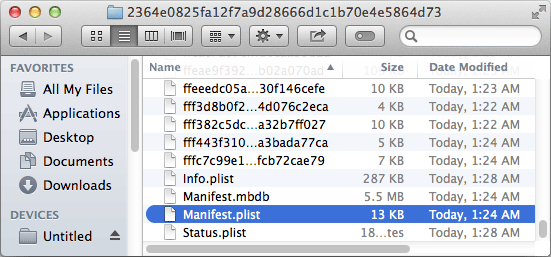
  2. A Finder window will open and you can see a folder named with the UDID (unique device identifier) of your iPhone. Open that folder and copy the Manifest.plist file to your external USB thumb drive.

  3. Attach the USB thumb drive to a Windows-based computer and run the iTunesKey application. When iTunesKey launches, click on the button to select the Manifest.plist file.

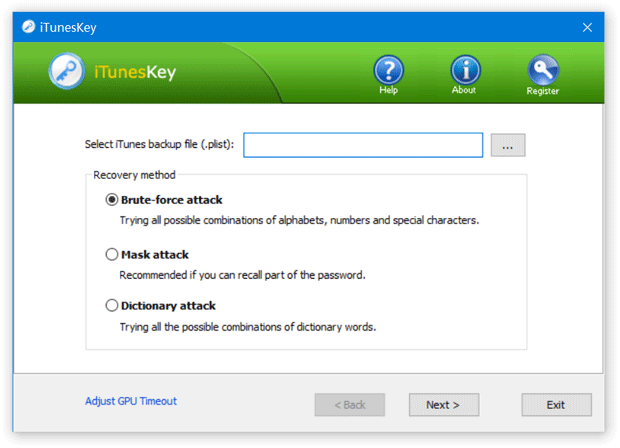
  4. Select one of the recovery methods: Brute-force attack, Mask attack and Dictionary attack, and click Next. Follow the instructions to perform the password cracking. After your iTunes backup is recovered, write it down so you’ll never forgot it.

Reset Lost Admin Password on Dell PowerEdge with RAID

April 6th, 2016 by Admin

Forgot Windows Server admin password for your Dell PowerEdge server? Most of password recovery Live CDs lack the RAID drivers so your hard drive won’t show up after booting. In this tutorial we’ll walk you through the steps of resetting lost admin password on Dell PowerEdge with PCUnlocker Enterprise.

What You’ll Need:

  • A USB thumb drive (or a blank CD)
  • The ISO image of PCUnlocker Enterprise – You can try the trial version before purchasing the full version
  • Dell RAID drivers – Click here to download the RAID drivers for Dell PowerEdge, or check out this article on how to download / extract Dell drivers directly from Dell official website
  • A working PC for making the Live CD/USB

Reset Lost Admin Password on Dell PowerEdge with RAID Controller

  1. Before getting started, use a working PC to download and install ISO2Disc, a free utility that specifically designed to create bootable CD / USB drive from ISO image.
  2. Launch ISO2Disc and click on Browse button. Select the ISO image of PCUnlocker Enterprise in your PC. Select “Burn to USB Flash Drive” and click on Start Burn.

    After the burning is complete, copy the RAID driver files you’ve downloaded and paste them in the root directory of your USB drive.

  3. Once you have your bootable USB drive, plug it in to a USB port on your Dell PowerEdge server. Power on the server and quickly and repeatedly press the F2 key to enter the BIOS Setup.
  4. In the BIOS menu, scroll down to the option for “USB Flash Drive Emulation Type“. Use the space bar to change this to “Hard disk“.
  5. Then go to the Boot Sequence option and press Enter. The USB device will now appear as a hard drive in your boot options. Use the space bar to enable or disable boot options and the + or – keys to change their order in the boot sequence.

    dell-poweredge-boot-order

  6. After making these changes in your BIOS settings, press ESC and choose “Save and Exit“. Your server will reboot from your USB drive.
  7. Wait for the PCUnlocker program to launch. The program might prompt you to select the SAM file because it can’t recognize your hard drive. So you have to load the RAID driver on the fly. Click on the Options button at the bottom of the screen, and then select “Load IDE/SCSI/SATA/RAID Driver“.

  8. When the file open dialog appears, choose the RAID driver setup .inf file stored on your USB drive. Click Open.

    dell-poweredge-raid

  9. Once the driver is loaded successfully, you’ll see a list of user accounts stored in the Windows SAM file. Choose the administrator account and click on Reset Password button to remove the password.

  10. Reboot your server and unplug the USB thumb drive, you can then log back in to your Windows Server admin account without password. Done!

How to Fix “The signature of this program is corrupt or invalid”

April 3rd, 2016 by Admin

When you download a software with Microsoft Edge or Internet Explorer, you might receive the error message saying “The signature of this program is corrupt or invalid“.

edge-warn-signature-corrupt

ie-warn-signature-corrupt

Recently we’ve also heard of our customers having this issue when downloading the Lock My Folders program in Windows 10, so we spend lots of time trying to reproduce this issue. We finally got to the bottom of the issue (we believe).

The signature was never corrupt or even invalid. Microsoft released a cumulative security update KB3140745 for Windows 10 that deprecated support for SHA1 code signing certificate. Any programs signed with SHA1 certificate after January 1st, 2016 will be flagged as an invalid signature. In this tutorial we’ll explain how to check if your downloaded program is signed with SHA1 or not, then discuss the methods to get around the download issue.

How do I know if a program is signed with SHA1?

  1. Right-click on your program and select Properties.
  2. Click on the Digital Signatures tab.
  3. Select the signature and click on the Details button.
  4. Click the View Certificate button.
  5. Click the Details tab.
  6. Look at the Signature hash algorithm.

    sha1-certificate

Methods to fix “The signature of this program is corrupt or invalid”

If you are the software developer, just contact the CA to re-issue or replace your SHA1 certificate with a new stronger SHA2 certificate, then sign your program with SHA2 certificate and the issue will be resolved.

If you download software from a reliable website and get the “The signature of this program is corrupt or invalid” error message, here are 3 ways to work around this problem:

  • When you see the a pop-up message that says the signature is corrupt or invalid, click on View downloads button.

    edge-warn-signature-corrupt

    Next right-click on the file in downloads and choose Run anyway.

    edge-run-anyway

    If Windows 10 Smart Screen displays a warning that the app cannot be recognized, click More Info and click Run Anyway to install.

  • Uninstall the Windows update that causes this issue. I can reproduce the problem by installing KB3140745 on Windows 10. I then uninstall this single update and it fixed the problem. If you’ve turned on automatic updating, you can block that specific update in Windows 10 so it won’t be installed any longer.
  • Only the browsers from Microsoft block SHA1 code signing certificate now. Chrome and Firefox still accepts SHA1 certificate. So you can get around this problem by downloading with Chrome or Firefox browsers.