Is there any way to backup power plans before reinstalling Windows 10? How can I apply a custom power plan on multiple PCs at once? In this tutorial we’ll show you an easy way to export a power plan to a .pow file, and then import the .pow file to restore the power plan on Windows 11 / 10.
How to Export and Import a Power Plan in Windows 11 / 10
- Before getting started, you need to open an elevated Command Prompt, Windows PowerShell or Windows Terminal. Run the
powercfg -listcommand to display all the power plans available in your system. Each power plan has its own unique GUID.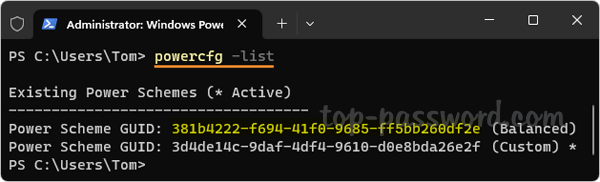
- Execute the following command to export a power plan to the file
d:\demo\Balanced.pow. TheYour_GUIDneeds to be replaced with the actual GUID of the power plan you want to export.powercfg -export d:\demo\Balanced.pow Your_GUID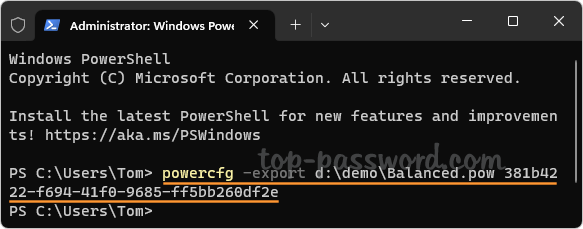
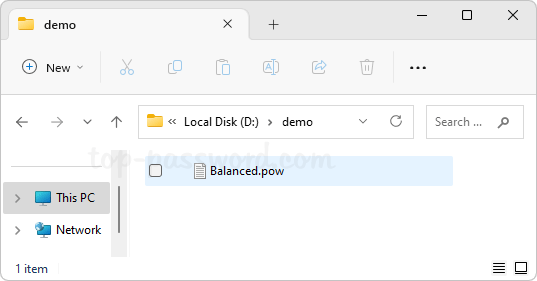
- Open File Explorer and browse to the location where your .pow file is stored. It’s actually a binary registry file which saves all your power scheme settings such as display, sleep, etc. You can transfer this file to other Windows PCs for restoring your power plan.
- To import a power plan, simple type the following command and hit Enter. Replace
d:\demo\Balanced.powwith the location where your .pow file is saved.powercfg -import d:\demo\Balanced.pow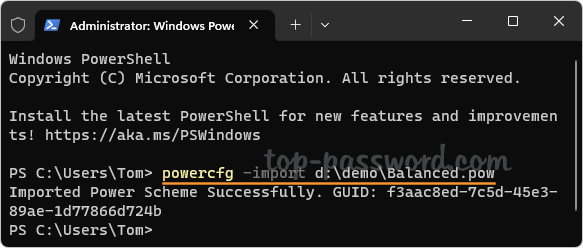
- Once you complete the above step, open Control Panel and go to Power Options, your imported power plan should appear and you can set it as active.
That’s it!