Archive for June, 2017

How to Uninstall or Reinstall Sticky Notes in Windows 10

June 14th, 2017 by Admin

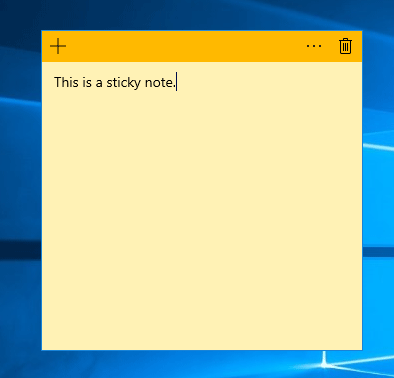
Sticky Notes not opening or stop working in Windows 10? Sticky Notes is currently not available to you? In this tutorial we’ll show you a simple way to uninstall or reinstall Microsoft Sticky Notes app in Windows 10.

windows-10-sticky-notes

Part 1: Uninstall / Remove Sticky Notes in Windows 10

  1. Press the Windows key + X shortcut to open the WinX menu. Choose either “Windows PowerShell (Admin)” or “Command Prompt (Admin)“.

    windows-powershell-admin

  2. Type or paste the following command and then press Enter key on the keyboard.
    Get-AppxPackage Microsoft.MicrosoftStickyNotes | Remove-AppxPackage

    uninstall-sticky-notes-app

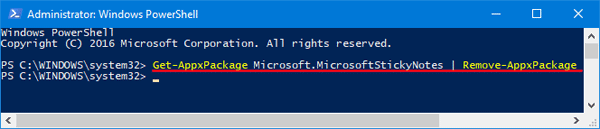
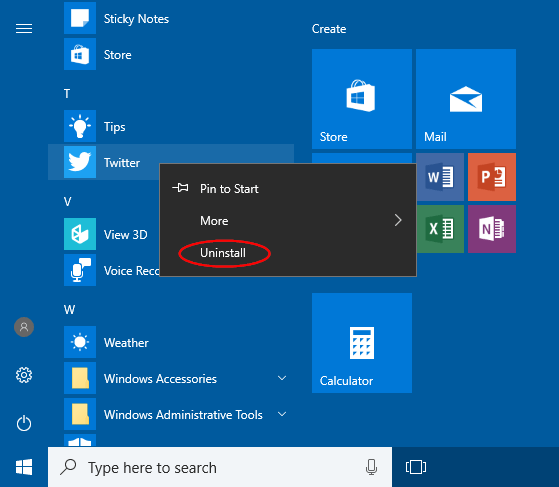
  3. After a while, Sticky Notes has been successfully uninstalled / removed from your Windows 10 computer.

Part 2: Install Sticky Notes in Windows 10

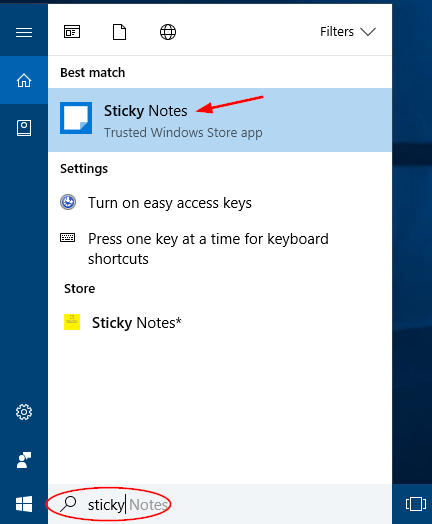
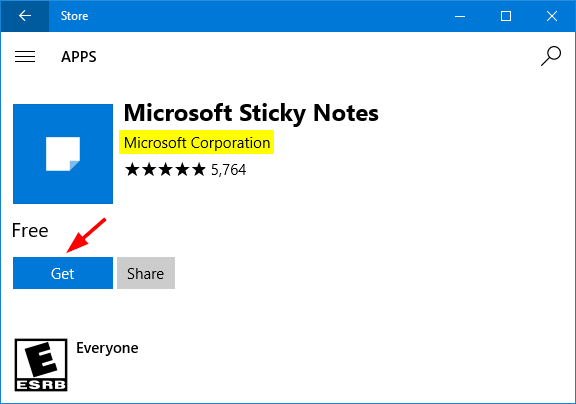
  1. Open the Windows 10 Store app. Type Sticky Notes in the search box and then click the Microsoft Sticky Notes app from the result.

    windows-10-store-app

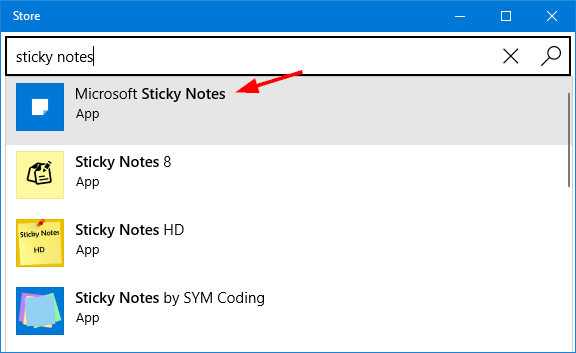
  2. Click the Get button. It will begin to download and install the latest version of Sticky Notes app on your computer.

    install-windows-10-sticky-notes

So that is how you can reinstall Sticky Notes application in Windows 10. Quickly get things working correctly.

Stop Windows 10 from Syncing Desktop Wallpaper Between Computers

June 9th, 2017 by Admin

How do I stop wallpaper syncing between devices? By default, Windows 10 will automatically sync your settings (including wallpaper, theme, Web browser settings, passwords, and other Windows settings) to all your Windows devices where you log in with the same Microsoft account. If you’d rather have a different wallpaper on every computer, you can selectively disable theme syncing in Windows 10.

How to Stop Windows 10 from Syncing Desktop Wallpaper Between Computers?

  1. Press the Windows logo key + I keyboard shortcut to open up the Settings app, and then click Accounts.

    accounts-settings

  2. Click the Sync your settings tab on the left side to view all of the sync settings. Under the Individual sync settings, turn off the Theme option.

    windows-10-sync-settings

  3. You will then need to repeat this process on other Windows 10 computers that you sign in with the same Microsoft account, otherwise syncing will still happen in one direction.
  4. After this, when you change the wallpaper or window color on one machine, the others shouldn’t be affected. That’s it!

2 Ways to Prevent Changing Desktop Background in Windows 10

June 8th, 2017 by Admin

Need to lock down the desktop wallpaper on your computer to stop kids from changing it? In this tutorial, we’ll walk you through the steps to prevent users from changing the current desktop background using the Local Group Policy Editor and Registry Editor.

Method 1: Prevent Changing Desktop Background in Windows 10 Using Group Policy

  1. Open the Local Group Policy Editor and navigate to:
    User Configuration -> Administrative Templates -> Control Panel -> Personalization

    prevent-changing-desktop-background

    Double-click the Prevent changing desktop background policy on the right side.

  2. Check the Enabled radio box, click Apply and OK.

    stop-changing-desktop-background

  3. The policy settings will apply immediately. Now when you try to change the desktop wallpaper by going to Settings -> Personalization -> Background, you’ll see a message that says “Some settings are managed by your organization“, and the options are greyed out.

Method 2: Prevent Changing Desktop Background in Windows 10 Using Registry Editor

  1. Open the Registry Editor and browse to the following key:
    HKEY_CURRENT_USER\Software\Microsoft\Windows\CurrentVersion\Policies

    policies-new-subkey

    Right-click the Policies key on the left side, select New -> Key. Name it ActiveDesktop.

  2. With the new ActiveDesktop key selected, right-click any empty space on the right side, select New -> DWORD (32-bit) Value. Name the new DWORD NoChangingWallPaper and set its value to 1.

    NoChangingWallPaper

  3. Reboot your computer for the changes to take effect. Your desktop background is now protected and anyone can not tamper it. When you right-click on a image and select “Set as desktop background” from context menu, nothing will happen.

Alternatively, you can also set a default desktop background in Windows 10 to prevent users from changing the desktop wallpaper image.

Set a Default Background Wallpaper for Windows 10 Desktop

June 8th, 2017 by Admin

Need to set a default wallpaper for all users on a computer? In this tutorial we’ll show you use group policy to set the default desktop wallpaper background in Windows 10. This will also prevent users from changing the background wallpaper.

Method 1: Set Default Background Wallpaper for Windows 10 Desktop Using Group Policy

  1. Use the Windows key + R keyboard shortcut to open the Run command. Type gpedit.msc and press Enter.

    gpedit

  2. In Local Group Policy Editor, browse to User Configuration -> Administrative Templates -> Desktop -> Desktop, and then double-click the Desktop Wallpaper policy on the right side.

    desktop-wallpaper-policy

  3. Select the Enabled option, and then type the path of the image you want to set as a default background. Click Apply and OK.

    desktop-wallpaper-gpo

  4. You have to log off and login once to see the changed desktop wallpaper.

Method 2: Set Default Background Wallpaper for Windows 10 Desktop Using Registry Editor

  1. Use the Windows key + R keyboard shortcut to open the Run command. Type regedit and press Enter.

    regedit

  2. In the Registry Editor, browse to the following key:
    HKEY_CURRENT_USER\Software\Microsoft\Windows\CurrentVersion\Policies

    policies-new-subkey

    Right-click the Policies key on the left side, select New -> Key. Name it System.

  3. While the newly-created System key is selected, right-click any empty space on the right side, select New -> String Value. Name the string Wallpaper and set its value to the path for the default wallpaper you want to use: For example, C:\defaultwallpaper.jpg.

    set-desktop-wallpaper-registry

  4. Close Registry Editor. You’ll need to restart your computer to see the new default wallpaper.

Quick Ways to Open Sticky Notes App in Windows 10

June 7th, 2017 by Admin

Sticky Notes is a built-in app that has existed in Windows for about a decade. With Windows 10 Anniversary Update, Sticky Notes is transformed into a shiny, new Windows Store app, and you can’t open it any longer by pressing WIN + R keys then typing StikyNot. In this tutorial we’ll show you the quickest ways to open Sticky Notes app in Windows 10.

windows-10-sticky-notes

Method 1: Open Sticky Notes in Windows 10 Using Cortana Search

Click the Cortana Search box on the taskbar, and then type sticky.

search-sticky-notes-in-cortana

Next click Sticky Notes from the search result to launch the app.

Method 2: Open Sticky Notes in Windows 10 Using Start Menu

In Windows 10, the Sticky Notes app is no longer available in the Accessories section of Start Menu, but you can still find it in the Start Menu. Go to the Start Menu and click All apps, you can find it under “S” in the Start Menu.

sticky-notes-in-start-menu

Method 3: Pin Sticky Notes Shortcut to Taskbar for Quick Access

If you need to open or use Sticky Notes app frequently, you can pin its shortcut to your taskbar. Just type sticky in Cortana’s search box. Right-click on the Sticky Notes app in the result, and then choose “Pin to taskbar“.

pin-sticky-notes-to-taskbar

That’s it!

2 Ways to Prevent Uninstalling Apps from Windows 10 Start Menu

June 5th, 2017 by Admin

Windows 10 Start Menu allows you to easily uninstall app by right-clicking on it and selecting Uninstall. While this is really convenient, you might want to disable this feature and stop others from uninstalling apps on your computer. In this tutorial we’ll show you how to use group policy or registry trick to prevent uninstalling apps from both Start Menu and Settings in Windows 10.

uninstall-apps-from-windows-10-start

Method 1: Prevent Uninstalling Apps from Windows 10 Start Menu Using Group Policy

  1. Press the Windows Key + R keyboard shortcut to open the Run dialog. Type gpedit.msc and hit Enter.

    gpedit

  2. When the Local Group Policy Editor window appears, browse to the following path in the left sidebar:
    User Configuration > Administrative Template > Start Menu and Taskbar

    prevent-users-from-uninstalling-apps

    Double-click the Prevent users from uninstalling applications from Start policy on the right.

  3. Select Enabled and then click OK.

    block-users-from-uninstall-apps

  4. Reboot your computer for the policy to take effect. When you right-click on an app in the Start menu, you shouldn’t find the uninstall option now. If you dig into the Settings -> Apps & features, then select any app and you’ll see the “Uninstall” option is also grayed out.

    prevent-uninstall-apps-from-windows-10-settings

Method 2: Prevent Uninstalling Apps from Windows 10 Start Menu Using Registry Editor

Since Local Group Policy Editor isn’t available in the Home edition of Windows 10, you may need to modify the registry to stop users from uninstalling apps. Follow these steps:

  1. Press Windows Key + R keyboard shortcut to open the Run dialog. Type regedit and hit Enter to open Registry Editor.

    regedit

  2. Navigate to the following registry location:
    HKEY_CURRENT_USER\Software\Policies\Microsoft\Windows

    Right-click the Windows key in the left pane, and then select New -> Key and name it Explorer.

    create-explorer-registry-key

  3. Right-click the newly-created Explorer key, and then select New -> DWORD (32-bit) Value. Name it NoUninstallFromStart and change its value from 0 to 1.

    NoUninstallFromStart

  4. Close Registry Editor and then reboot your computer. When you log back in to Windows 10, you should no longer see the “Uninstall” option in the context menu when right-clicking an app from the Start menu.