If you’re running Windows 7/Vista/XP, just press F8 key while your computer is booting up and you can boot into Safe Mode easily. However, the F8 key doesn’t work in Windows 10 and 8. In my previous post I’ve covered another way to boot Windows 8 into Safe Mode, but the method is still not as convenient as F8 key. In this tutorial we’ll show you how to get F8 key to work again for Safe Mode in Windows 10 and 8.
How to Get F8 Key to Work Again for Safe Mode in Windows 10 / 8?
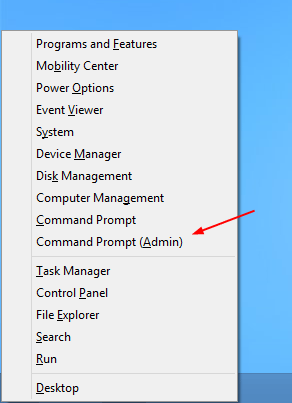
After getting into Windows 10 / 8, press Windows + X key combinations to bring up the Power User Menu. Click on Command Prompt (Admin) option. It will launch a command prompt which runs with administrator privileges.
To get that classic F8 key to work again we need to restore the legacy boot menu policy. When the command prompt opens, run the following command:
bcdedit /set {default} bootmenupolicy legacy
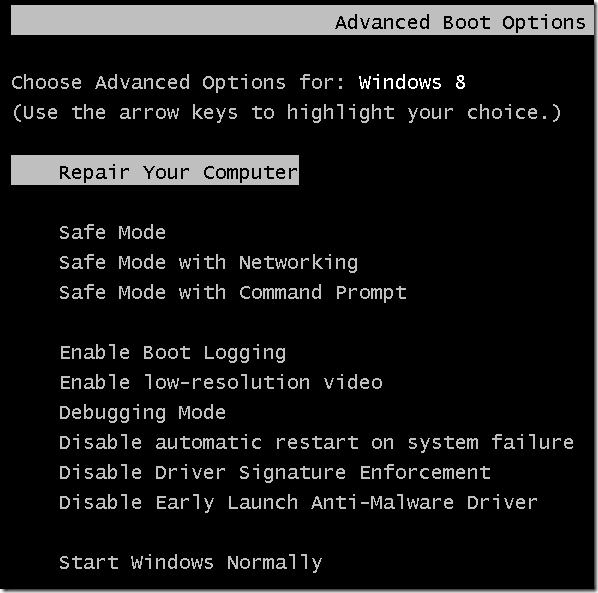
That’s all there is to it. Now restart your computer. Press F8 key during Windows startup, you will see the Advanced Boot Options menu from which you can select Safe Mode.
If you want to disable the legacy boot menu again, simply run this command at the Command Prompt:
bcdedit /set {default} bootmenupolicy standard