Did you mess up the Windows registry and need to restore it to a previous state? Problems with the Windows registry can cause your computer to freeze, slow down, restart randomly, or be unusable. Luckily, since Windows 7, the system will automatically make a backup of your registry files after a successful boot. Here we’ll explain how to restore your Windows registry to a previous state, in order to fix / repair a corrupted registry.
How to Restore Windows Registry to A Previous State?
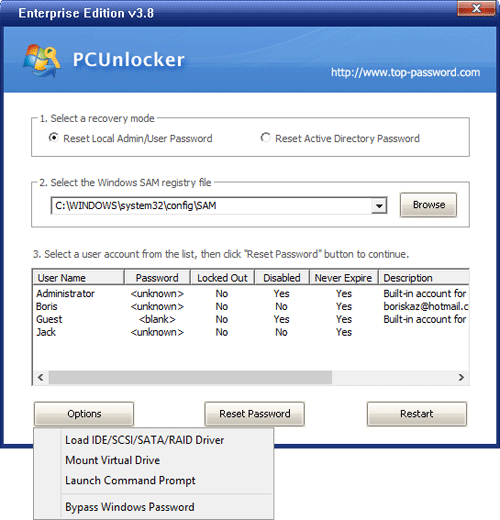
As the registry files are inaccessible while Windows is running, you need to boot your PC from a boot media for replacing the registry. Here we’ll use the PCUnlocker utilty, which comes as a self-extracting zip file containing a bootable CD image. Download the program and unzip it locally. Burn the CD image to a blank CD with your favorite burning program or ISO2Disc.

Boot your computer from the newly burned CD. After booting from the CD, you’ll get to the PCUnlocker program. Despite this program is mainly designed for resetting lost Windows password, it can also be used to backup the files on your computer, including the registry. Click on the “Option” button and select “Launch Command Prompt”.
Before restoring, I highly recommend you to take a backup of your current registry files, by typing these commands, one by one, and press Enter after each (Assuming C drive is the driver letter of your Windows installation).
mkdir c:\regbackup

copy c:\windows\system32\config c:\regbackup
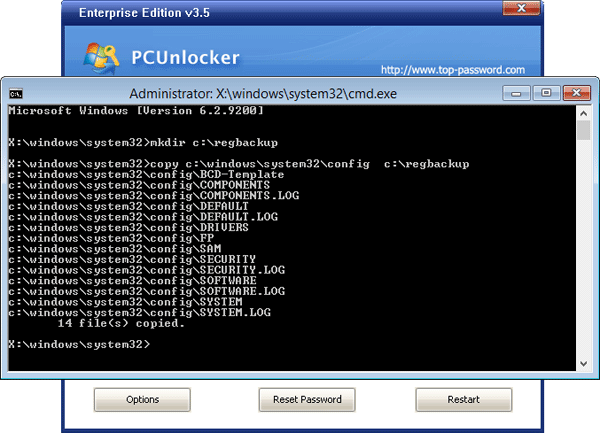
These commands will create a backup folder and copy all your current registry files to that folder.
In Windows 10, 8 and 7, there is a folder called RegBack on your system partition which contains the most recent copy of registry files that were backed up automatically by Windows. Here we need to copy the registry files from C:\Windows\System32\config\RegBack to C:\Windows\System32\config. To do so type in this command:
copy c:\windows\system32\config\RegBack c:\windows\system32\config
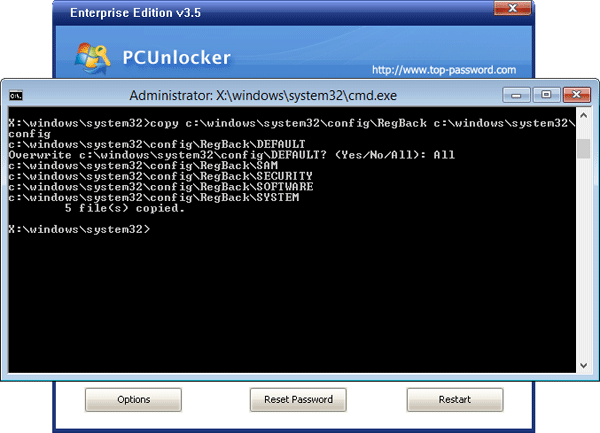
Now you’ve successfully restored your Windows registry files to last known good state. Remove the CD and restart your computer to see if you are able to boot into Windows properly.