A screenshot is an image that captures what appears on your screen. In this tutorial we’ll show you 4 simple ways to take quick screenshots in Windows 10, without using any third-party software.
Method 1: Take screenshot of whole screen with [PrtScn] key (copy to clipboard)
This method is the easiest and most popular way to capture your whole screen. It works in all versions of Windows, including Windows 10/8/7/Vista/XP.
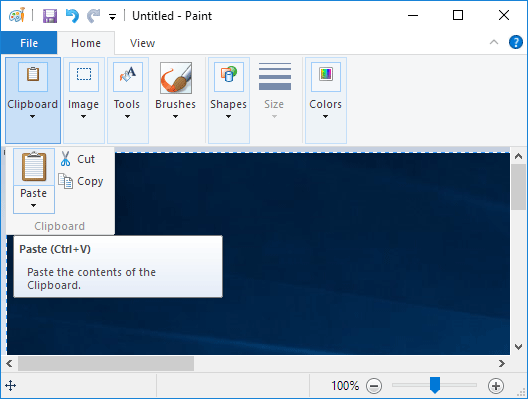
Just press the PrntScr key on your keyboard, which creates a screenshot of the whole screen and saves it to the clipboard. Want to save it in file? It will take some extra clicks. Open an image editing program like Paint and hit Ctrl + V to paste the image from the clipboard, you can then save it as a file.
Method 2: Take screenshot of whole screen with [Win] + [PrtScn] (as a File)
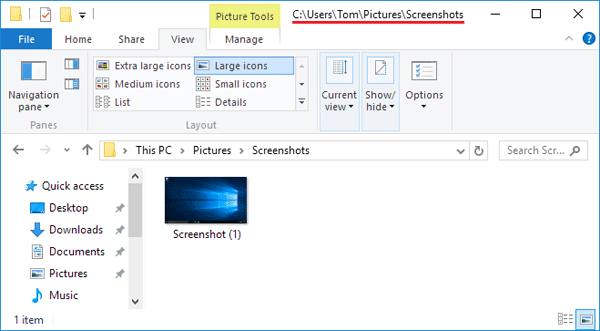
Simultaneously press the Windows logo Key + PrtScrn on your keyboard. This will take a screenshot of the whole screen and save the image directly into the User’s Pictures folder (e.g. C:\Users\Tom\Pictures\Screenshots), in .png format. No need to open Paint and paste. A real time saver for computer novices!
Method 3: Take screenshot of active window with [Alt] + [PrntScr] (copy to clipboard)
Instead of capturing the whole desktop and all opened apps, this method captures only the currently active window.
Click on the title bar of the window that you want to capture. Press Alt + PrtScn keys together. A screenshot of your currently active window will be copied to the clipboard. Next paste it into your favorite image editing program for saving or editing.
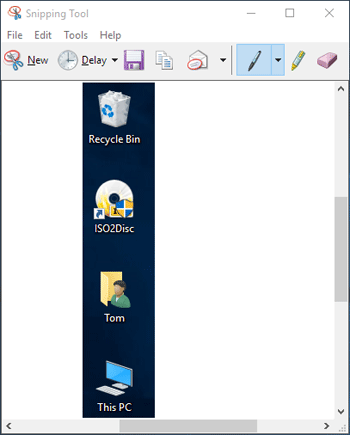
Method 4: Take screenshot with built-in Snipping Tool
Snipping Tool was introduced in Windows 7, and available in Widows 10 as well. It is very handy for capturing specific areas of your screen. Follow these steps and you can take all kinds of screenshots like a pro:
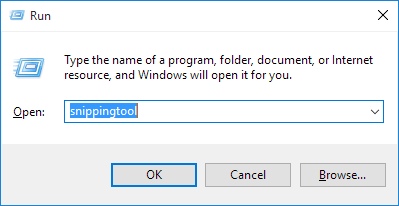
Press the Windows logo key + R to open the Run box. Type snippingtool and hit Enter. If you’re running Windows 7/Vista, you can go to the Start Menu, choose Accessories and then click Snipping Tool.
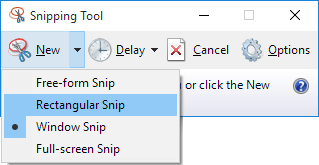
When the Snipping Tool window opens, click on New button and you can choose from one of four types of snip:
- Free-form Snip – let you draw and captures any irregular part of the screen
- Rectangular Snip – allow you to drag the cursor around an object to form a rectangle
- Window Snip – let you select an open window, such as a browser window or dialog box and let you capture it
- Full-screen snip – enable you to capture the entire screen, like the old-fashioned PrntScr key.
Once you’ve captured your screenshot, it opens in the Snipping Tool editing window. The Snipping Tool editor allows you to edit and annotate the screenshot.