If you’ve upgraded to Windows 8, you’ll noticed that the border size of window is fairly thick, which doesn’t look good. If you’re one of those users who want to customize the window border size, then you hit the right place. In this article we’ll show you how to change the window border size in Windows 8 using a quick registry tweak.
How to Change the Window Border Size in Windows 8?
First, we have to open the Windows Registry Editor. Press Windows + R key combination to bring up the Run box, type regedit and press Enter.
Navigate to the location: HKEY_CURRENT_USER\Control Panel\Desktop\WindowMetrics. In the right panel, you can easily find the values here that are related to the border width are BorderWidth and PaddedBorderWidth. The default value of BorderWidth is -15 and that of PaddedBorderWidth is -60. Change them to higher values to reduce the border width.
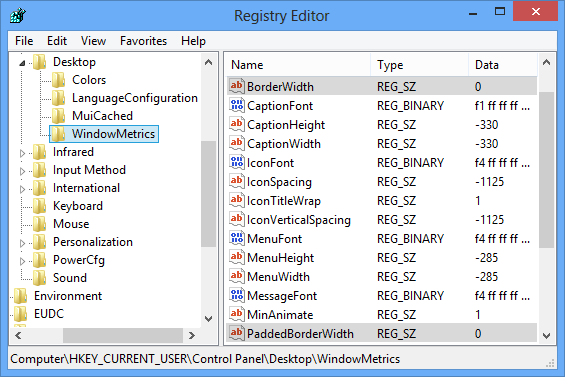
To make your window borders as small as possible, double-click BorderWidth and set it to 0, and then double-click PaddedBoderWidth and set it to 0.
That’s it. Now you have successfully changed the window border size in Windows 8. Restart your system and see the effect. To make your window look more attractive, you can also change the color of the window borders. To do so, right-click on your desktop and select the Personalize from the context menu, then click on the Color option which allows you to change the border color to whatever you like.