Windows Firewall allows you to create custom rules for allowing or blocking an app from accessing the network. If you don’t want to lose all your current firewall settings after reinstalling, or need to migrate the firewall exceptions to a new PC, it’s a good idea to make a backup of your firewall rules. In this tutorial we’ll explain how to export and import firewall policy in Windows 10.
Method 1: Using Windows Firewall with Advanced Security
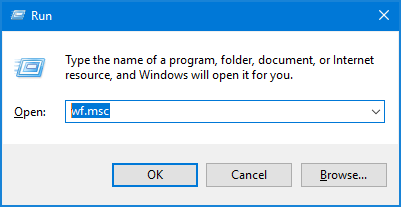
Just press the Windows key + R shortcut, then type wf.msc in the Run command box and press Enter.
This will open the Windows Firewall with Advanced Security MMC snap-in. Under the Actions pane in the right side, you can click the corresponding link to export policy, import policy, or restore default policy.
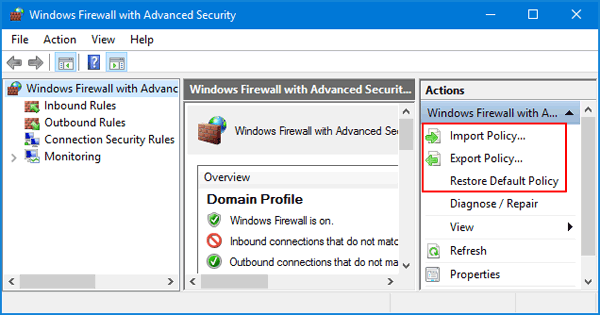
Just follow the step-by-step GUI wizard to export/import your firewall policy. The firewall policy will be exported to a single binary file with the .wfw extension.
Method 2: Using Command Prompt
If you prefer the command line, you can also backup or restore Windows Firewall rules using the netsh command. Here’s how:
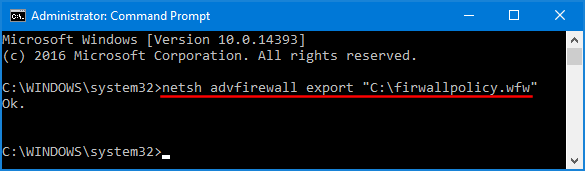
Open the Command Prompt in administrator mode. Type the following command and press Enter. This will export all your firewall policies to a file named firewallpolicy.wfw in the root path of C:\ drive.
netsh advfirewall export "C:\firwallpolicy.wfw"
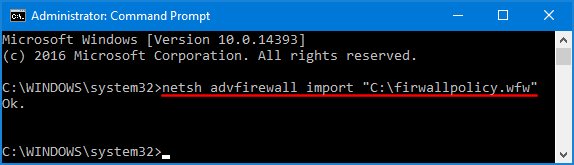
To import the firewall policy, just paste the following command and press Enter.
netsh advfirewall import "C:\firwallpolicy.wfw"
If you want to restore the firewall policy to the defaults, just type:
netsh advfirewall reset