The system locale allows you to use the specified language for non-Unicode programs. If your Windows system uses a default en-US locale, the Japanese text in a game won’t display correctly. In this tutorial we’ll show you how to change system locale in Windows 10, using Control Panel or Command Prompt.
Note: You must log into Windows 10 as administrator to set a different system locale. Changing system locale doesn’t affect the language in menus & dialog boxes for Windows or other programs that do use Unicode.
Method 1: Change System Locale in Windows 10 Using Control Panel
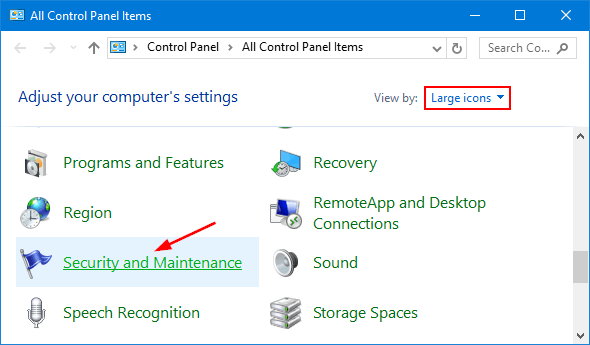
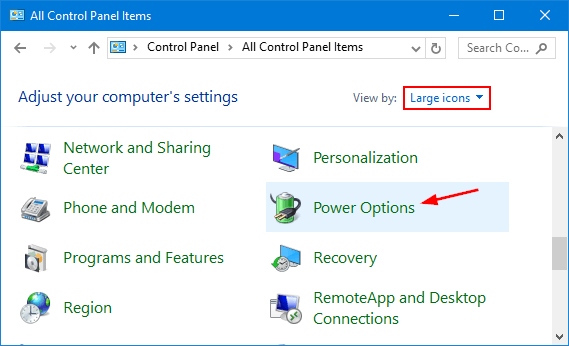
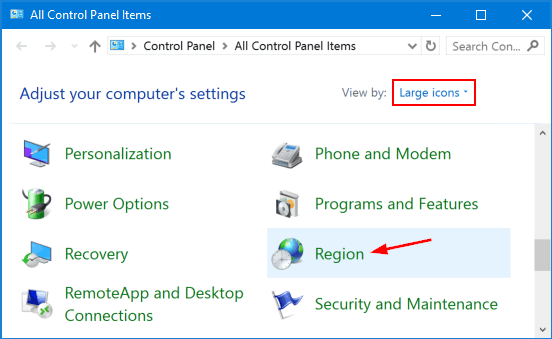
- Open the Control Panel in Large icons view, click Region.
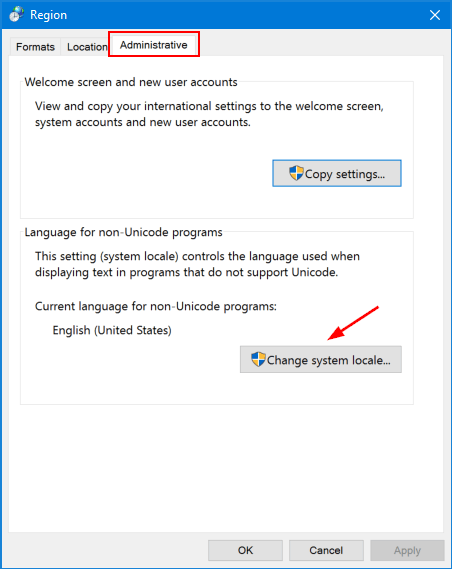
- In the Region dialog that opens, select the Administrative tab and then click Change system locale.
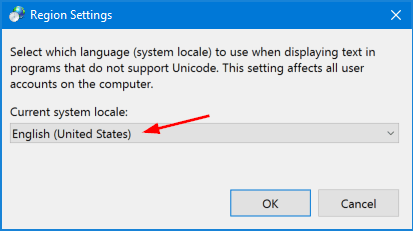
- Select the desired language from the Current system locale drop-down list, and click OK.
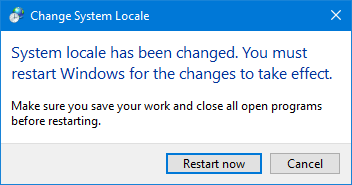
- Restart your computer for the changes to take effect.
Method 2: Change System Locale in Windows 10 Using Command Prompt
-
Open Notepad (or any other text editor), then copy and paste the following text into it. Replace en-US with the language tag for your desired system locale. To see all supported language tags in Windows, please refer to this article.
<gs:GlobalizationServices xmlns:gs="urn:longhornGlobalizationUnattend">

<gs:UserList>

<gs:User UserID="Current" CopySettingsToDefaultUserAcct="true" CopySettingsToSystemAcct="true"/>

</gs:UserList>

<!-- system locale --><gs:SystemLocale Name="en-US" />

</gs:GlobalizationServices>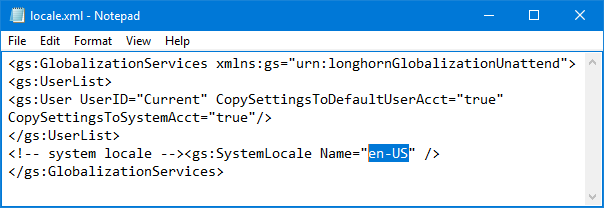
- After editing, save the file as a .xml file. Let’s say D:\locale.xml.
- Open the Command Prompt in administrator mode. Copy and paste the following command line and press Enter.
control.exe intl.cpl,, /f:"D:\locale.xml"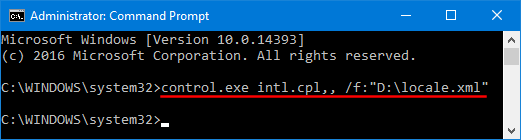
- Reboot your computer to apply the new system locale settings.