Automatic Maintenance is a built-in feature in Windows 10/8 that is turned on by default. When your computer is idle, the system will automatically run its maintenance tasks (windows updates, security scanning, disk checking, etc) at the background.
Just open the Control Panel in Large icons view, click Security and Maintenance.
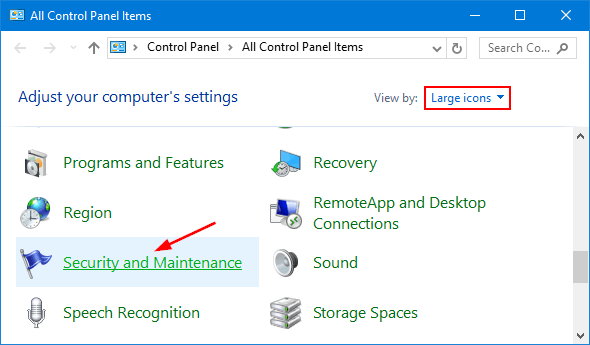
You can then see if automatic maintenance is in progress. From there you can see a link for stopping the automatic maintenance.

If you want to prevent Windows 10 from automatically running the maintenance next time, you can disable it using the following registry hack.
How to Disable Automatic Maintenance in Windows 10?
- Press the Windows Key + R keys simultaneously, then type regedit in Run dialog box and press Enter.
- When the Registry Editor window appears, navigate to the following key:
HKEY_LOCAL_MACHINE\SOFTWARE\Microsoft\Windows NT\CurrentVersion\Schedule\Maintenance - In the left pane, right-click on the Maintenance key, and then select New -> DWORD (32-bit) Value.
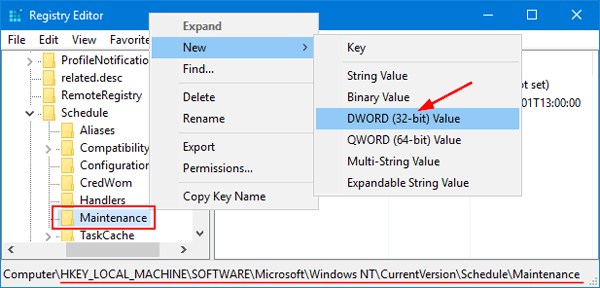
- Name the new value MaintenanceDisabled.
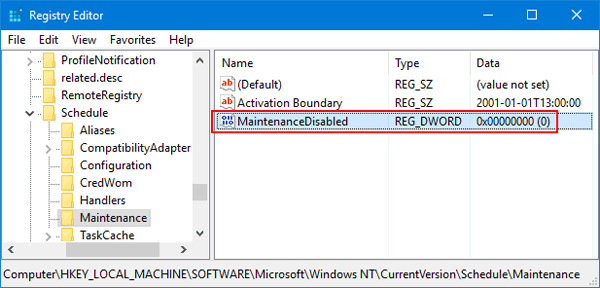
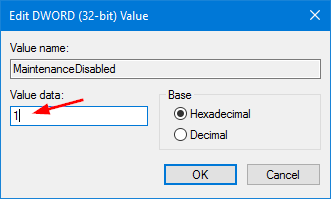
- Next, double-click on the new value to modify. In the Value data field, type 1 if you want to disable automatic maintenance (If you want to enable automatic maintenance again, just set its value to 0.) and click OK.
- Close Registry Editor and reboot your computer. Now you’ve successfully disabled automatic maintenance in Windows 10. That’s it!