How can I disable the Settings button in Windows 10 Start Menu? Windows 10 allows you to customize the left section of Start Menu, by adding or removing the folders such as Settings, File Explorer, Documents, Download, Music, Picture, Video etc.
By default, File Explorer and Settings are the only folders listed there. In this tutorial we’ll show you how to remove the ‘Settings’ from Windows 10 Start Menu.
How to Remove ‘Settings’ from Windows 10 Start Menu?
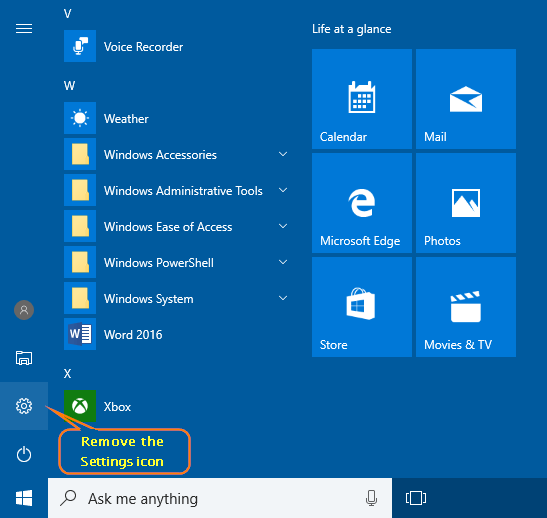
- Open the Start Menu and then select Settings. If the Settings icon is missing from the Start Menu, you can press the Windows logo + I keys simultaneously to open the Settings app.
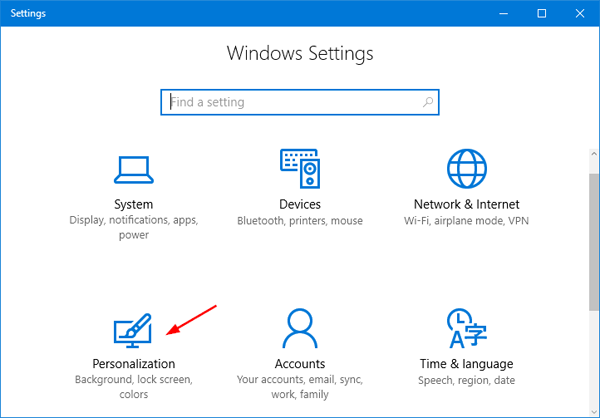
- Once the Setting app is launched, click Personalization.
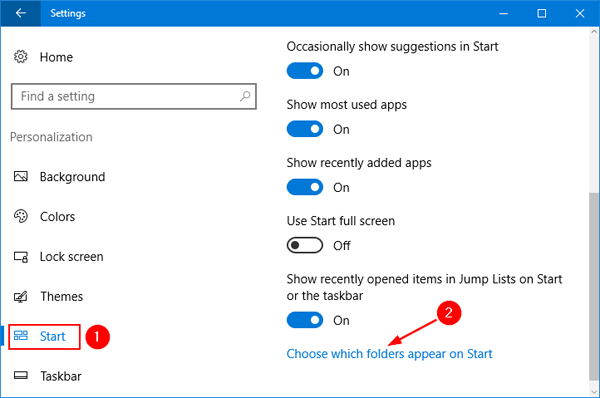
- Click Start on the left side. On the right side, scroll down to the bottom and click Choose which folders appear on Start.
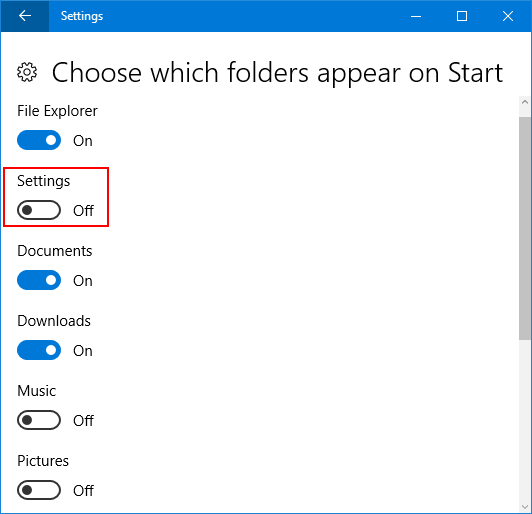
- Choose whatever folders you want to appear on the Start Menu. To remove Settings from Windows 10 Start Menu, toggle the “Settings” option to Off and you’re done.
Now click the Start button, you’ll see the Settings icon disappeared from Windows 10 Start Menu. But you can still access the Settings app by pressing the Windows logo + I shortcut keys. If you want to bring the Settings icon back to the Start Menu, just repeat the steps above and toggle the “Settings” option to On.