When you download an app from Windows Store, it just downloads the app without asking where you want to install it. By default, Windows 10 stores all apps in C:\Users\user_name\AppData\Local\Packages. If you find yourself always on the verge of running out of disk space on system(C:), you can change the default location where Windows 10 saves and installs new apps.
How to Change Default Location Where New Apps will Install?
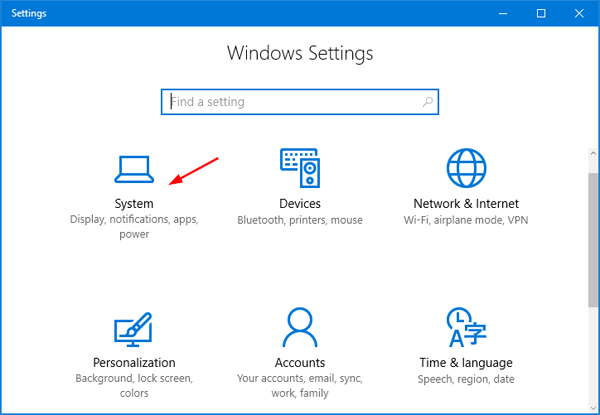
- Open the Settings app. You can either click the Settings icon from Windows 10 Start Menu, or press the Windows key + I keyboard shortcut.

- Click on the System option.
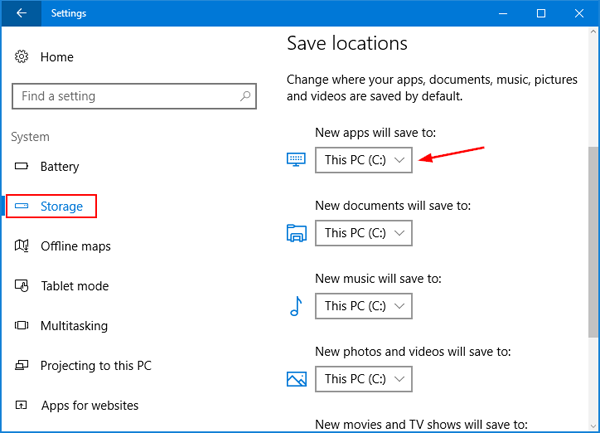
- On the left-side, click Storage. On the right side under Save locations, select the drive you want New apps will save to and click Apply.
- Close the Settings app and restart your system. Now whenever you install a new app from Windows 10 Store, it will be installed in a newly-created folder named “WindowsApps” under the root path of your new default location.