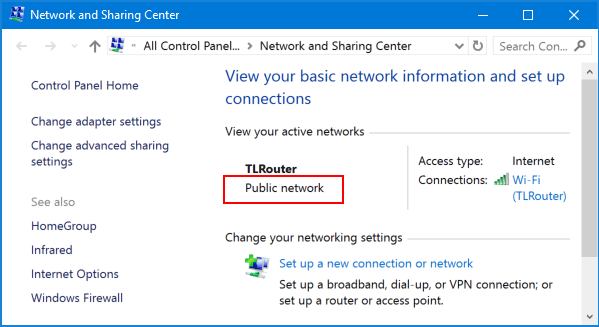
The first time you connect to a network, you’ll be prompted to turn on sharing and connect to devices. Turn on this settings will set your network location to private. A private network makes your computer discoverable to other PCs. If you don’t want to share musics, pictures, videos or even printers with other PCs on the network, you should set the network type to public. In this tutorial we’ll show you 3 ways to change network location to public or private in Windows 10.
Method 1: Change Windows 10 Network Location Using Group Policy
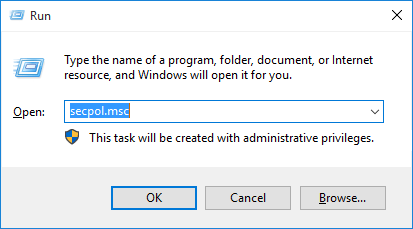
- Press the Windows key + R to open the Run box. Type secpol.msc and press Enter.
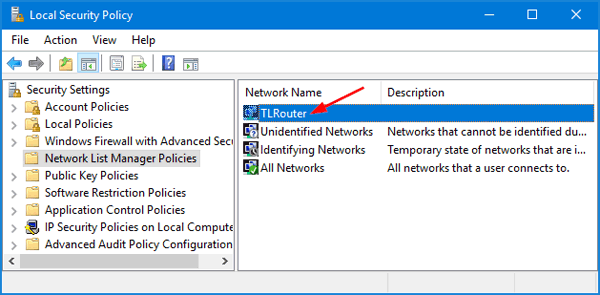
- When the Local Security Policy window opens, click Network List Manager Policies in the left pane. Double-click on the name of the current network connection in the right pane.
- Click the Network Location tab at the top. Under the Location type, you can choose either Private or Public.
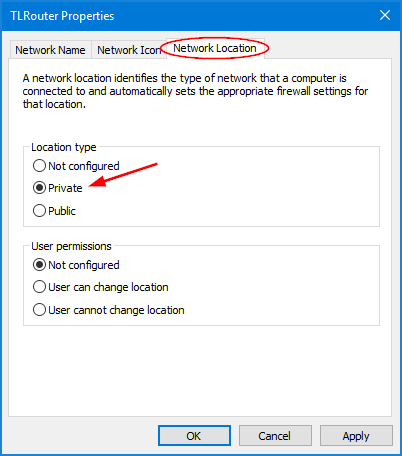
- Click Apply and then OK to save your change.
Method 2: Change Windows 10 Network Location Using Registry Editor
- Press the Windows key + R to open the Run box. Type regedit and press Enter.
- In the left pane of Registry Editor, navigate to the key:
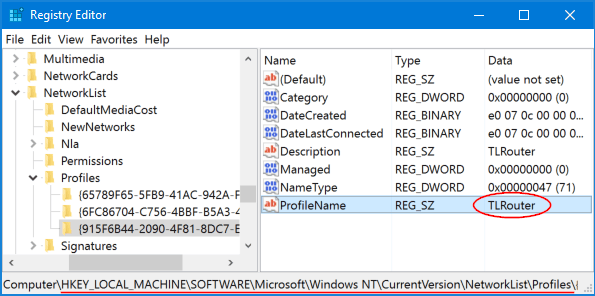
HKEY_LOCAL_MACHINE\SOFTWARE\Microsoft\Windows NT\CurrentVersion\NetworkList\Profiles - Expand the Profiles key in the left pane. Click on each subkey and have a look if the ProfileName matches the name of your current network connection.
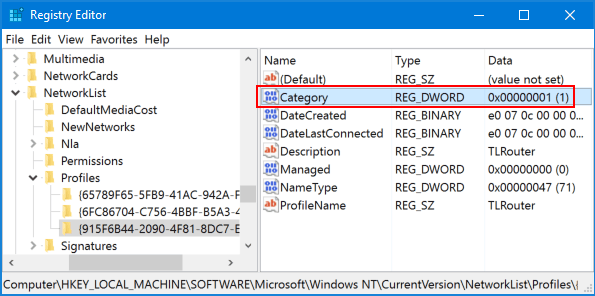
- If you have found the right subkey, double-click the Category in the right pane and edit the DWORD to the value you want. Public: 0, Private: 1, Domain: 2.
- Reboot your computer to apply the new network location.
Method 3: Change Windows 10 Network Location Using PowerShell
- Open PowerShell in Administrator mode.
- Type or paste the following command in the PowerShell and press Enter. It will list the name and properties of your active network connection. In my example, the network name is TLRouter.
Get-NetConnectionProfile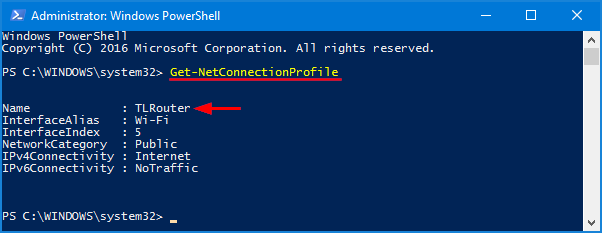
- Type the following command and press Enter to change your network location to private. Replace TLRouter with your network name.
Set-NetConnectionProfile -Name "TLRouter" -NetworkCategory Private
If you want to change the network location to public, type this command instead:
Set-NetConnectionProfile -Name "TLRouter" -NetworkCategory Public