My password has expired and now I am completely locked out of my computer? When you log into Windows, you might receive a message that says “Your password has expired and must be changed“. What to do if you forgot your old password or you get the access denied error when you try to change the password? In this tutorial we’ll show you 5 ways to set password to never expired for Windows local account.

Method 1: Set Windows Password to Never Expire Using Computer Management
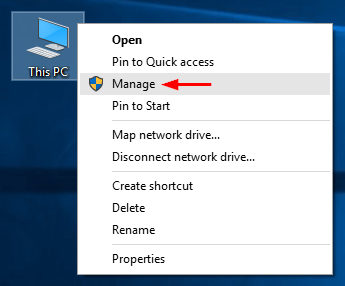
Right-click the My Computer (This PC) icon on your desktop and then select Management from the pop-up menu.
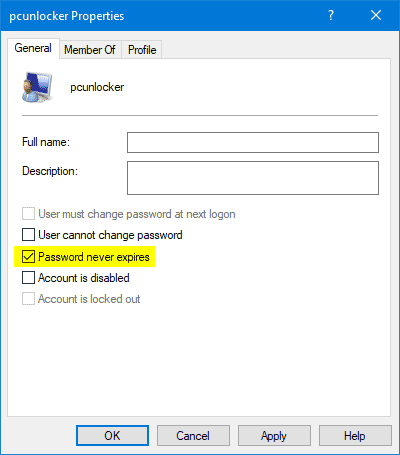
When the Computer Management console launches, go to System Tools -> Local Users and Groups -> Users. Right-click on the user with an expired password in the middle pane and select Properties.
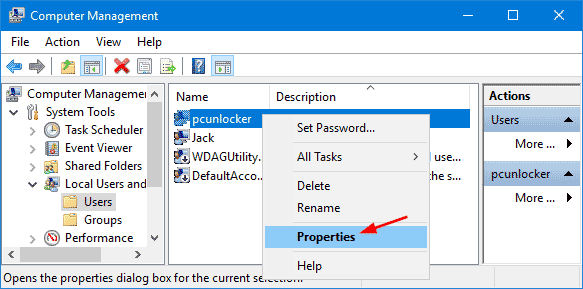
Check the “Password never expires” box and click OK.
When done, close the Computer Management and you can determine when the password of your Windows account will expire. Open a Command Prompt and type:
net user account_name
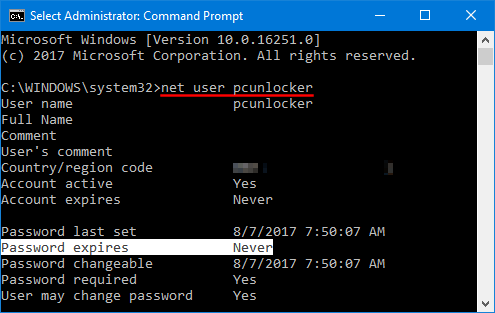
The output of this command will give you a lot of information about account. Just look for the line beginning with “Password expires” and you can see the password expiration date. In our example, it showed that the password of my account “pcunlocker” will never expire.
Method 2: Set Windows Password to Never Expire from Command Line
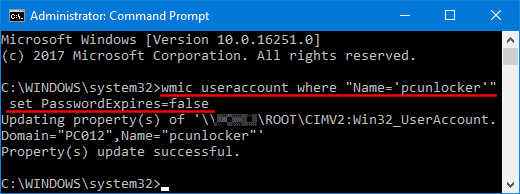
Open the Command Prompt as Administrator. Type the following command and press Enter. Replace “pcunlocker” with the name of your local account:
wmic useraccount where "Name='pcunlocker'" set PasswordExpires=false
Method 3: Set Windows Password to Never Expire Using PowerShell
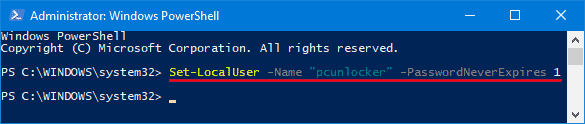
Open the PowerShell as Administrator. You can use the Set-LocalUser cmdlet to modify a local user account and set its password to never expire:
Set-LocalUser -Name "pcunlocker" -PasswordNeverExpires 1
Method 4: Set Password to Never Expire for All Accounts Using Group Policy
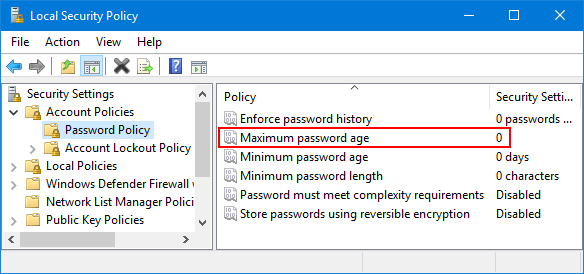
Press the WIN + R keys to open the Run command box. Type secpol.msc and press Enter to open the Local Security Policy Editor. Go to Account Policies -> Password Policy, ensure the Maximum password age is set to 0, meaning that passwords never expire.
You can also apply the password expiration policy using command line. Follow these steps:
Open the Command Prompt as Administrator. Type the following command and hit Enter.
net accounts /maxpwage:unlimited
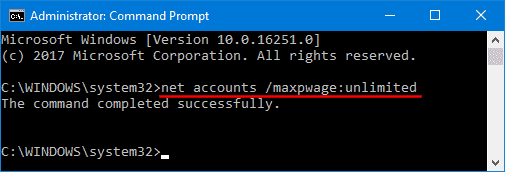
This will set password to never expire for all your Windows local accounts.
Method 5: Set Windows Password to Never Expire Using a Boot CD
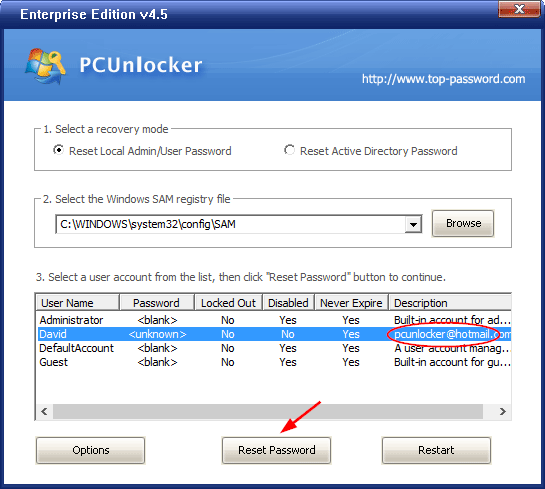
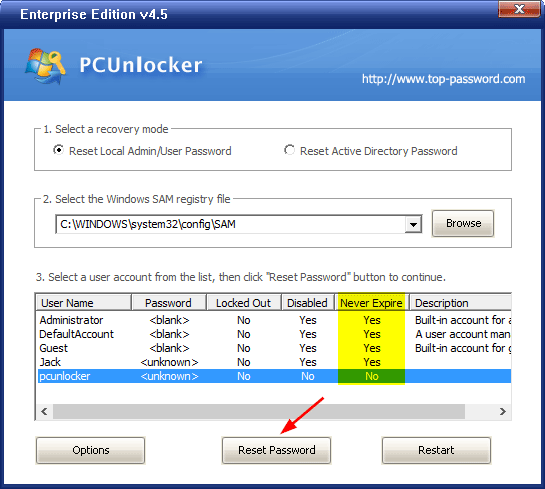
If your Windows password is expired and unable to change password on the login screen, you’re completely locked out of your computer and all of the methods above won’t work for your case. Then you have to use a password utility called PCUnlocker, which can reset your forgotten Windows password, as well as setting your password to never expire.
To start, you need to make a PCUnlocker Live CD (or USB drive) from an accessible PC. Next boot your locked computer from the CD. Select the account with an expired password and click on “Reset Password” button. The program will remove your Windows password and disable password expiration for your account.
Reboot and eject the CD, you can then log into your Windows account with no warning of user password’s about to expire. That’s it!