System Cooling Policy is missing in Windows? System Cooling Policy lets you change the cooling mode of your system. If you couldn’t see the System Cooling Policy option under the Power Options of Control Panel, you need to tweak the registry settings. In this article we’ll show you how to restore the missing System Cooling Policy option in Windows 10, 8 and 7.
Fix: System Cooling Policy Missing in Power Options
-
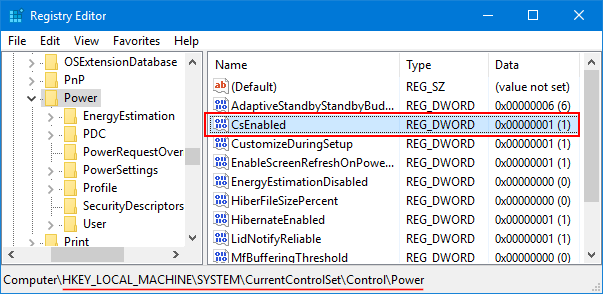
Open Notepad. Copy and paste the code below into Notepad, then save it as a .reg file.
Windows Registry Editor Version 5.00

[HKEY_LOCAL_MACHINE\SYSTEM\CurrentControlSet\Control\Power\PowerSettings\54533251-82be-4824-96c1-47b60b740d00\94D3A615-A899-4AC5-AE2B-E4D8F634367F]
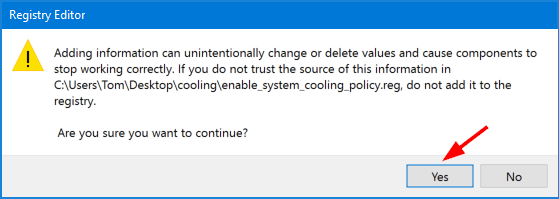
"Attributes"=dword:00000002 - Double-click on the .reg file to import the settings into the registry. Click Yes when asked to confirm.
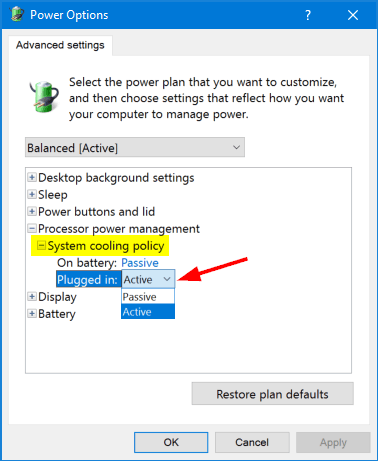
- Open the Control Panel and access the Power Options, you’ll see that the System Cooling Policy is shown under the.Processor power management node.
If you want to remove the System Cooling Policy option again, repeat the steps above to import the following registry settings.
Windows Registry Editor Version 5.00

[HKEY_LOCAL_MACHINE\SYSTEM\CurrentControlSet\Control\Power\PowerSettings\54533251-82be-4824-96c1-47b60b740d00\94D3A615-A899-4AC5-AE2B-E4D8F634367F]

"Attributes"=dword:00000001
That’s it!