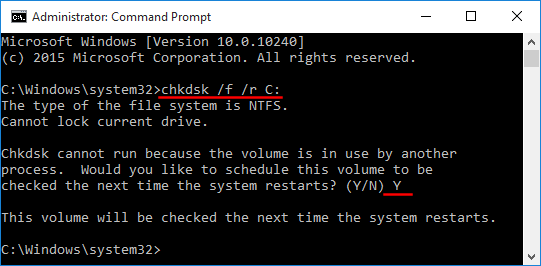
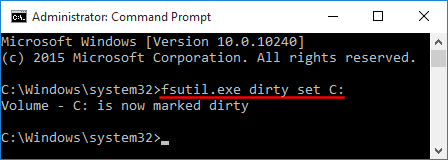
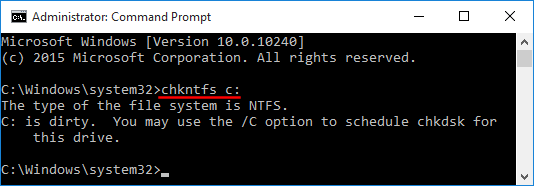
When a dirty bit is set on a volume, Windows automatically performs a disk checking the next time the computer is restarted. You can run the chkntfs command at the Command Prompt to check if a volume is dirty, but there is no way to clear the dirty bit unless you let Windows go through disk scanning at boot.
In this tutorial we’ll show you how to manually clear or set the dirty bit for a NTFS & FAT32 volume in Windows 10, 8, 7, Vista and XP. The procedure requires you to use a disk editor software such as WinHex. If you want to edit the dirty bit for a system volume currently in use, you need to use a WinPE bootable CD to boot off your PC.
How to Manually Clear or Set Dirty Bit on Windows Volume?
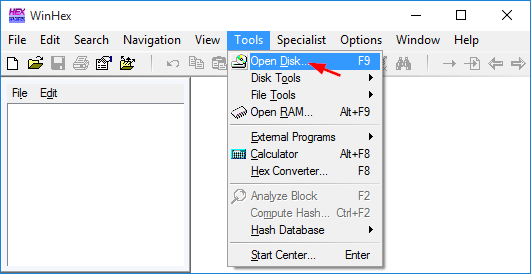
To get started, open WinHex as administrator rights. Click the Tools menu and select Open Disk.
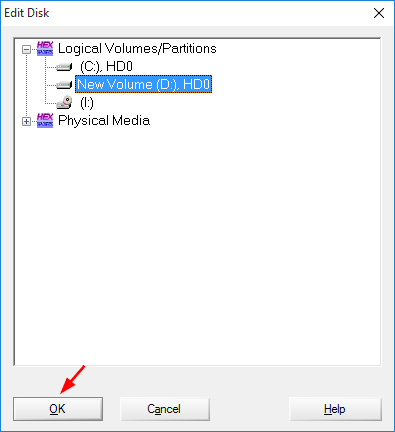
When prompted to select a drive for editing, choose the logical volume you want to edit the dirty bit on, and then click OK.
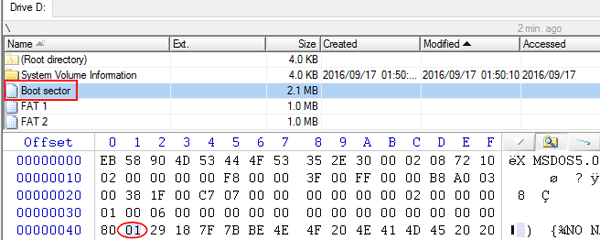
For FAT32 Volume:
Click on “Boot sector” at the directory browser. The dirty bit for FAT32 volume is located at offset 0x41. If this volume is dirty, the bit should be 01. Just change 01 to 00 and then save your changes back to disk, now you’ve successfully cleared the dirty bit.
For NTFS Volume:
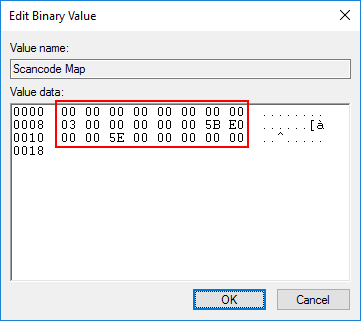
Click on $Volume at the directory browser. The offset location of the dirty bit is slightly different on every NTFS volume. To locate the dirty bit, look for a hex string of 13 bytes, beginning with 03 01, ending with 80 00 00 00 18. You should be able to find a match within the first or second sector.
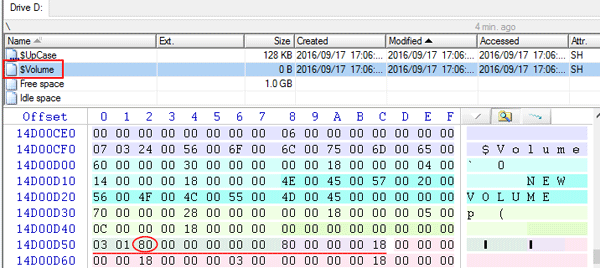
The dirty bit is the 3th byte of the hex string that I’ve circled with red line. To set a dirty flag on the drive, just change it to 01. Or change it to 00 if you want to clear the dirty flag.
When it’s done, commit the change to the disk.