Virtual hard disk (VHD / VHDX) is a disk image file format for storing the complete contents of a hard drive. In this tutorial we’ll show you how to mount and unmount VHD / VHDX file from Command Prompt and PowerShell.
Method 1: Mount and Unmount VHD/VHDX from Command Prompt
This method allows you to mount and unmount VHD/VHDX file in all versions of Windows, including Windows 10 / 8 / 7 and Windows Server.
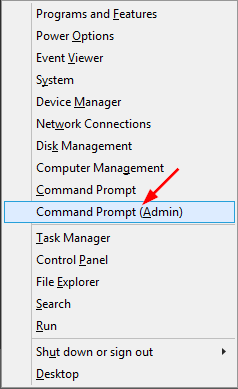
- Open the Command Prompt in Administrator mode.
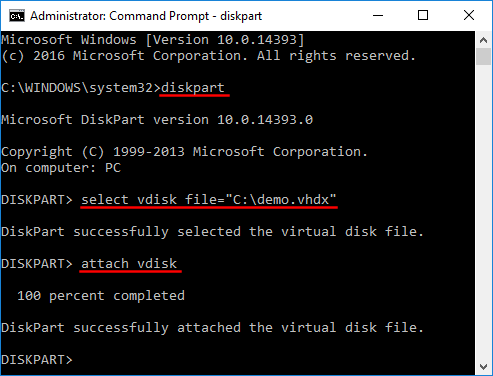
- At the Command Prompt, type diskpart and press Enter to access the command-line disk partitioning utility.
- Before mounting or unmounting virtual disk, you need to specify the location of your vhd/vhdx file. Type the following command and hit Enter.
select vdisk file="[location of vhd]" -
You can now mount or mount your VHD/VHDX file using the below commands:
- To mount VHD/VHDX file, type attach vdisk and press Enter. You can see a new virtual hard drive in your Disk Management and Windows Explorer.
- To unmount a virtual hard disk, type detach vdisk and press Enter.
- To mount VHD/VHDX file, type attach vdisk and press Enter. You can see a new virtual hard drive in your Disk Management and Windows Explorer.
Method 2: Mount and Unmount VHD/VHDX from PowerShell
In Windows Server 2016 / 2012 / 2008, you can also mount and unmount VHD/VHDX file using the PowerShell cmdlet. Here’s how:
- Open the PowerShell as Administrator.
- When the command-line window opens, you can run the Mount-VHD cmdlet to mount your vhd/vhdx file.
Mount-VHD –Path "[location of vhd]" - To unmount your virtual hard disk, just run the Dismount-VHD cmdlet instead.
Dismount-VHD –Path "[location of vhd]"
If you get the error message like “Mount-VHD is not recognized as the name of a cmdlet“, you need to add a feature named “Hyper-V Module for Windows PowerShell” to your server.