Starting with Windows 10 version 20H1, Microsoft has added a new button on the right side of the taskbar, which shows the weather and news for your area.
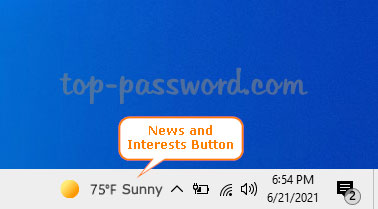
If don’t like this feature or want to save internet bandwidth, here are 3 ways to remove, hide or completely disable the “News and Interests” button in Windows 10 taskbar.
Method 1: Remove or Hide the News and Interests Button via Windows 10 Taskbar
Right-click any blank area in the taskbar and then select News and interests -> Turn off.
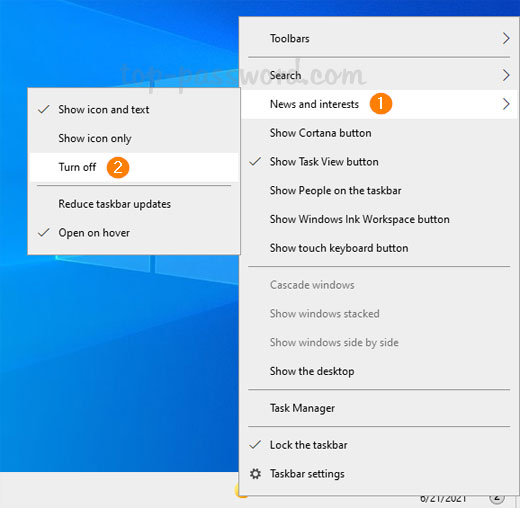
The “News and Interests” button will no longer appear on your taskbar.
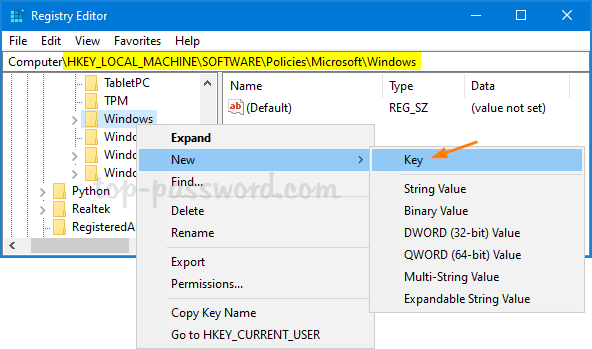
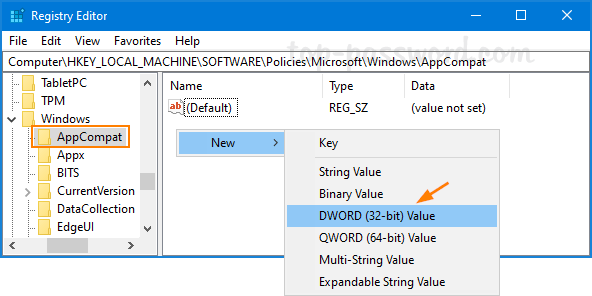
Method 2: Remove or Hide the News and Interests Button via Registry Editor
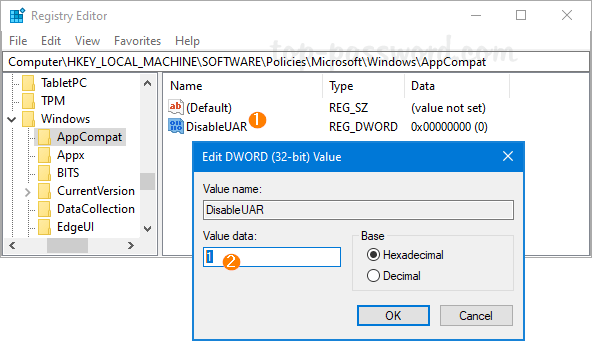
Open Registry Editor and navigate to: HKEY_CURRENT_USER\Software\Microsoft\Windows\CurrentVersion\Feeds. On the right side, double-click on ShellFeedsTaskbarViewMode to modify the value data.

Enter 2 in the Value data box and click OK.
- 0 = Show icon and text
- 1 = Show only icon
- 2 = Hide everything
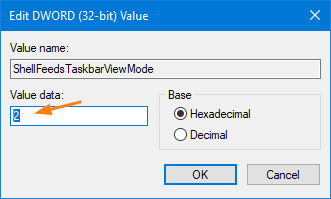
Close Registry Editor. Log off and then log back in, and the “News and Interests” button will gone.
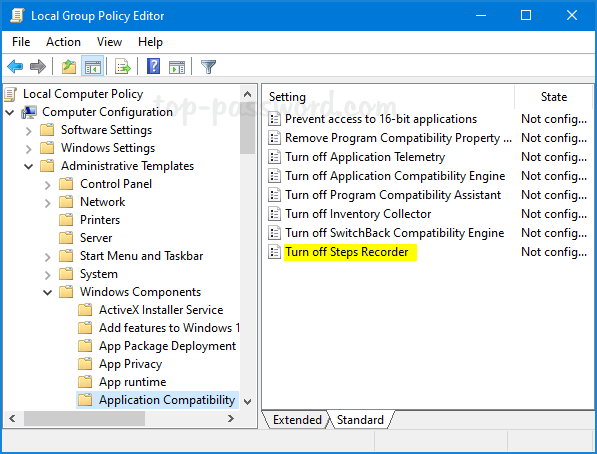
Method 3: Disable or Turn off News and Interests via Group Policy
Open Local Group Policy Editor and browse to: Computer Configuration -> Administrative Templates -> Windows Components -> News and interests. On the right pane, double-click on the “Enable news and interests on the taskbar” policy.

Choose the Disabled option. Click Apply and then OK.
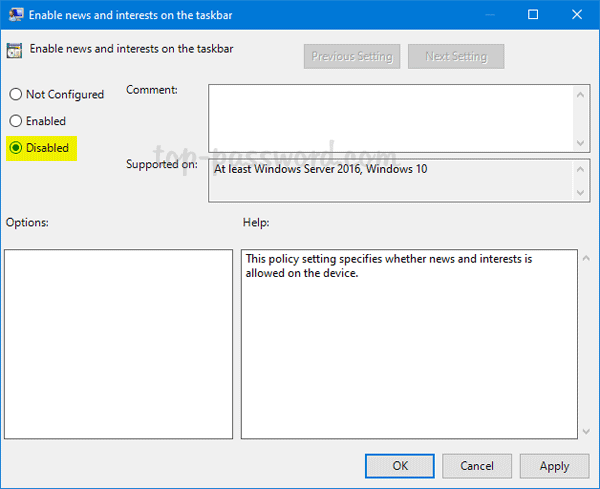
Now you’ve completely turned off News and Interests in Windows 10. Close Local Group Policy Editor and restart your computer.