There are situations where File Explorer becomes unresponsive and you need to restart it. To apply a registry tweak, you may also need to restart File Explorer. In this tutorial we’ll show you some fast methods to restart File Explorer in Windows 11.
Method 1: Restart File Explorer Using Task Manager
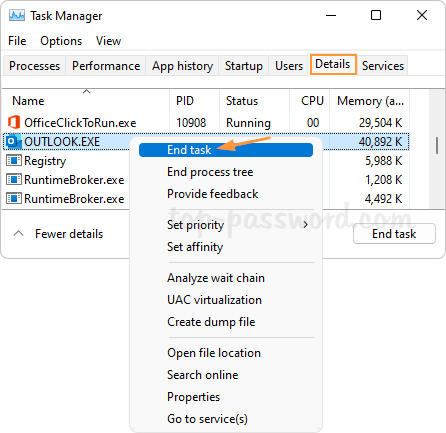
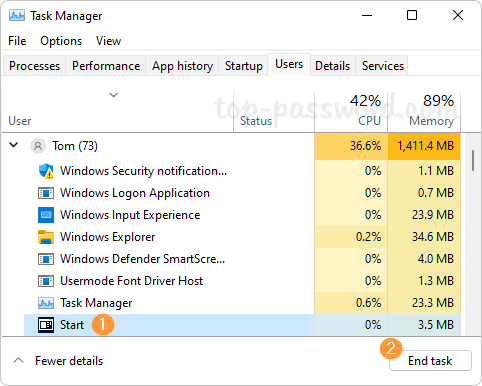
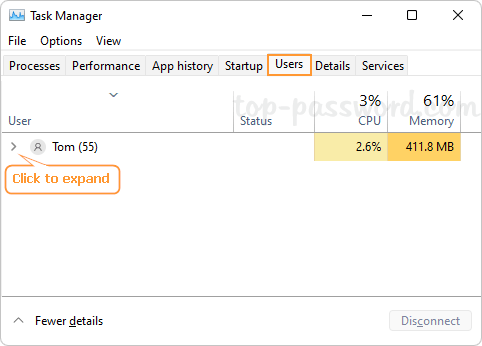
Use the Ctrl + Shift + Esc keyboard shortcut to open up Task Manager. Choose the Users tab, then click the arrow next to your current account to expand a list of all running programs.
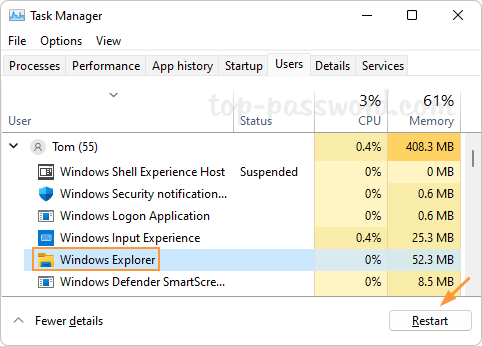
Select “Windows Explorer” and click the Restart button to restart File Explorer.
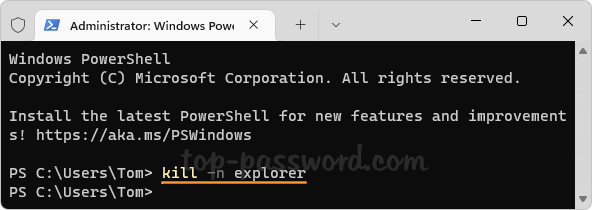
Method 2: Restart File Explorer Using Windows PowerShell
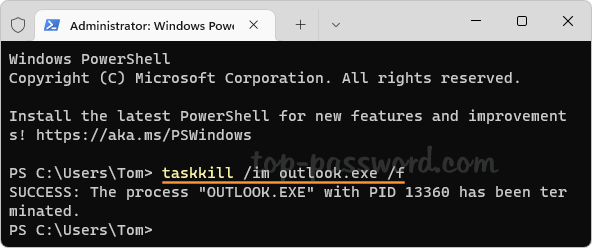
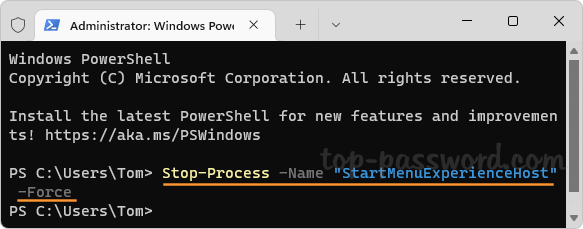
Open Windows PowerShell as administrator, and then run one of the following commands:
- kill -n explorer
- stop-process -name explorer -force
It will restart the File Explorer immediately.
Method 3: Restart File Explorer Using Command Prompt
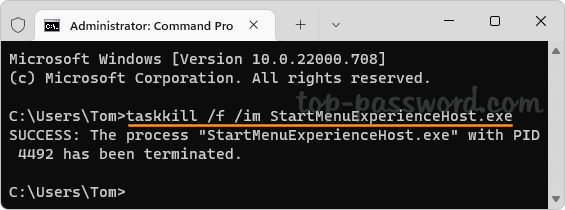
Open Command Prompt as administrator, and execute these commands one by one:
taskkill /f /im explorer.exe

start explorer.exe
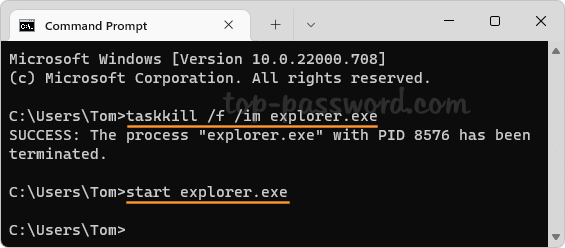
This will forcibly terminate the explorer.exe process and then start it.
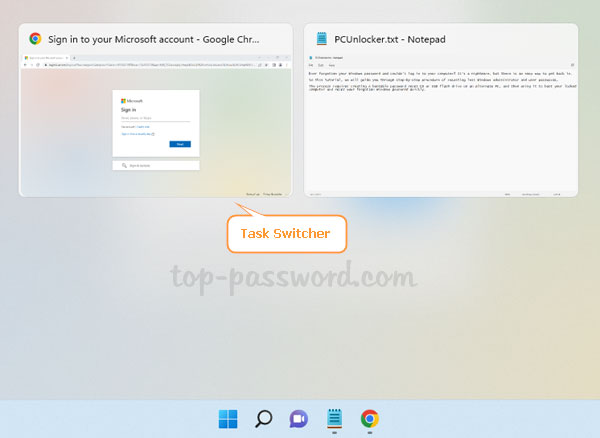
Method 4: Restart File Explorer Using Keyboard Shortcut
Press and hold the Alt + Tab keys at the same time. When the Task Switcher appears, release the Tab key and then press F4. After a while, Windows Explorer will restart automatically.
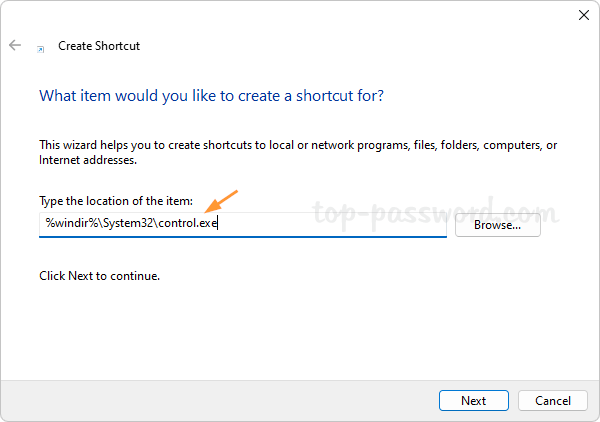
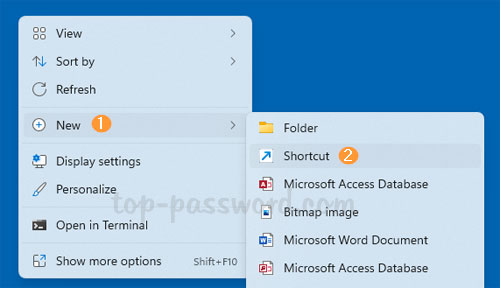
Method 5: Create a Desktop Shortcut to Restart File Explorer
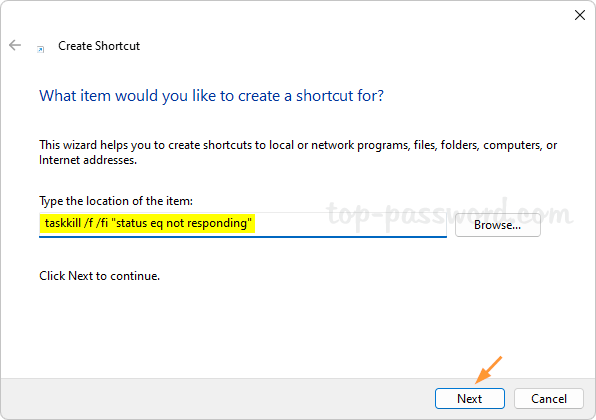
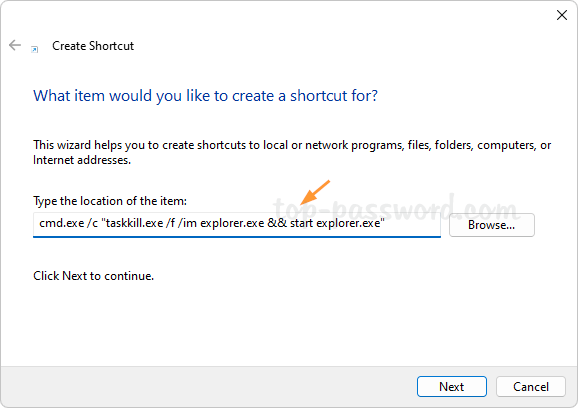
Right-click the empty space on your desktop and choose New -> Shortcut from the context menu that pops up.
Copy the following command and paste it in the location box, and click Next.
cmd.exe /c "taskkill.exe /f /im explorer.exe && start explorer.exe"
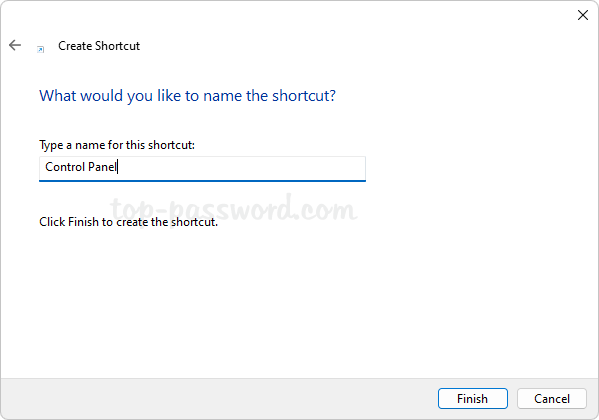
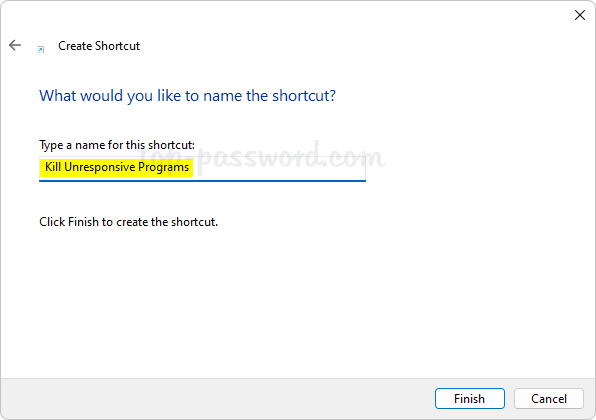
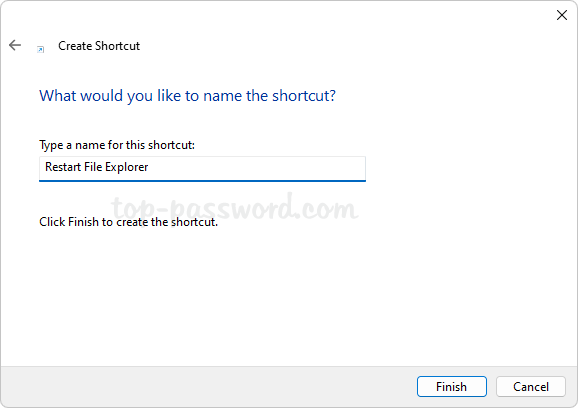
Type a meaningful name for this shortcut. Click Finish.
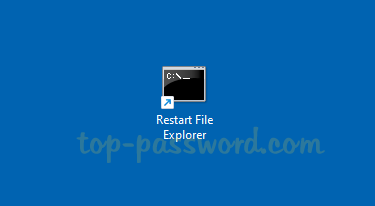
Whenever you need to restart Windows Explorer, simply double-click the desktop shortcut you just created.
That’s it!