Mapped network drive doesn’t appear in File Explorer? This problem usually happens when you map a network drive using administrative Command Prompt or a logon script. By default, only network drives created with standard rights will show up in File Explorer. In this tutorial we’ll show you two solutions to fix the issue of mapped network drive not showing in Windows 11.
Method 1: Configure the EnableLinkedConnections registry value
- Open Registry Editor and navigate to:
HKEY_LOCAL_MACHINE\SOFTWARE\Microsoft\Windows\CurrentVersion\Policies\System. Right-click the System key in the left navigation pane, and choose New -> DWORD (32-bit) Value.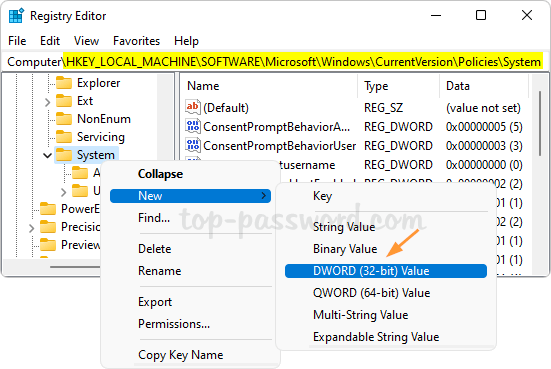
- Type EnableLinkedConnections and then press Enter.
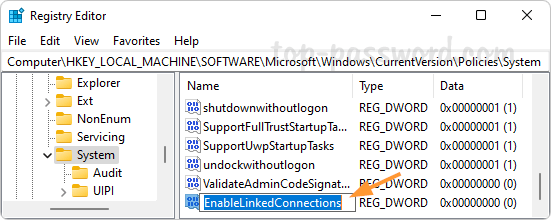
- Next, double-click it to modify. In the Value data field, enter 1 and click OK.
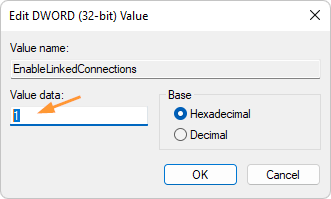
- After restarting the computer, network drives created by elevated apps will be visible in File Explorer, and elevated apps can also access the network drives created by programs running with standard rights.
Method 2: Map a network drive with normal Command Prompt
If the mapped network drives are not available, try to use the standard Command Prompt to map a network drive. Follow these steps:
- Open up a regular Command Prompt (NOT in admin/elevated mode). Type the following command and press Enter. Replace “
remote_ip” and “shared_folder” with the IP address of your network computer and the name of the shared folder.
net use z: \\remote_ip\shared_folder /persistent:yes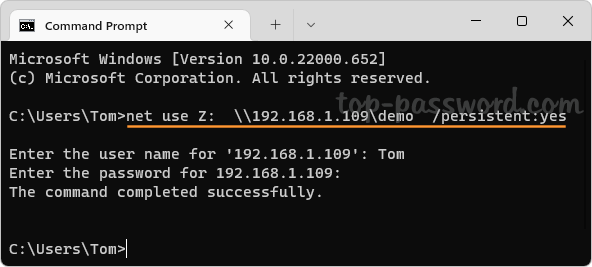
- The above command will map the shared folder to
Z:and you can then access the network drive in File Explorer.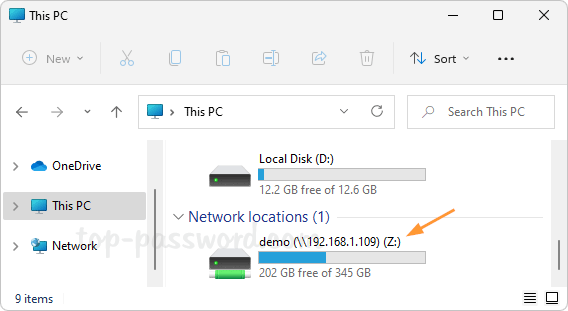
If you want to hide a mapped network drive for all users but letting programs access them, please use the method described in this article: How to Hide A Drive / Partition from Windows Explorer
- Whenever you want to disconnect the network drive, run this command:
net use z: /delete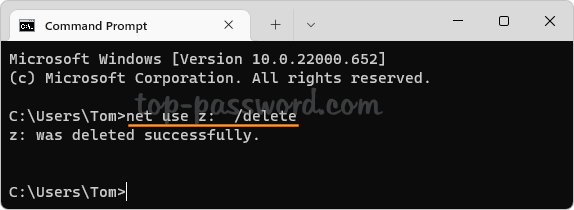
That’s it!