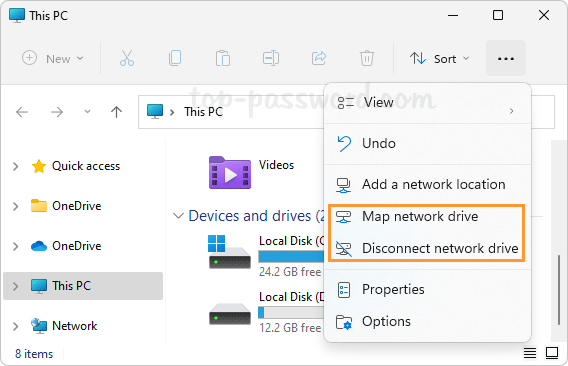
When you right-click This PC icon on your desktop, you’ll see two options: Map network drive and Disconnect network drive.

You can also access these options from the toolbar if you open File Explorer to This PC.
If you don’t need to access network resources frequently, it’s not necessary to map a network drive and you can hide the above options. In this tutorial we’ll show you 2 simple methods to remove “Map network drive” and “Disconnect network drive” context menus in Windows 11.
Method 1: Remove “Map network drive” Context Menu via Group Policy
- Open Local Group Policy Editor and browse to:
User Configuration -> Administrative Templates -> Windows Components -> File Explorer. On the right pane, double-click the policy called “Remove Map Network Drive and Disconnect Network Drive” policy to edit it.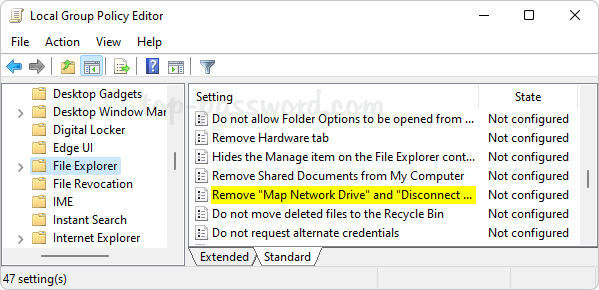
- Choose the Enabled option. Click Apply and then OK.
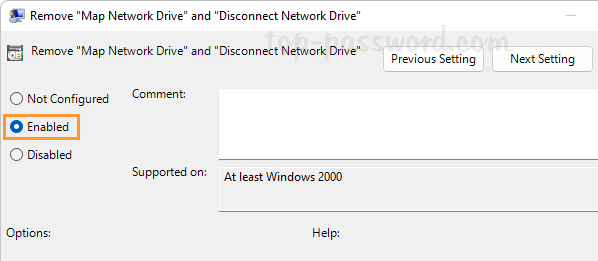
- This change will take effect immediately. You’ll see that the “Map Network Drive” context menu is missing.
Method 2: Remove “Map network drive” Context Menu via Registry Editor
- Open Registry Editor and navigate to:
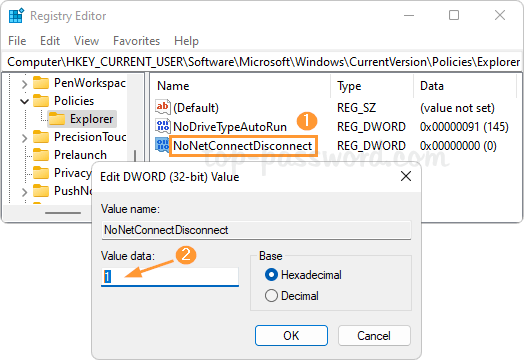
HKEY_CURRENT_USER\Software\Microsoft\Windows\CurrentVersion\Policies\Explorer. On the right pane, right-click the blank area and select New -> DWORD (32-bit) Value.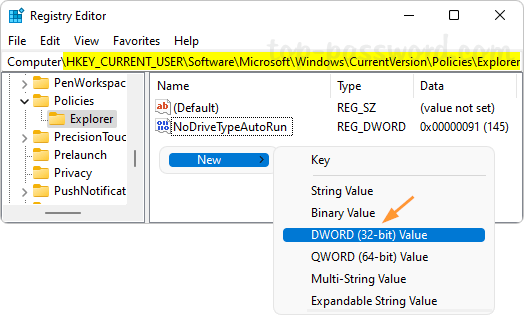
- Rename the newly-created DWORD to NoNetConnectDisconnect, then double-click it and change its value data to 1.
- Close Registry Editor. The next time you log in to your Windows account, the “Map Network Drive” context menu will no longer show up. Whenever you need to restore it, just delete the DWORD NoNetConnectDisconnect.
Conclusion
These methods just hide the “Map network drive” and “Disconnect network drive” from the context menu in Windows 11. After removing the “Map network drive” option, you can still map a network drive using Command Prompt.