Local Security Policy Editor can help you manage accounts policy, local policy, user rights assignment, and more. In this tutorial we’ll show you 5 fastest methods to open Local Security Policy Editor in Windows 11. Note that Local Security Policy Editor is not available in the Home edition of Windows 11.
Method 1: Open Local Security Policy Editor via Run
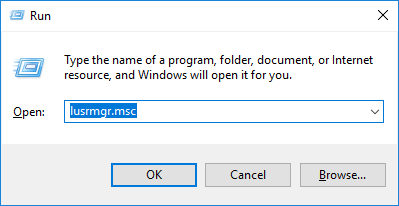
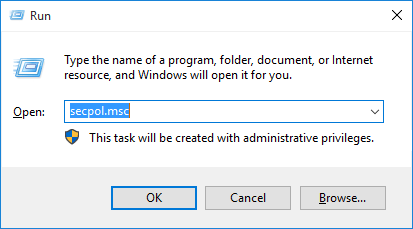
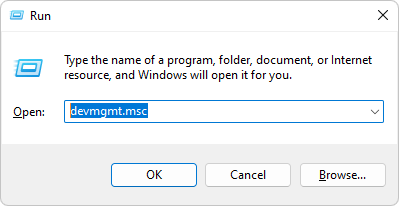
Press the Windows key + R together to open the Run dialog, then enter secpol.msc and click OK.
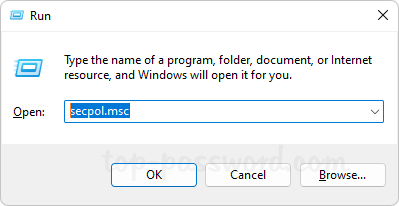
This should be the most common way to launch the Local Security Policy Editor.
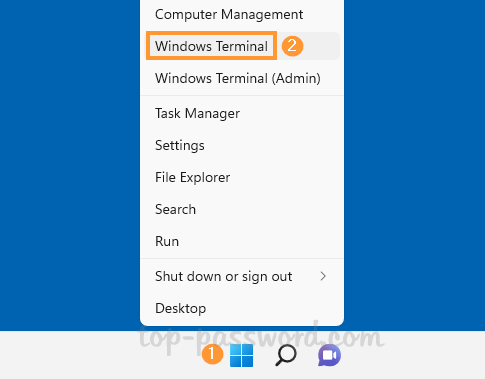
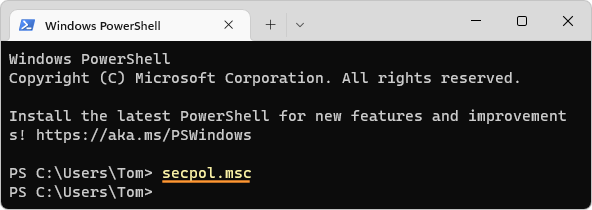
Method 2: Open Local Security Policy Editor via Windows Terminal
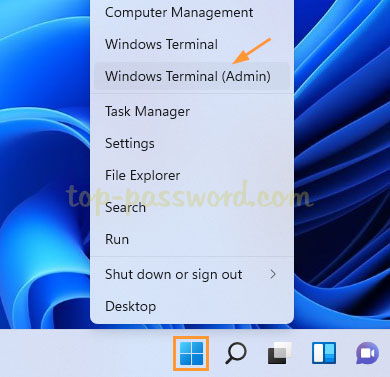
Right-click the Start button on the taskbar and choose either “Windows Terminal” or “Windows Terminal (Admin)“.
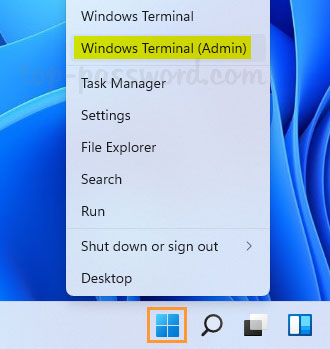
When it opens the Windows PowerShell or Command Prompt tab, you can run the secpol.msc command to open the Local Security Policy Editor.
Method 3: Open Local Security Policy Editor via Search
Click the Search button on the taskbar, then type “Local Security Policy” in the text box at the top of the pop-up window.
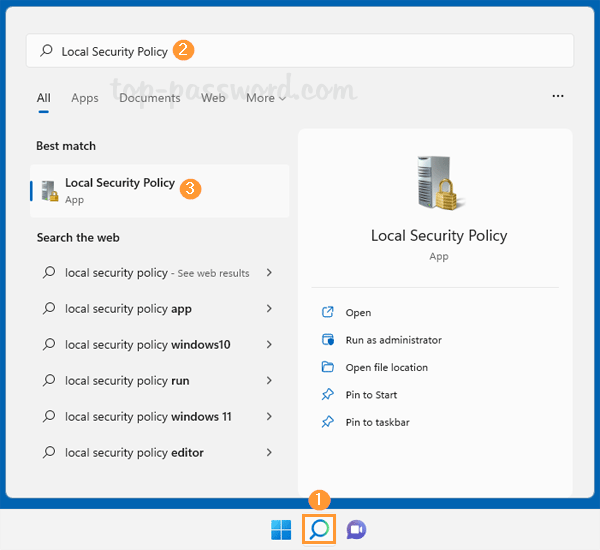
The Local Security Policy Editor app will appear under the “Best match” section. You can open it with / without admin rights.
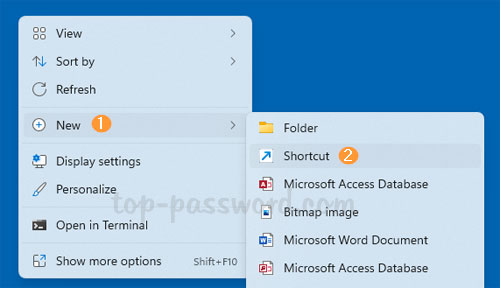
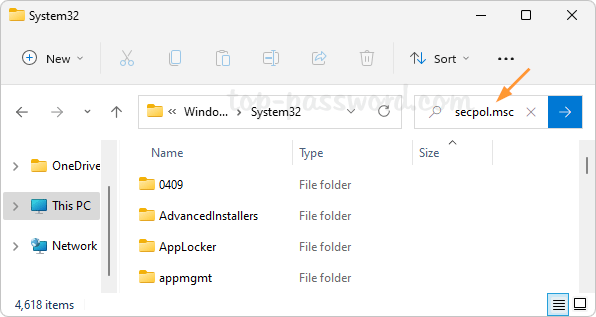
Method 4: Create a Desktop Shortcut to Open Local Security Policy Editor
Open File Explorer and browse to the directory: C:\Windows\System32. Click the Search box in the upper right-hand corner, type secpol.msc and press Enter.
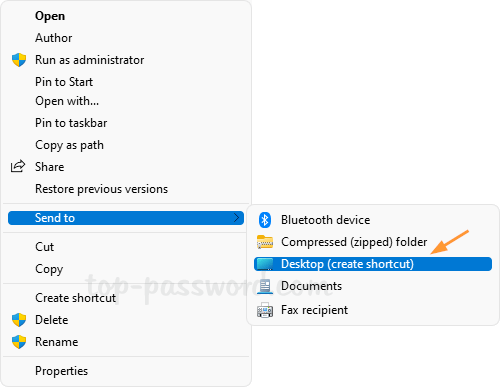
Right-click the secpol.msc program which appears in the search result, and choose “Show more options” from the pop-up menu.
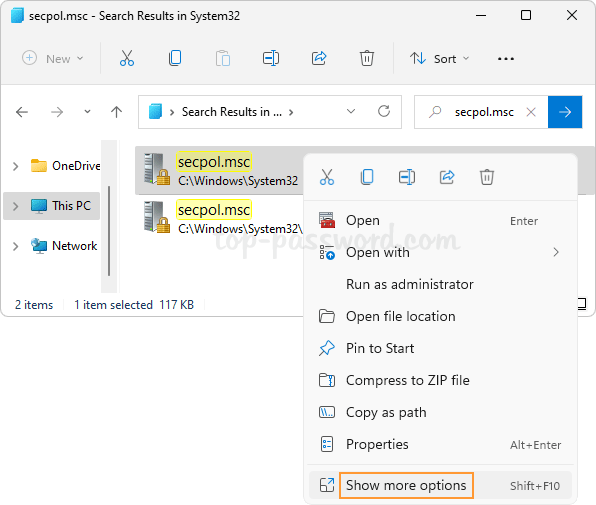
Select “Send to“, and then “Desktop (create shortcut)“.
You can then double-click the secpol.msc shortcut on your desktop to open Local Security Policy Editor.
Method 5: Using Local Group Policy Editor
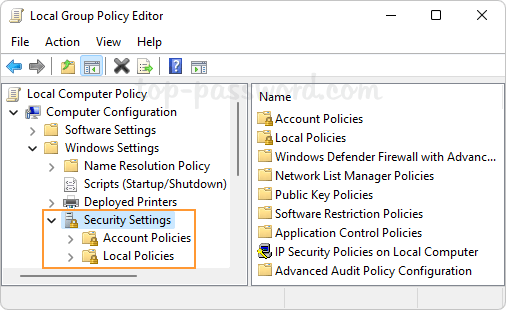
Local security policy is a subsection of group policy. After opening Local Group Policy Editor, go to Computer Configuration -> Windows Settings -> Security Settings, and you can view and edit local security policy over there.
That’s it!