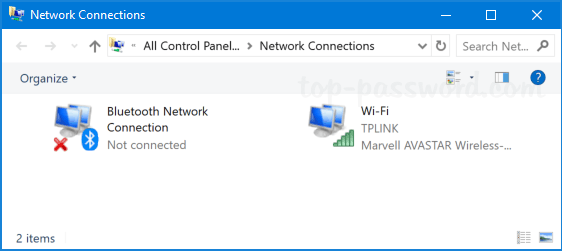
Network Connections is the most commonly used Control Panel applet for network administrators. From there you can view and manage all your wired / wireless adapters in one place. In this tutorial we’ll show you 3 quickest ways to open Network Connections in Windows 10.
Method 1: Open Network Connections via Run or Command Prompt
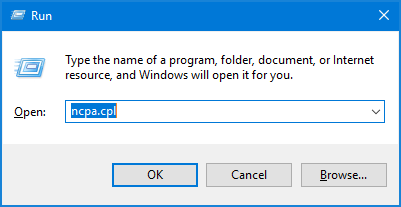
Press the Windows key and the R key at the same time to open the Run box. Type ncpa.cpl and hit Enter and you can access Network Connections immediately.
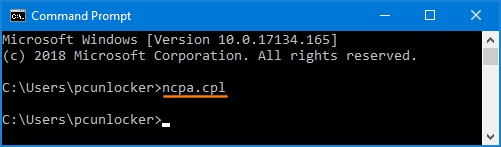
A similar way of opening Network Connections is to run ncpa.cpl at the Command Prompt.
Method 2: Open Network Connections via Taskbar
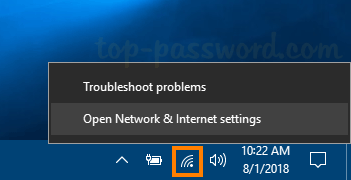
Right-click the network icon which is located at the notification area of taskbar, and then select “Open Network & Internet settings” from the popup menu.
In the resulting pop-up window, click the “Change adapter options” in the right pane.
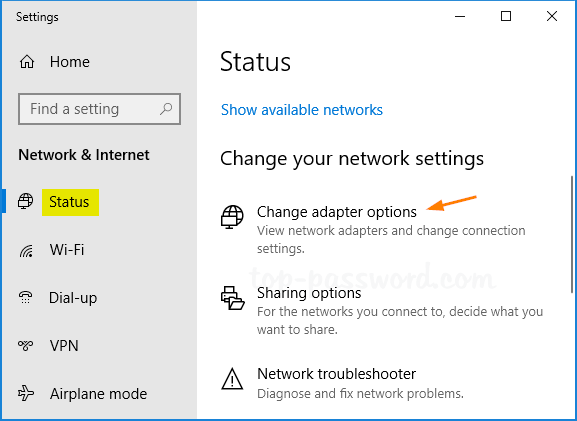
It will open Network Connections in no time.
Method 3: Open Network Connections via Control Panel
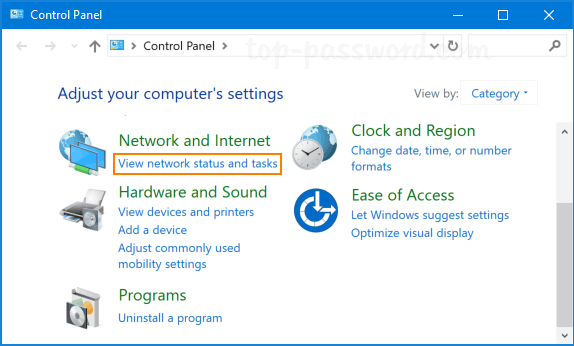
Open the Control Panel in category view, click the “View network status and tasks” link beneath the “Network and Internet” heading.
In the resulting window, click “Change adapter settings” on the left-hand side.
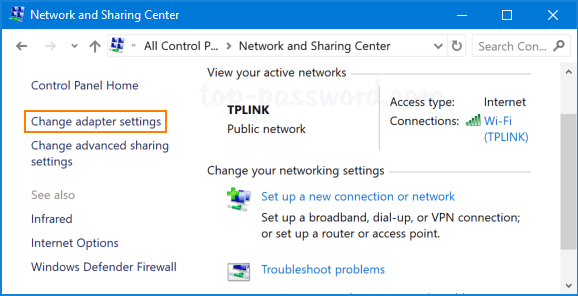
Now you can view a list of network connections on your system.